Expose an HTTP Server
This section will show you how to make an HTTP service available through Border0 using your single sign-on credentials.
- Create an HTTP socket and link it to your Border0 connector
- Authenticate and Connect
- Kill the session and watch the recording
1 - Create an HTTP Socket
We'll start by creating a socket in the Border0 portal.
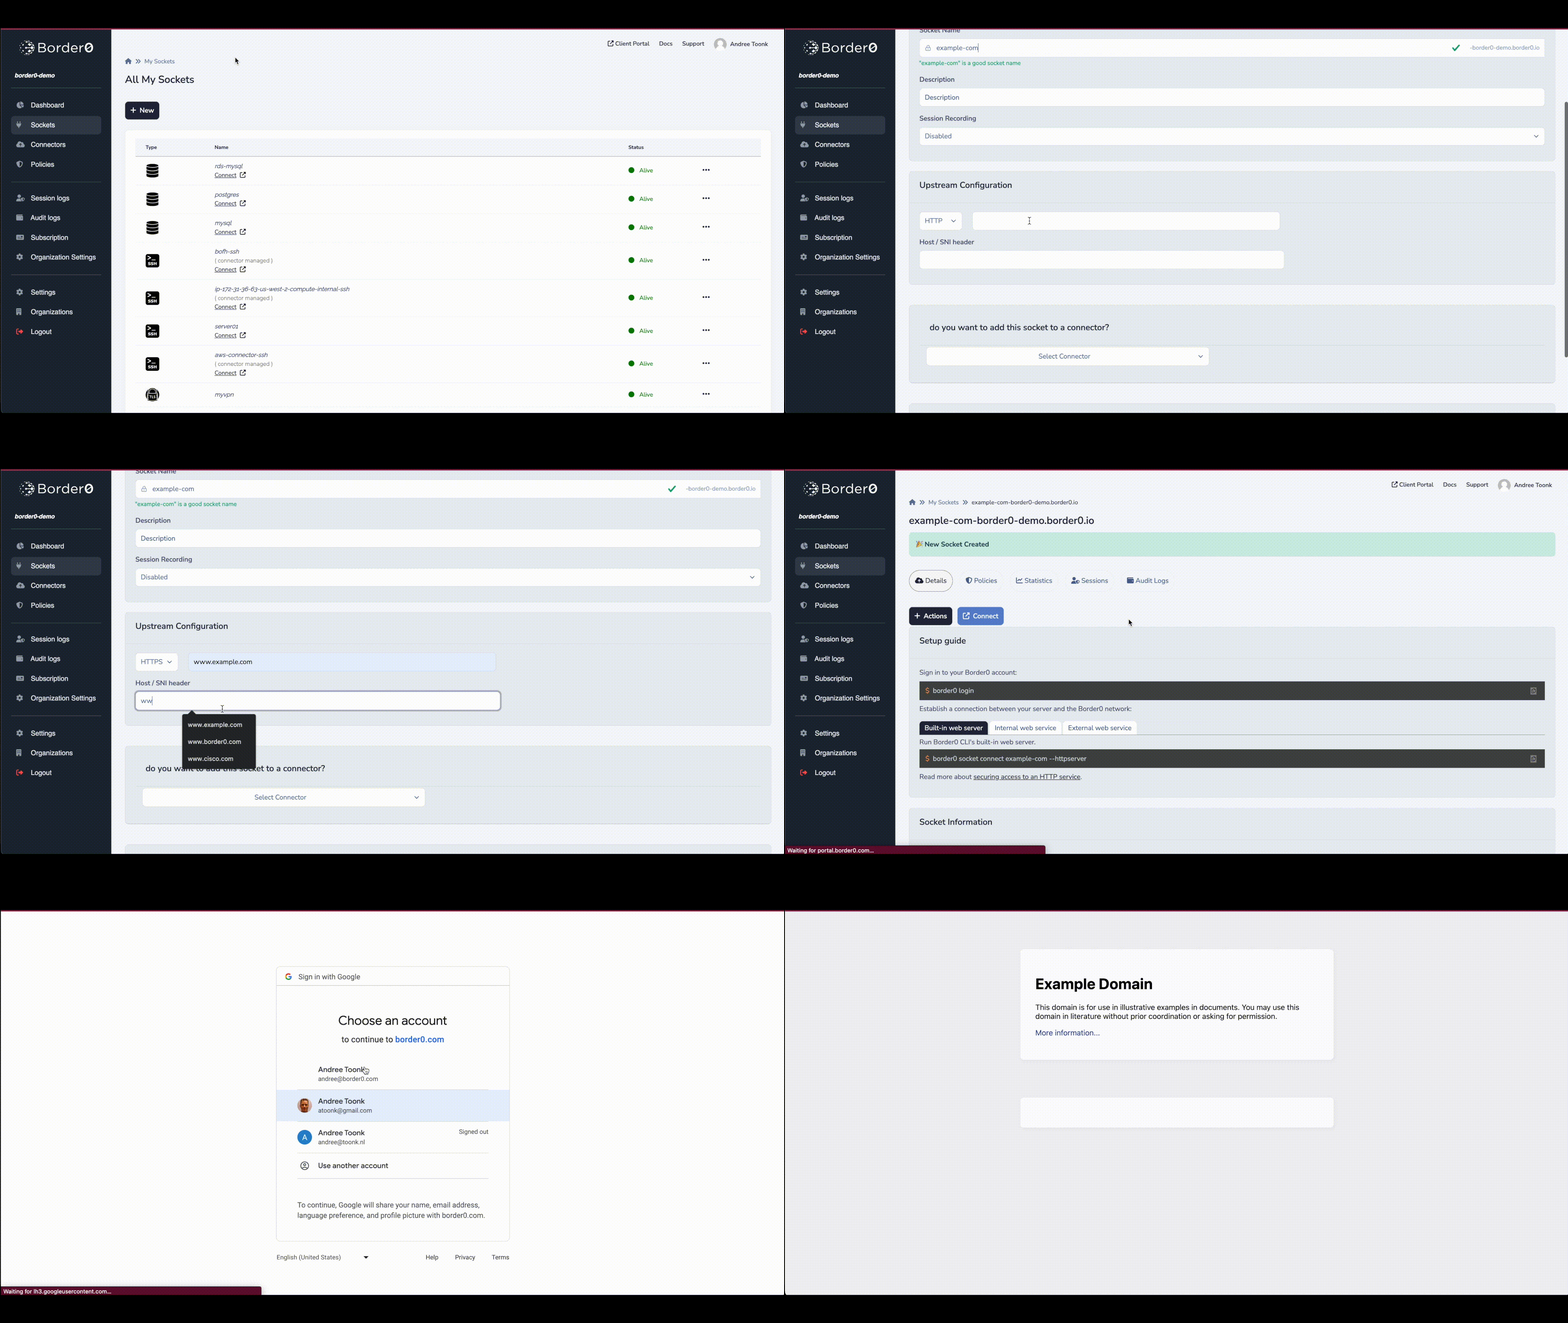
- In the Sockets page, click on new HTTP socket
- set a name and optionally a description
Upstream Configuration
For HTTP Sockets we can set the following upstream parameters
- upstream protocol, either http or https. In our example we'll select
https - provide the hostname, in our case we'll select
www.example.com - Optionally we can also set the upstream HOST / SNI field, this is important if the origin is expecting a specifc host header. We'll set it to
www.example.com
The last step is to link the connector you wish to use for this new socket: select your connector from the list
Internal web applicationsIn this example we're using www.example.com , however you can use any http endpoint, including private internal web applications. As long as the connector has access to the web app, you'll be able to make any http(s) service available. For example https://10.10.10.10
2 - Authenticate and Connect
Once you're new socket has been created, the status indicator should show "alive". This indicates the connector has picked up the configuration and is ready to serve traffic for your new socket.
now visit the url of your new http socket, or simply click on the blue connect button to visit your new http socket. You'll be asked to authenticate. Access is controlled by the policies attached to your socket.
The video below demonstrates the process.

HTTP socket
Access PolicyNote that the default organization-wide policies will be applied. Visit the Policy tab in the socket details page to modify the policy settings for this service.
Session recording
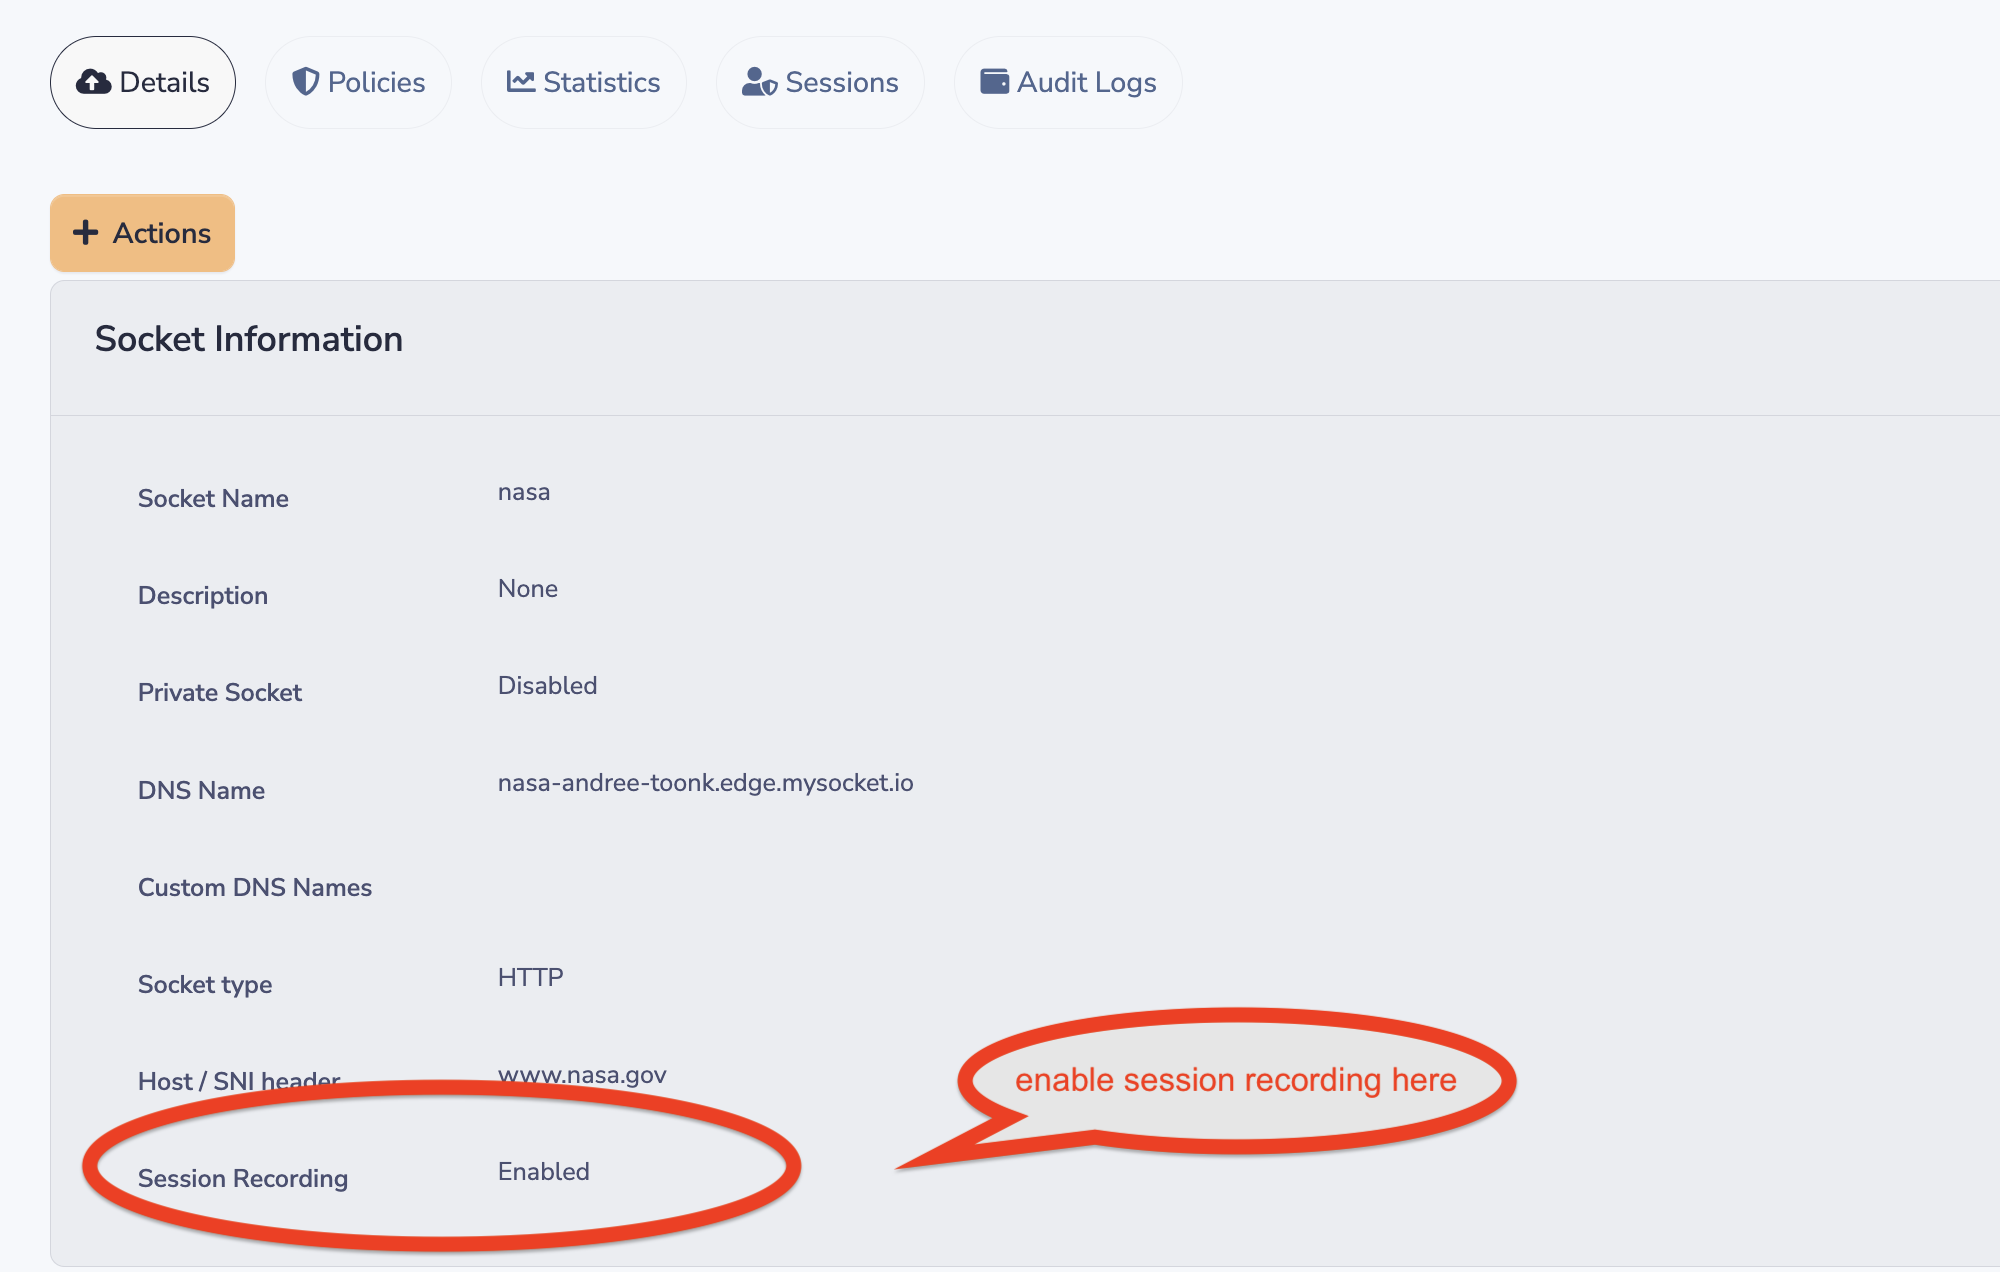
Optionally, session recording for HTTP sessions can be enabled in the portal, as can be seen in the image below.

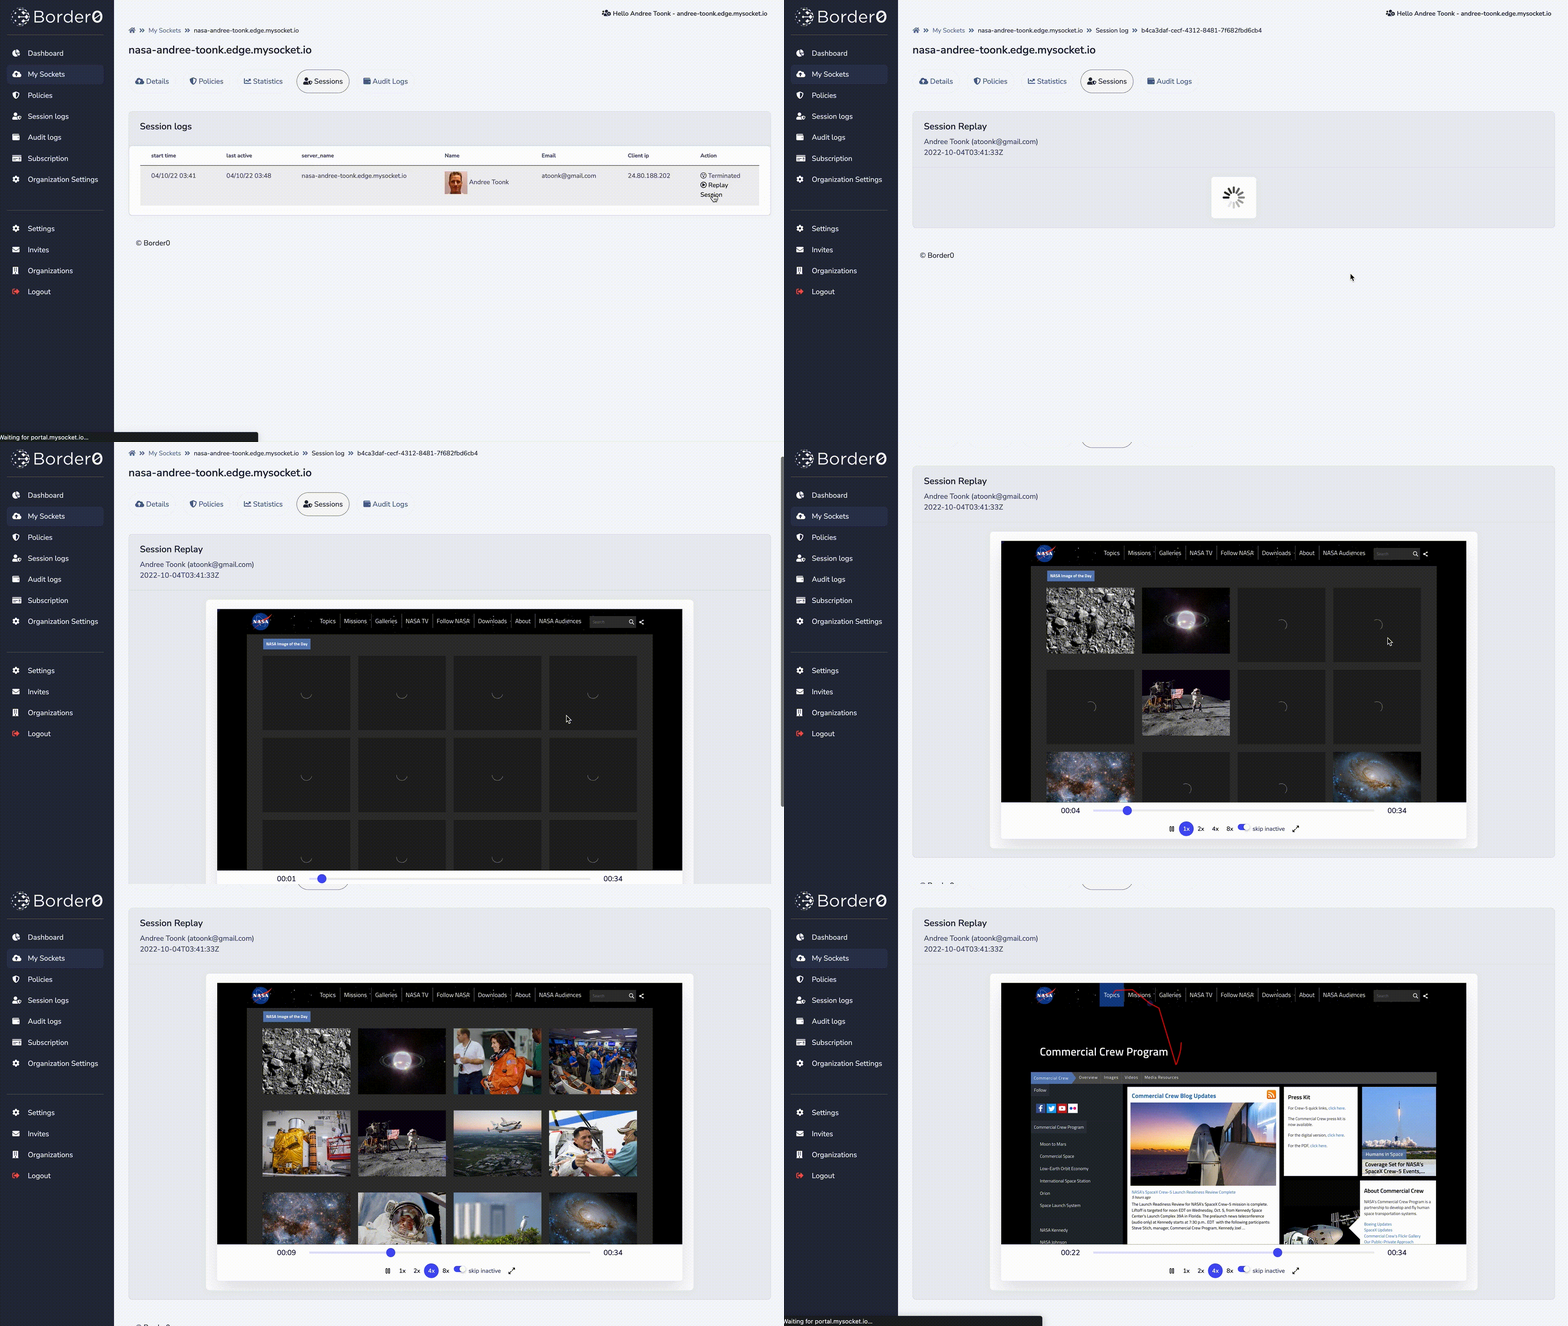
After that, you can see session recordings in the sessions tab of this socket. An HTTP session recording will show you the rendering of the HTTP DOM data. And can be replayed as a movie in the Border0 portal. See below for an example.

Passing User information from Border0 into your web application
For your internal web app, it is helpful to know what user (who) is making the HTTP requests. The Border0 Identity aware proxy makes that information available to your internal Application by adding the following extra HTTP headers to the upstream request. In other words, your private application will have access to the following HTTP headers.
    "X-Auth-Email": "[email protected]",
    "X-Auth-Expiresin": "1667999378",
    "X-Auth-Name": "John Doe",
    "X-Auth-Subject": "366e24ea-5dad-4bf0-9653-9dea4e1e0591",
    "X-Auth-Userid": "[email protected]",
    "X-Auth-Username": "[email protected]"
Using Grafana with Border0
Grafana makes it simple to integrate with Border0’s identity headers by using its built-in auth.proxy feature. When users connect to Grafana through a Border0 HTTP socket, Border0 forwards identity information in headers such as:
X-Auth-EmailX-Auth-NameX-Auth-UseridX-Auth-Username
Grafana can trust these headers for automatic SSO. 📺 Also see: this demo for a quick overview
Grafana configuration
In grafana.ini, enable the proxy auth provider and point it to the X-Auth-Email header, this is a simple minimal grafana.ini config file:
[session]
cookie_secure = true

[users]
allow_sign_up = false
auto_assign_org = true
auto_assign_org_role = Admin

[auth]
disable_login_form = true
disable_signout_menu = true

[auth.anonymous]
enabled = false

[auth.basic]
enabled = false

[auth.proxy]
enabled = true
header_name = X-Auth-Email
header_property = username
auto_sign_up = true
headers = Email:X-Auth-Email
This tells Grafana to accept the Border0 header, automatically create users on first login, and assign them to your organization.
Quick test with Docker
You can spin up Grafana with the config above:
docker run -i
-v $(pwd)/grafana.ini:/etc/grafana/grafana.ini
-p 3000:3000 grafana/grafana
Next, create a new HTTP socket in Border0 and point it to your local Grafana instance (http://localhost:3000 if running on the same machine as your Border0 connector, otherwise adjust for your environment).
Now when users connect through the Border0 socket, they’ll land in Grafana already signed in with their SSO identity.
Updated 6 months ago
