
Microsoft Entra ID (f.k.a. Azure AD) Directory Service (SCIM 2.0)
Microsoft Entra ID SCIM 2.0 (Beta)This integration supports automated user and group provisioning via SCIM 2.0.
Border0 integrates with Microsoft Entra ID (formerly Azure AD) using SCIM 2.0, an open standard for synchronizing directory data. This integration allows you to automatically provision and manage users and groups in your Border0 organization. The instructions below explain how to configure Microsoft Entra ID with Border0 for user and group management.
Integration Instructions
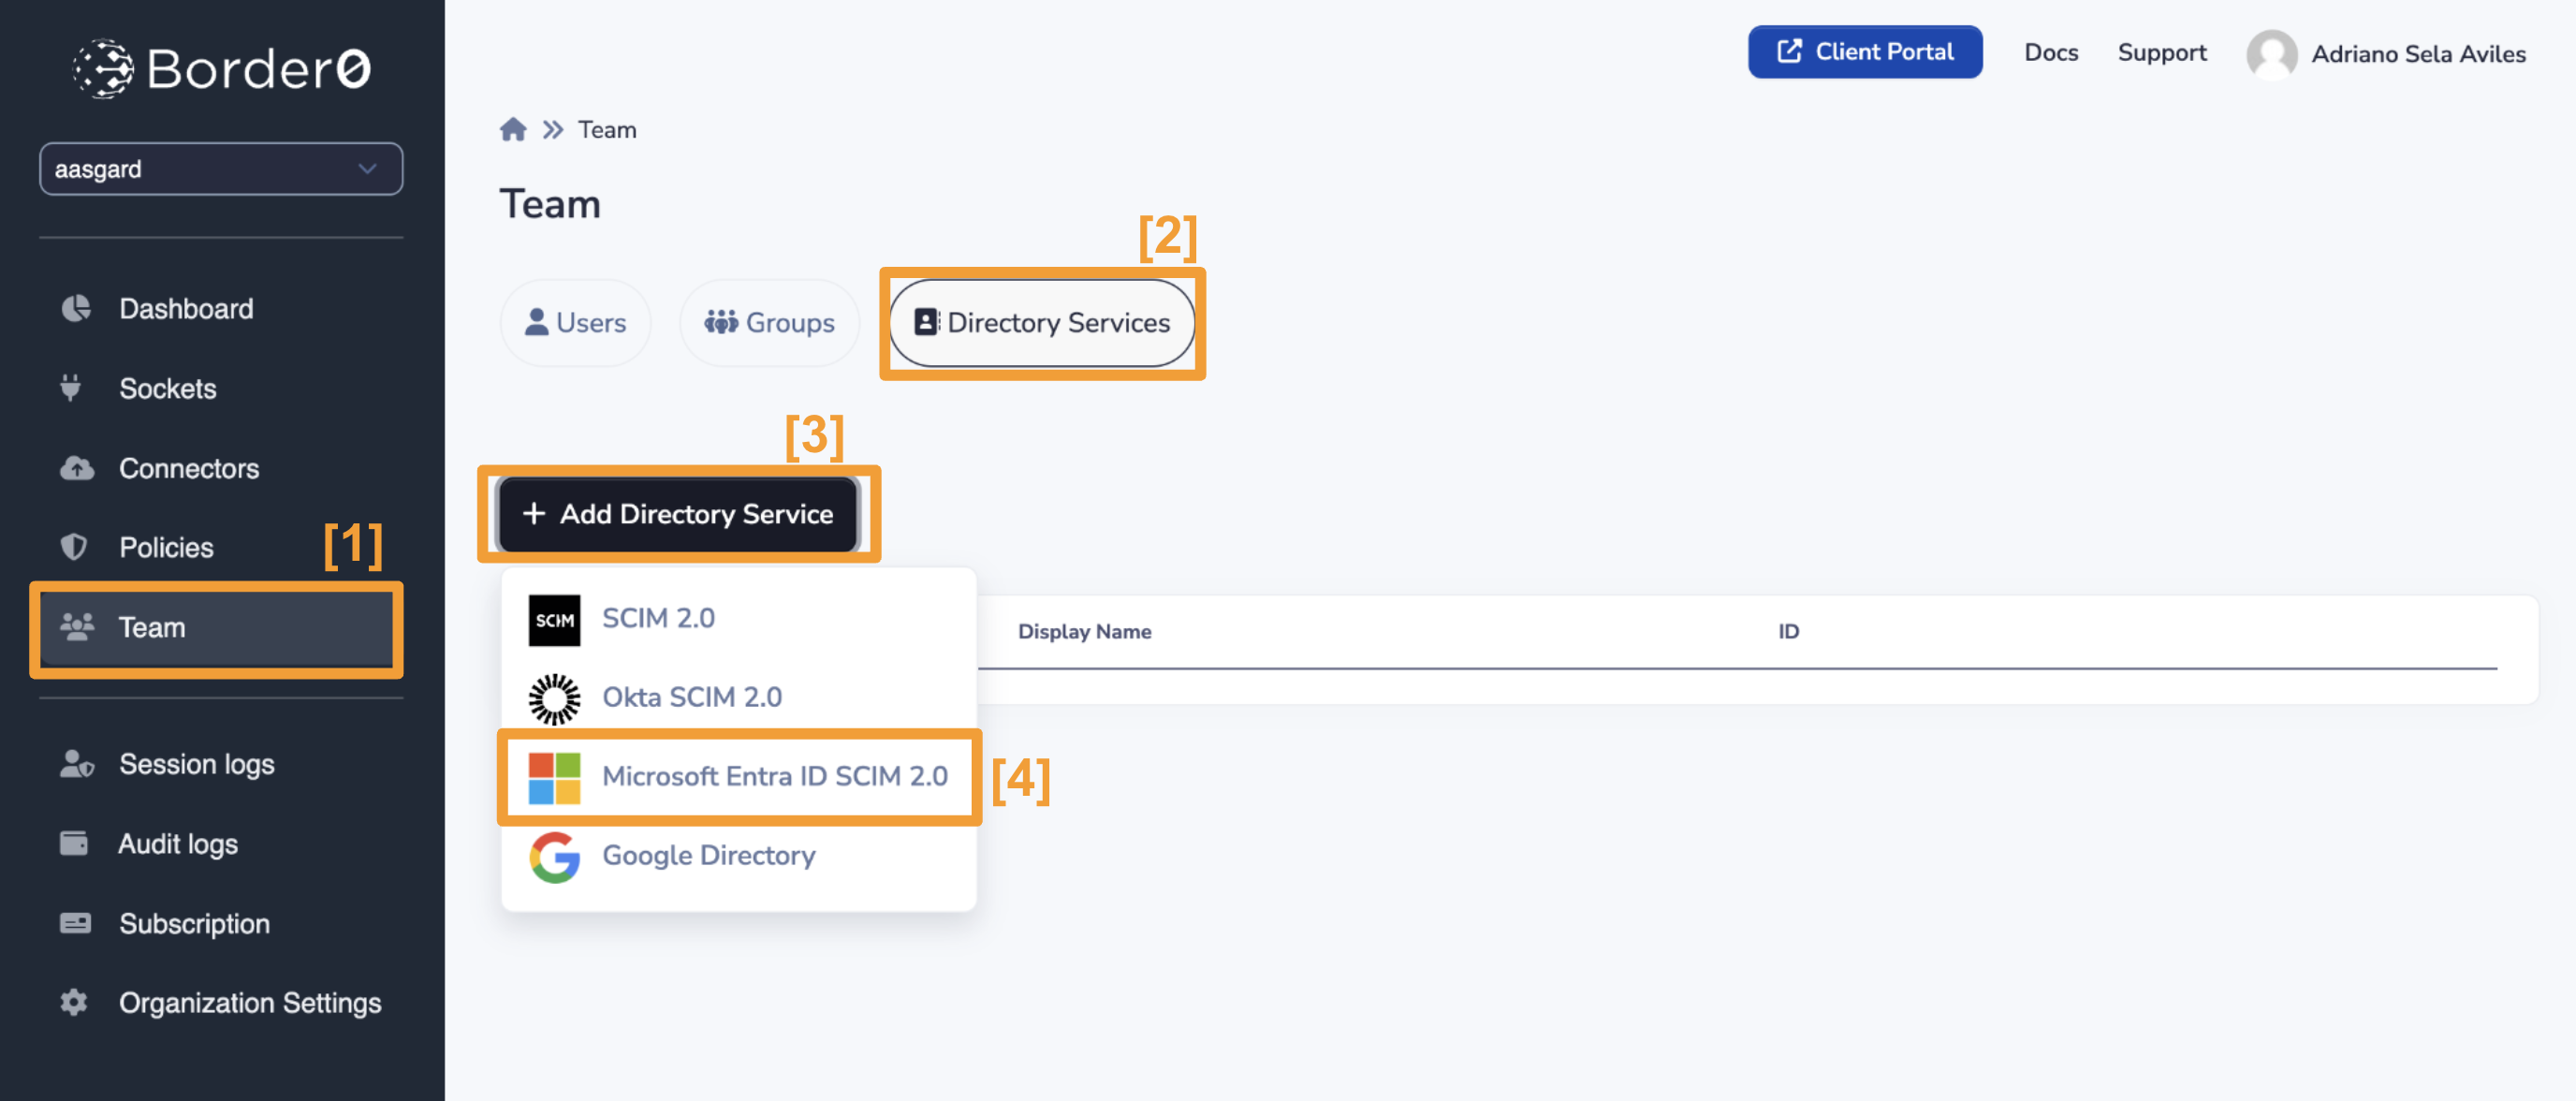
- [1] Select "Team" from the Border0 menu (left-side pane) on the Portal
- [2] Select "Directory Services" from the Organization Settings page
- [3] In this page you will find a table where each row represents a directory service. Click on the "+ Add Directory Service" button
- [4] Select the "Microsoft Entra ID SCIM 2.0" option
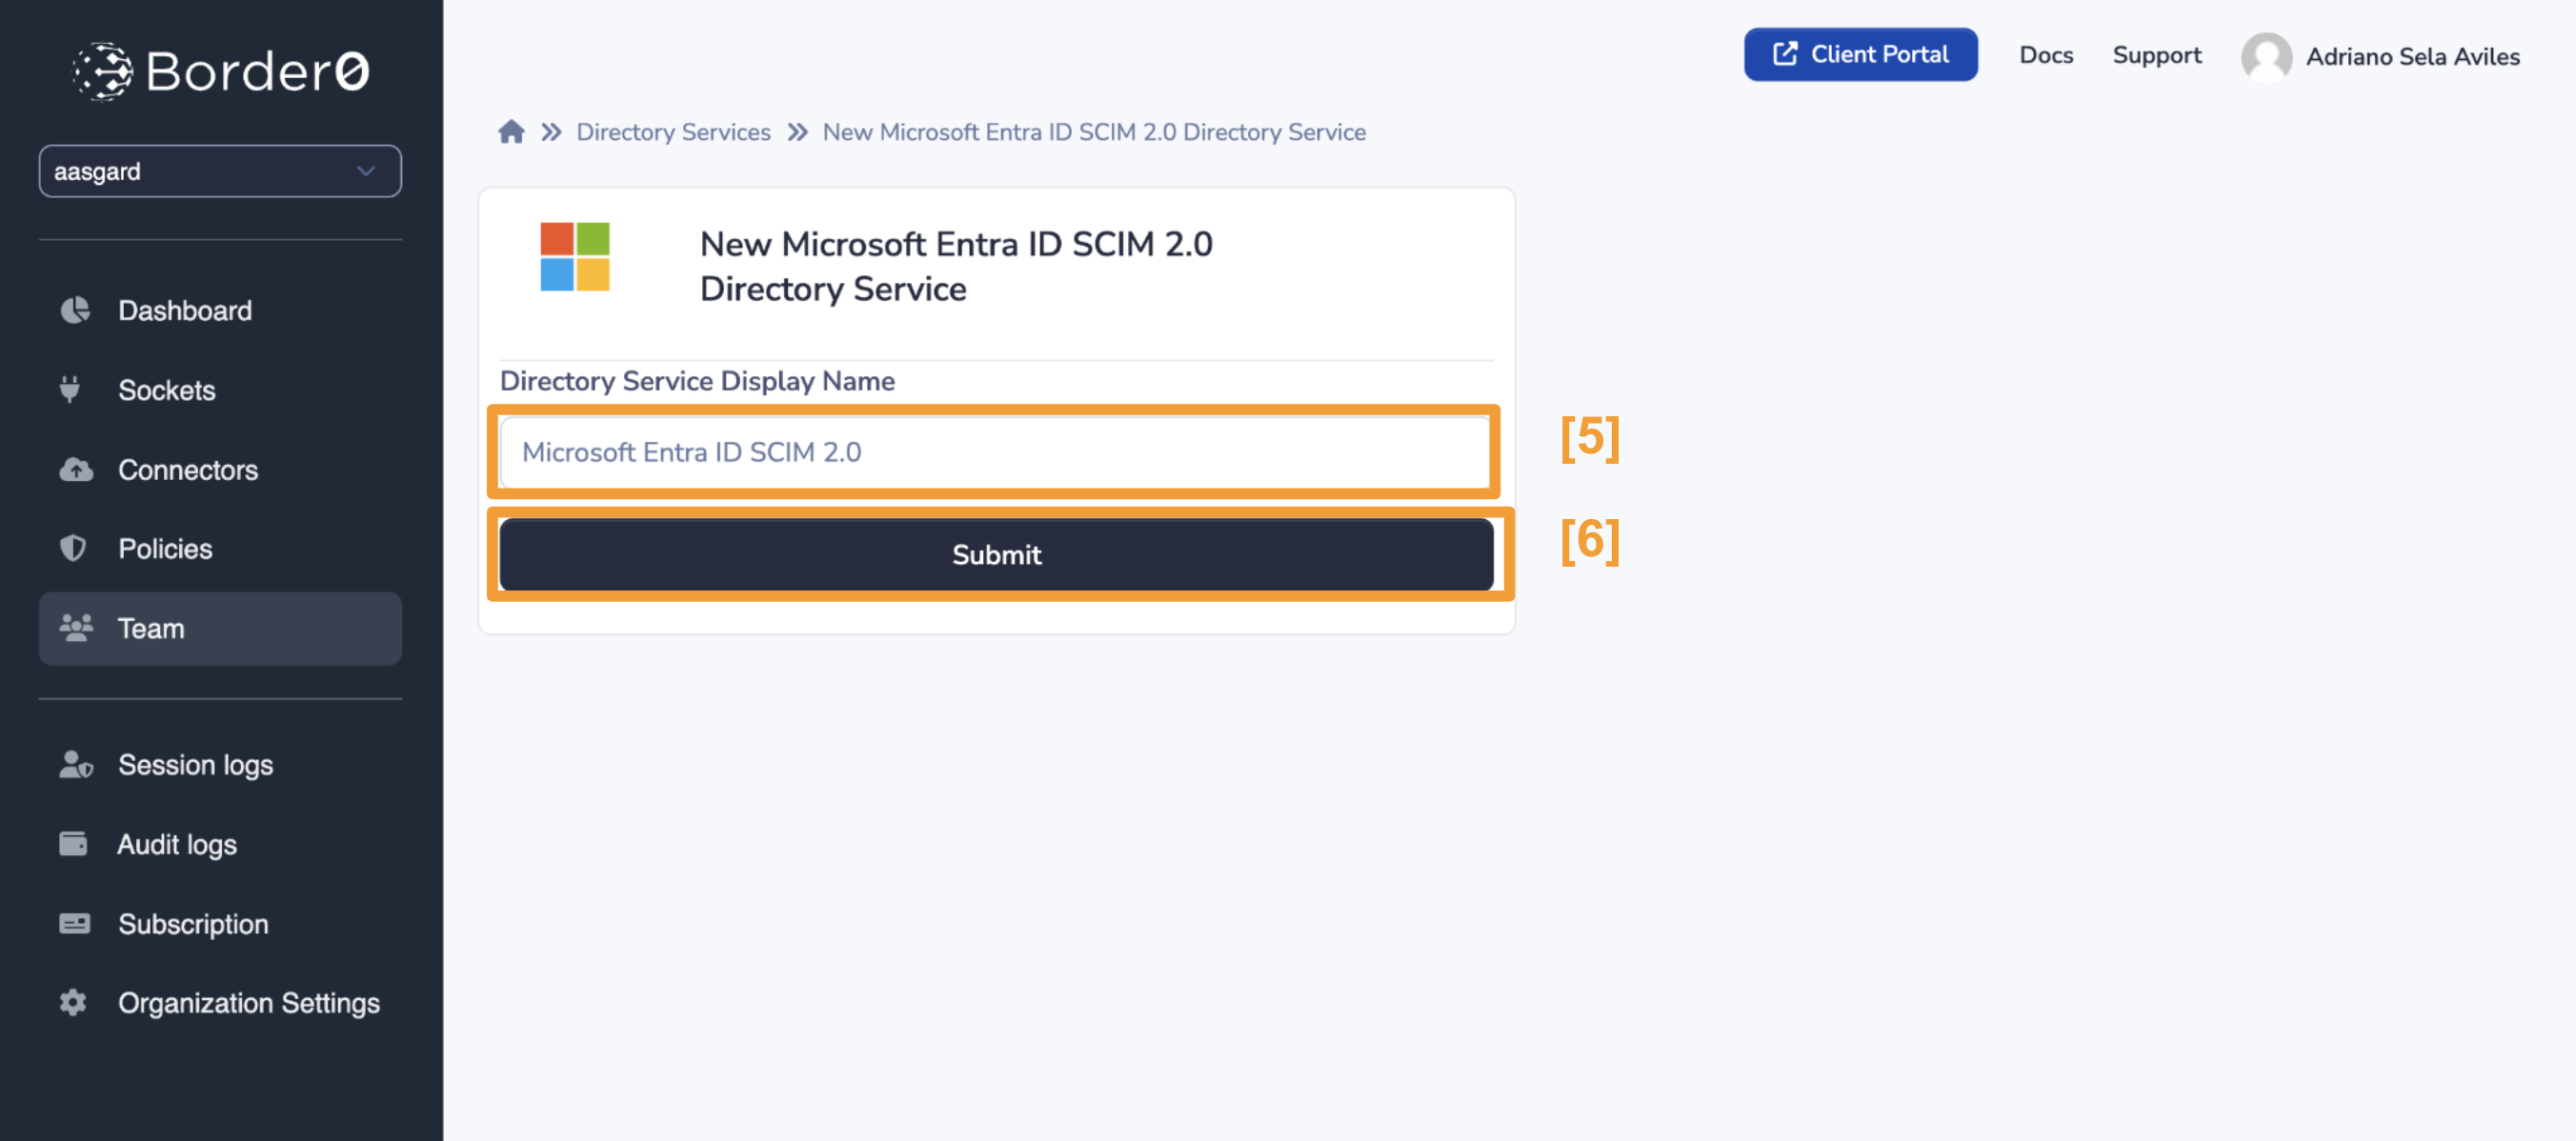
- [5] Give your directory service a friendly display name
- [6] Click submit
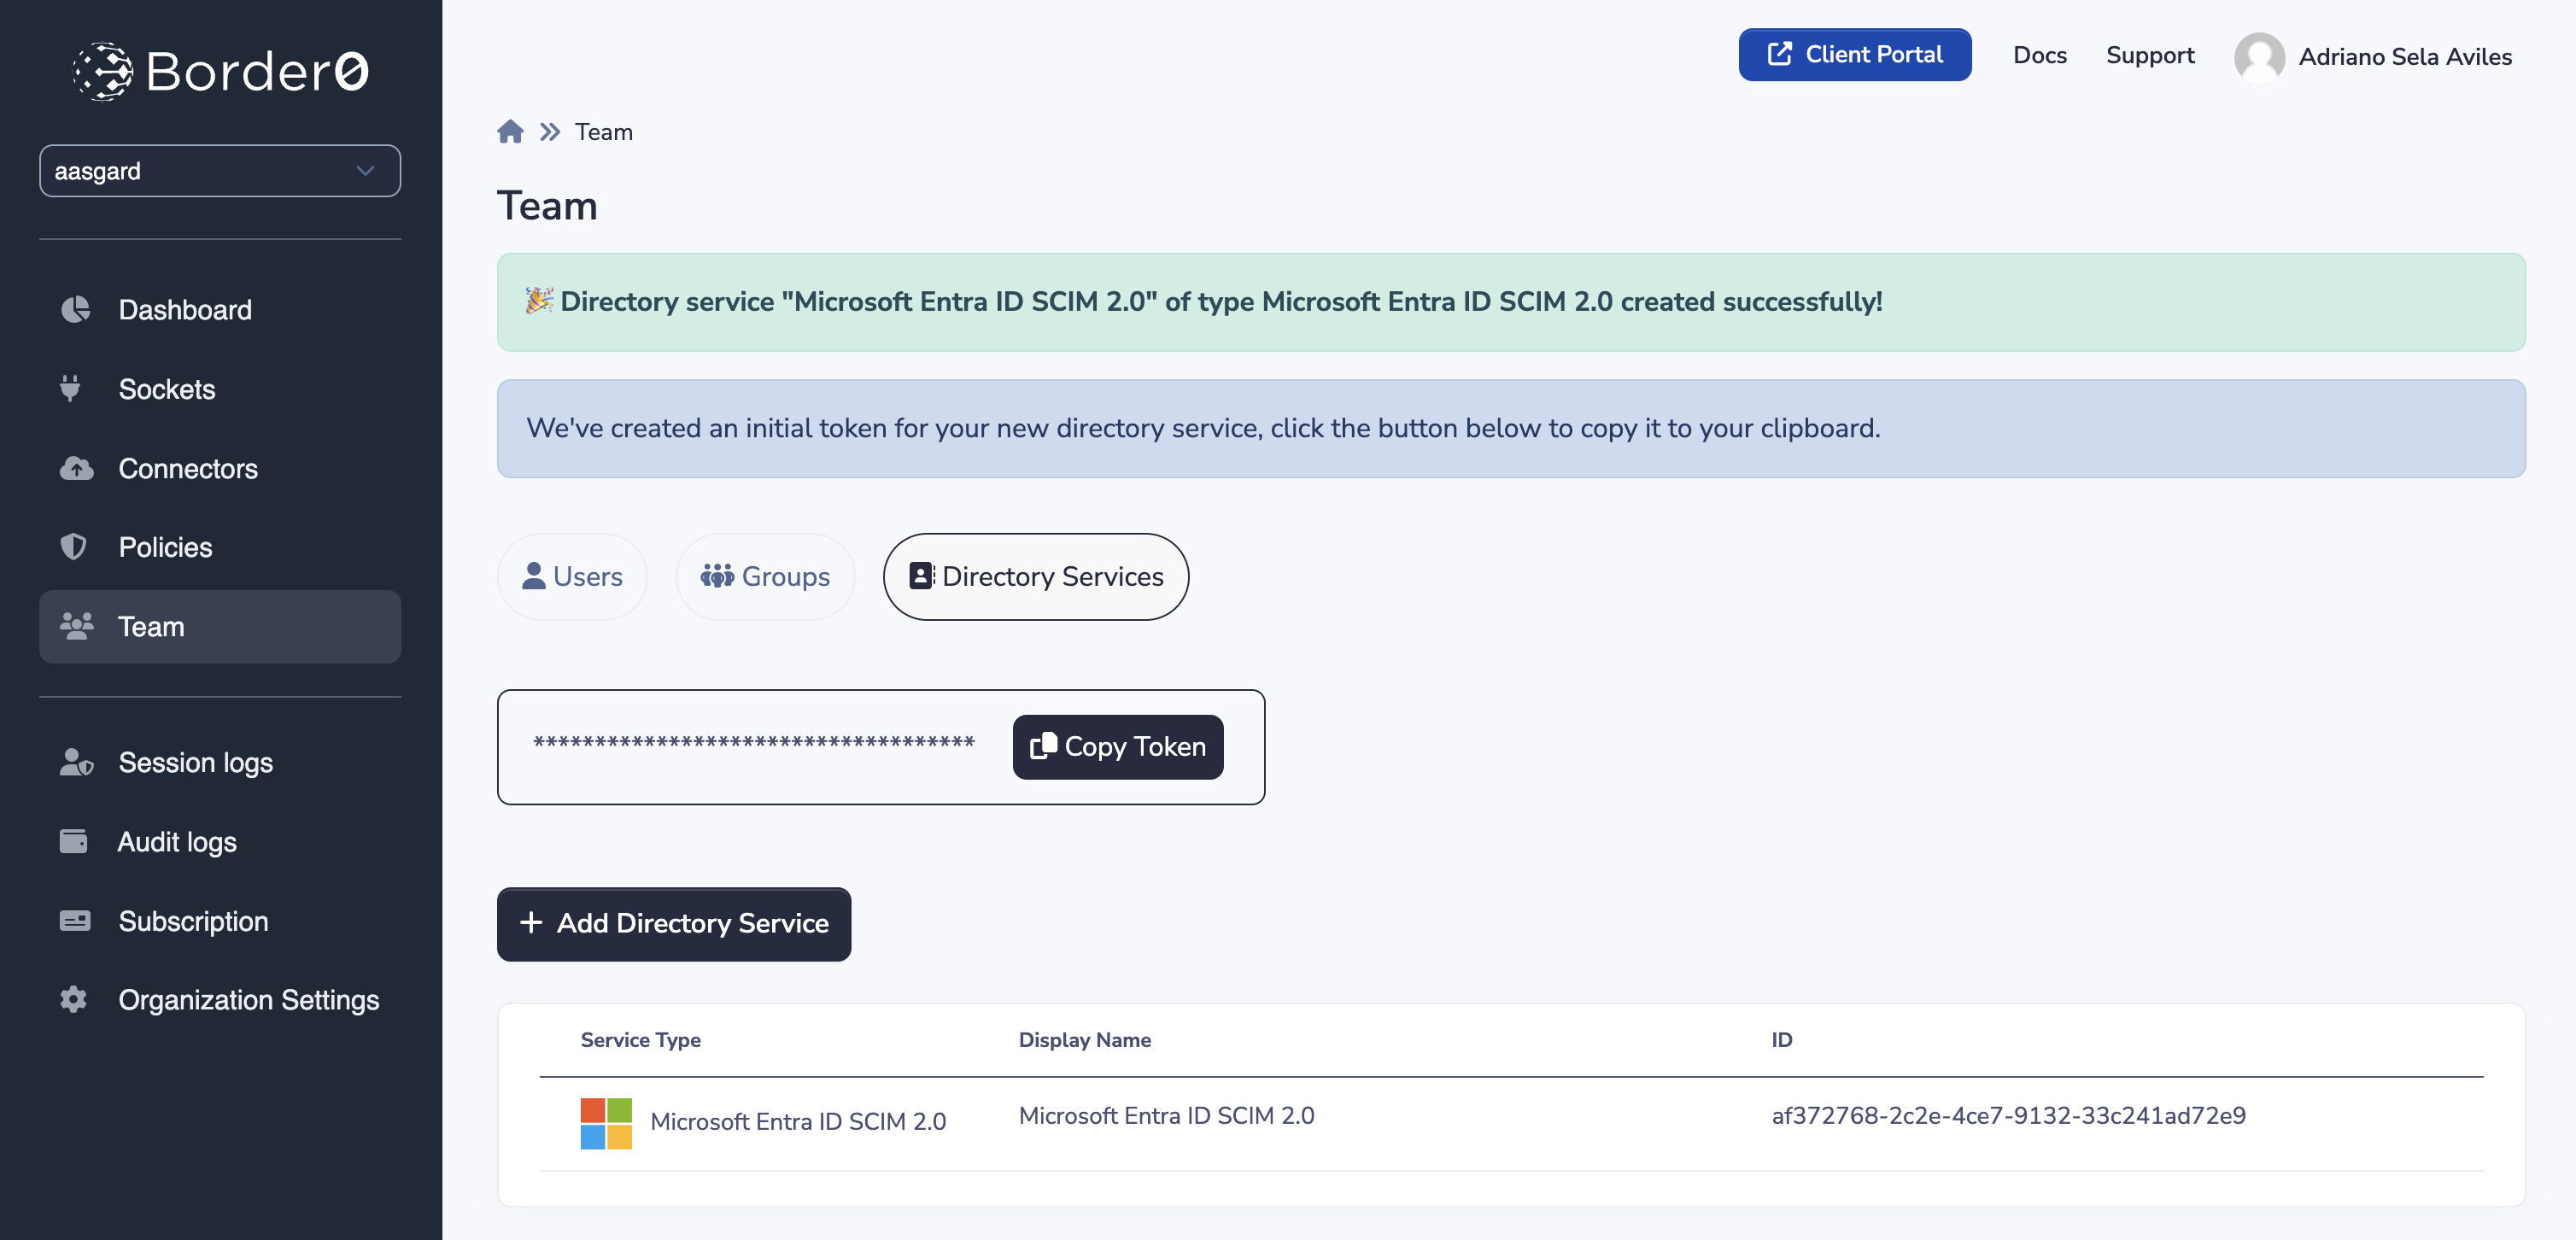
- [7] Upon creation of your new directory service, a token will be created. This token will be used by Microsoft Entra ID / Azure to authenticate itself against your Border0 organization. The token is only allowed to manage users and groups associated with this specific integration. You may copy the token to your clipboard for later use by clicking the "Copy Token" button. Note that we won't use this token until later, so you may want to avoid navigating away
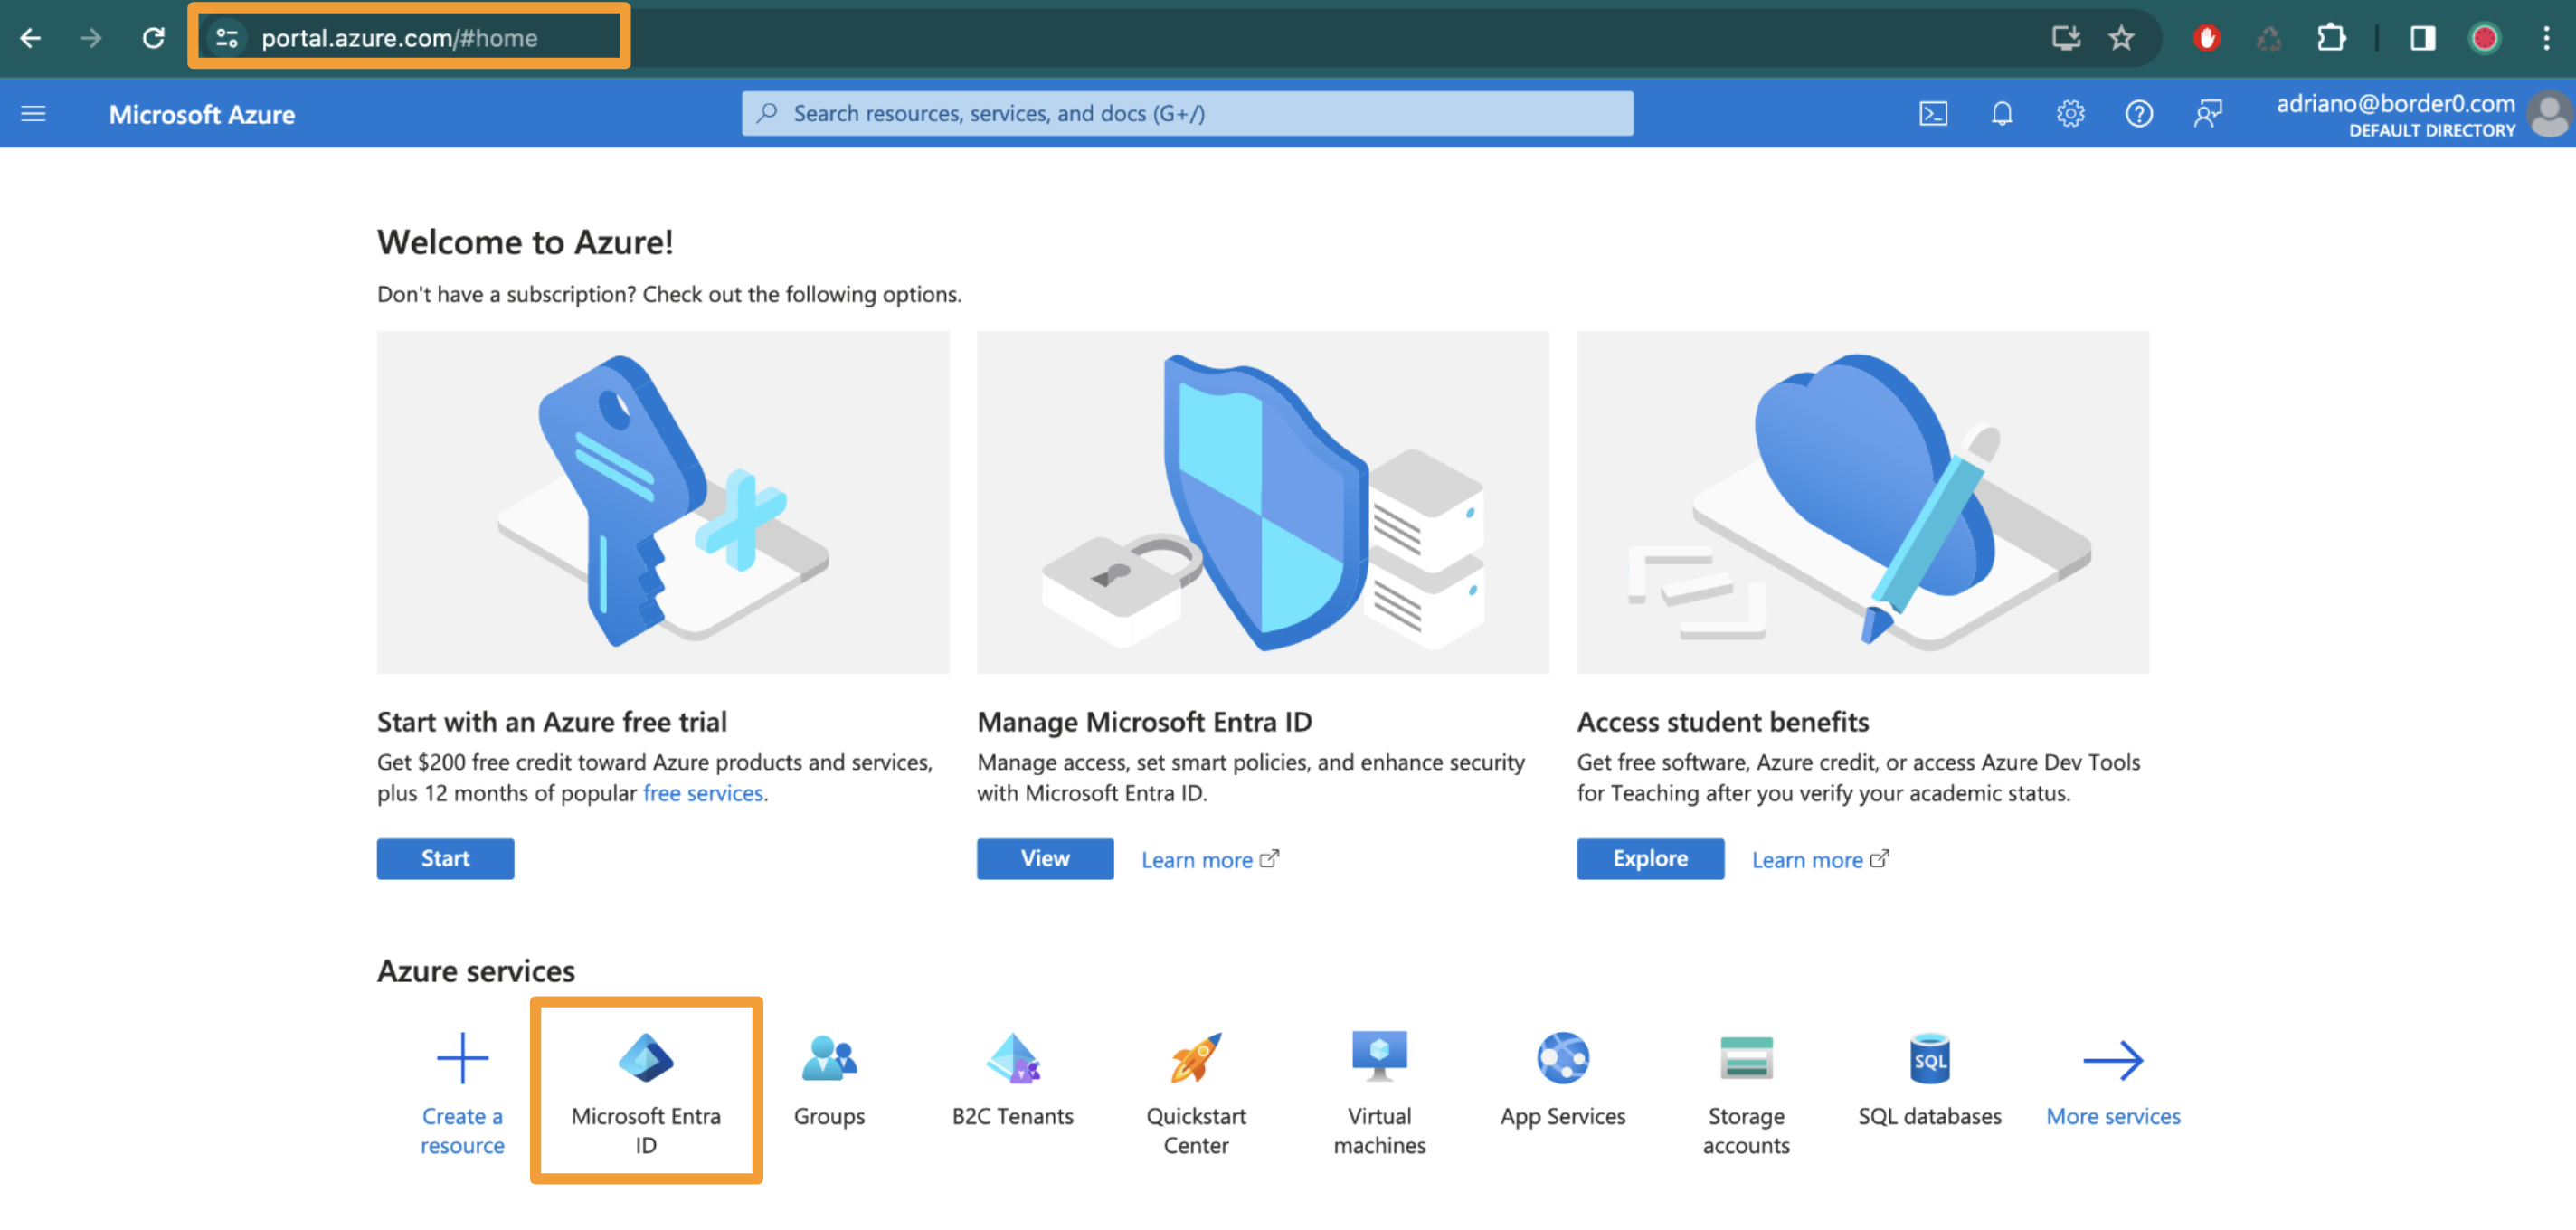
- [8] In a new browser tab, navigate to
https://portal.azure.com(the Azure Portal) and either select "Microsoft Entra ID" from under the "Azure services" section of the homepage or search for it in the search bar at the top of the page
- [9] In the Microsoft Entra ID dashboard, click on the "Enterprise Applications" tab on the drawer on the left side of the page.
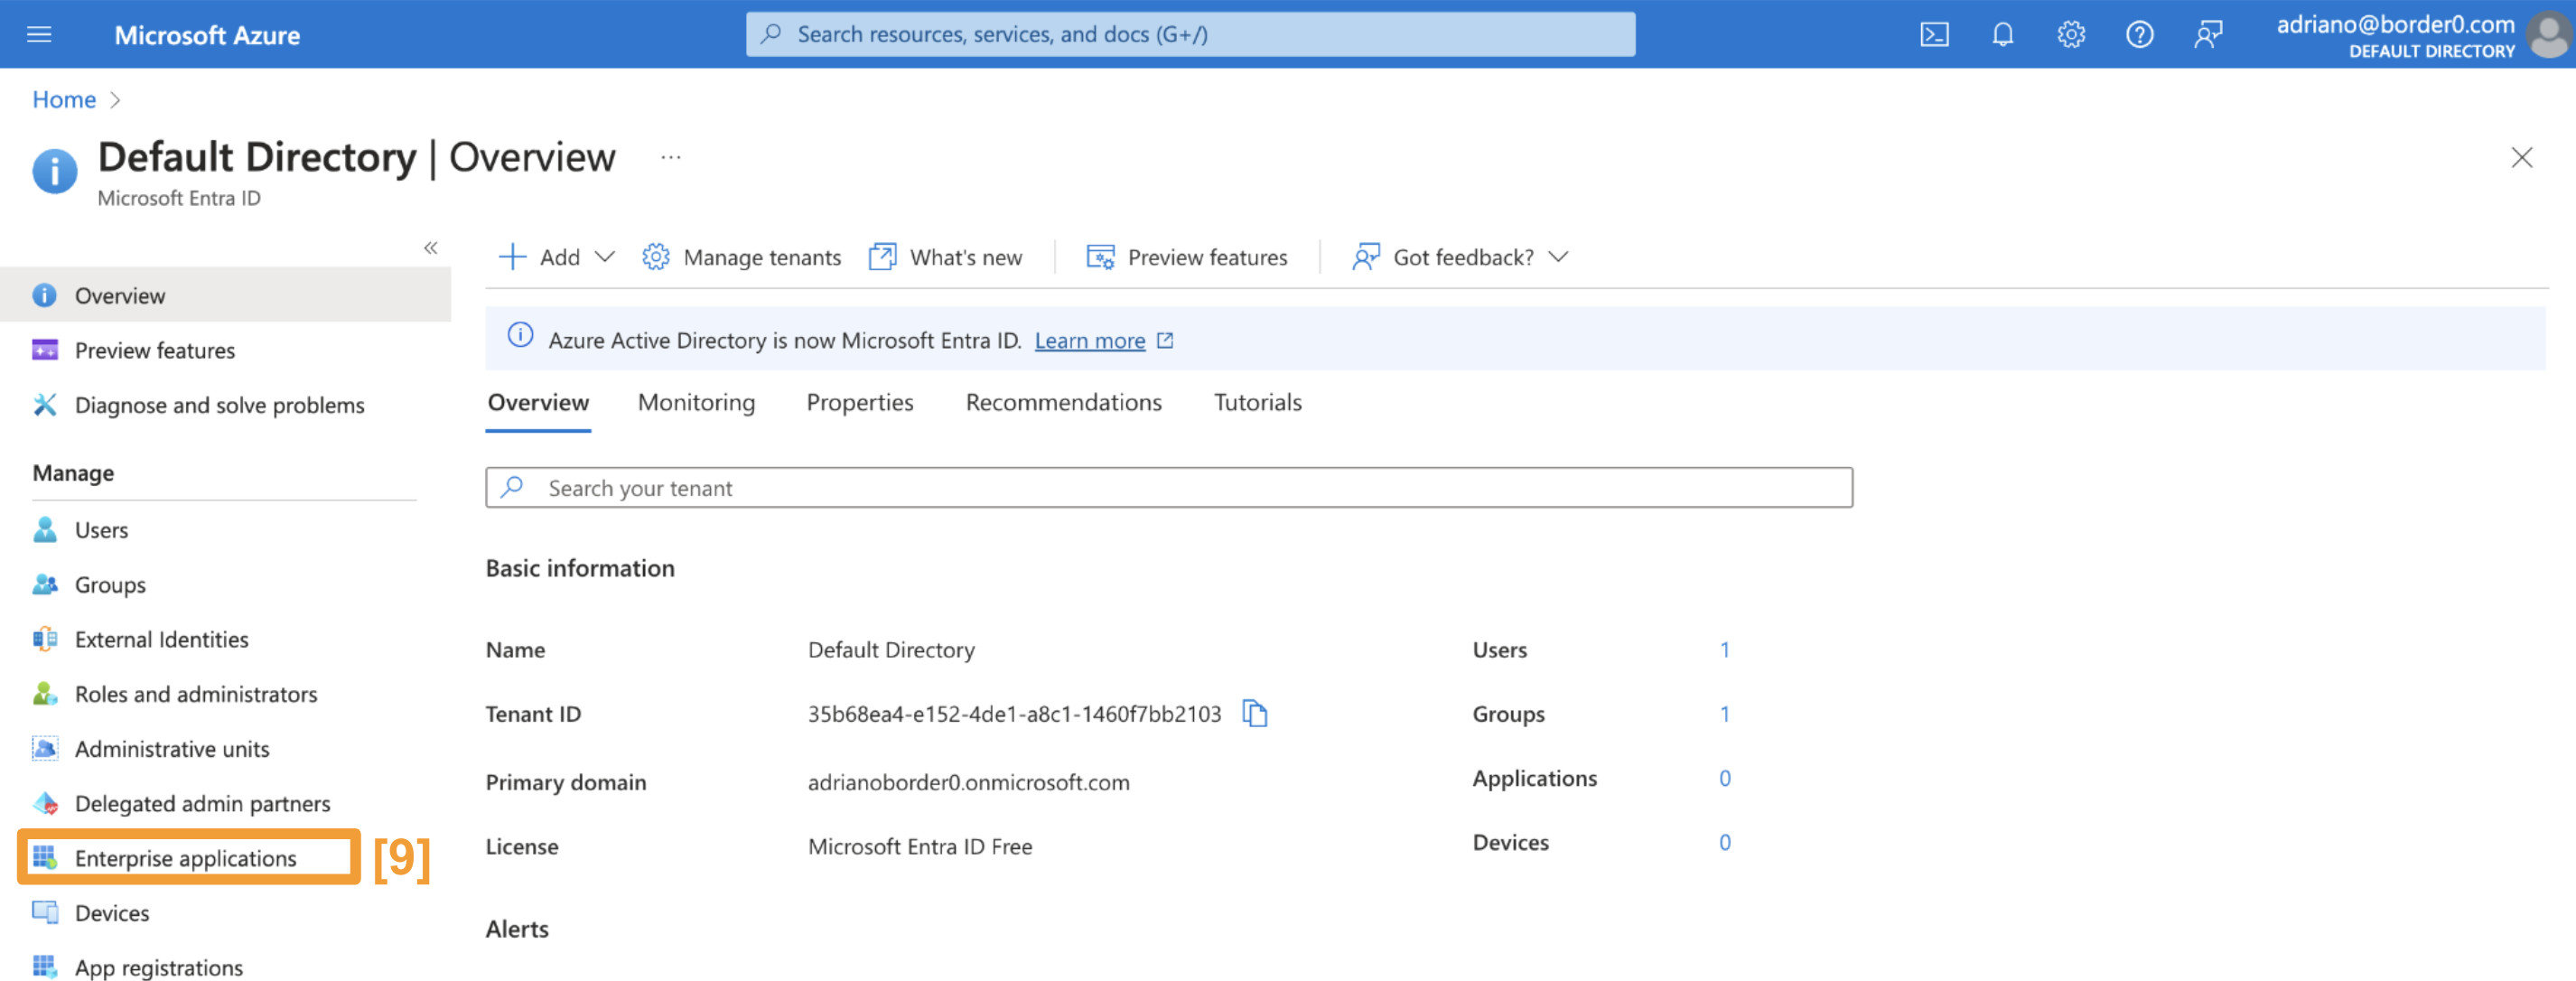
- [10] In the Enterprise applications page, click the "New application" button
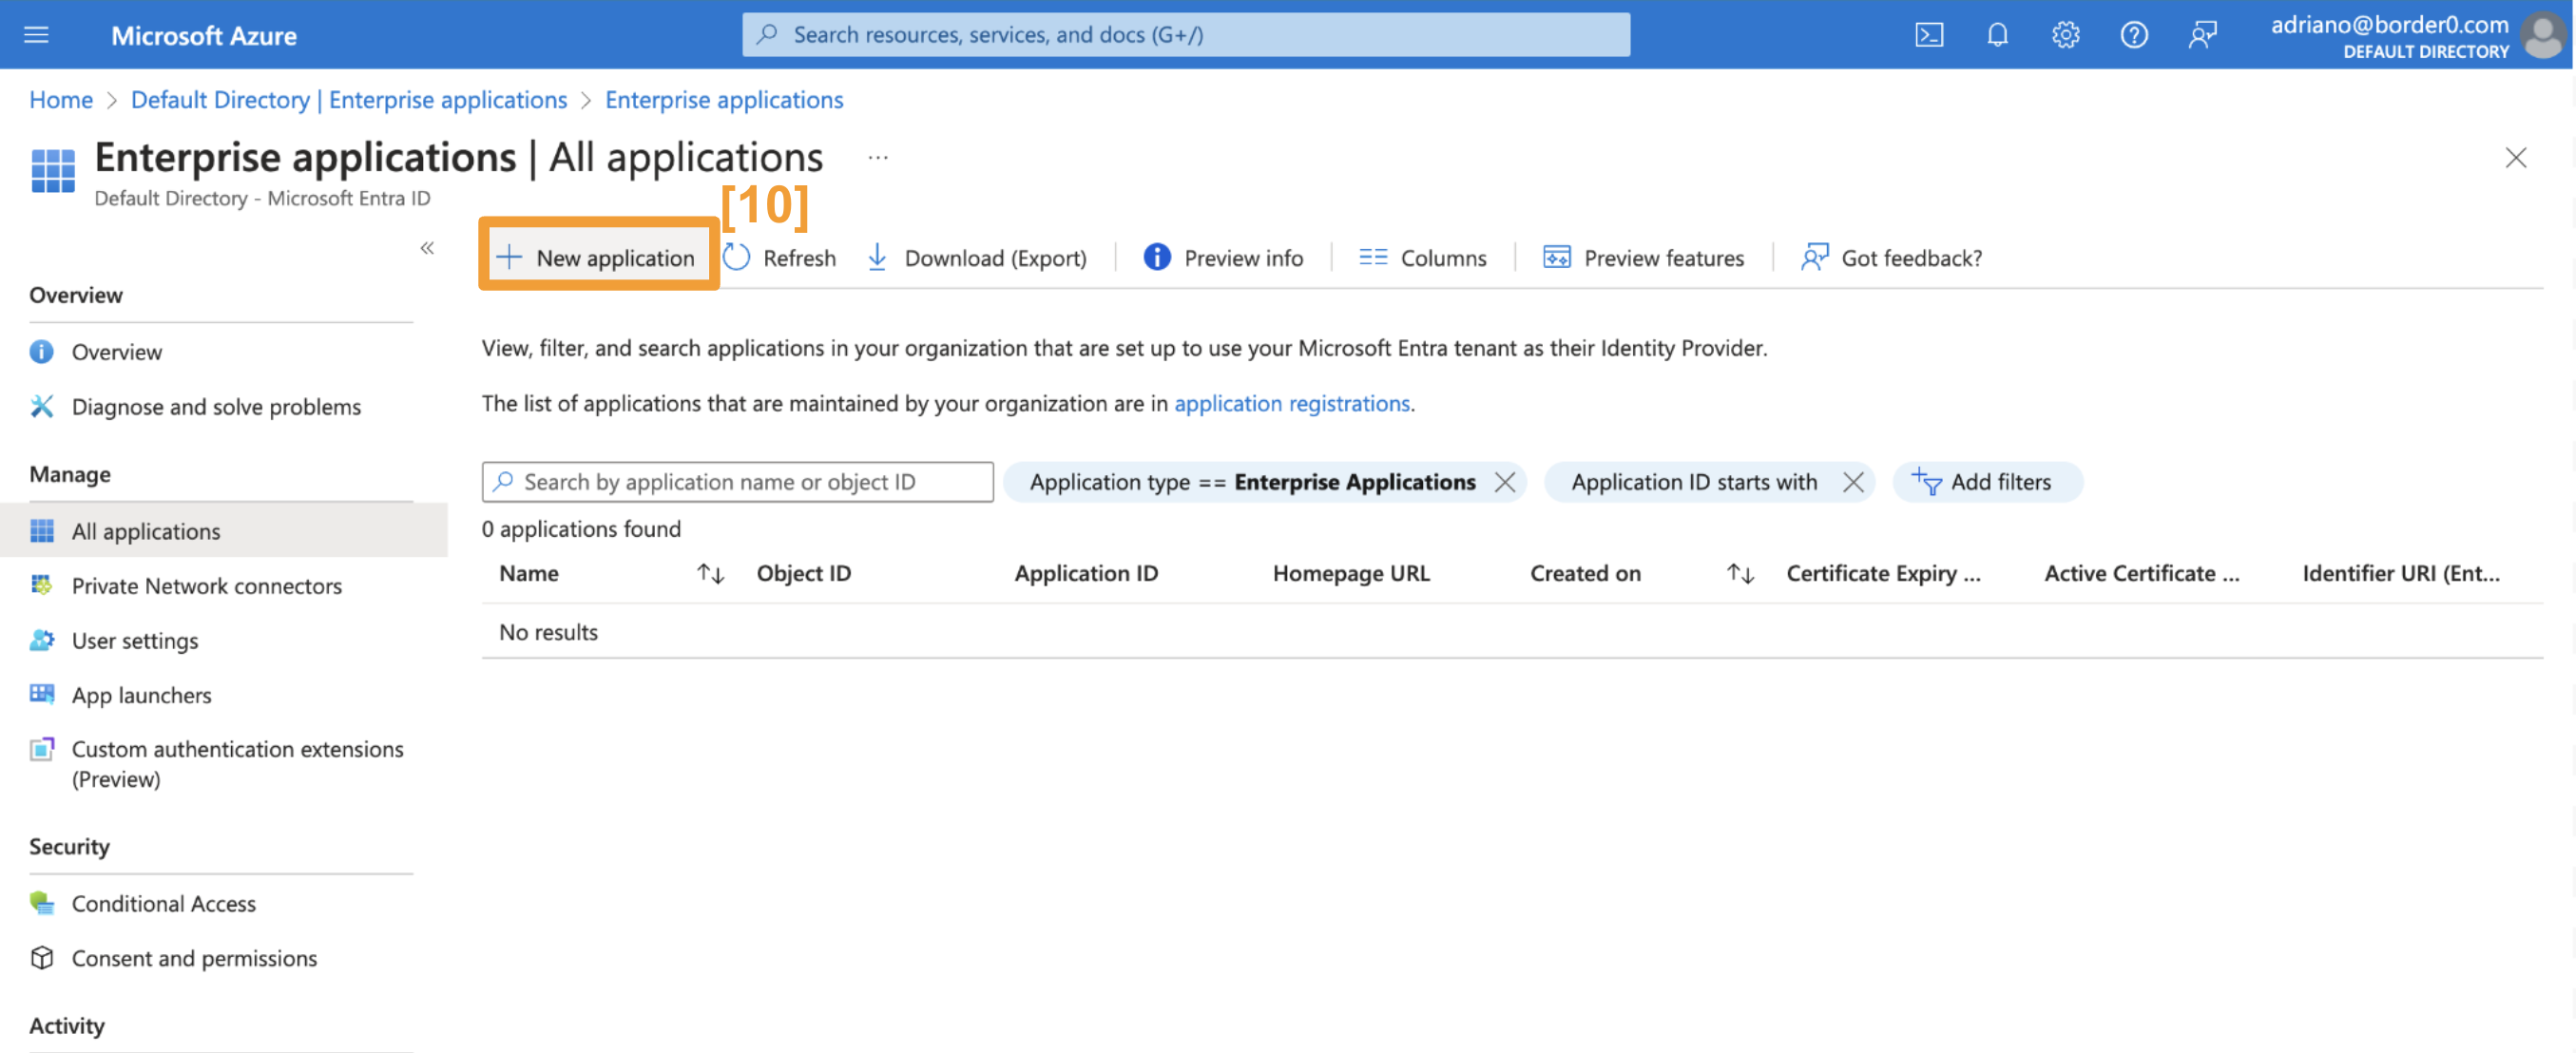
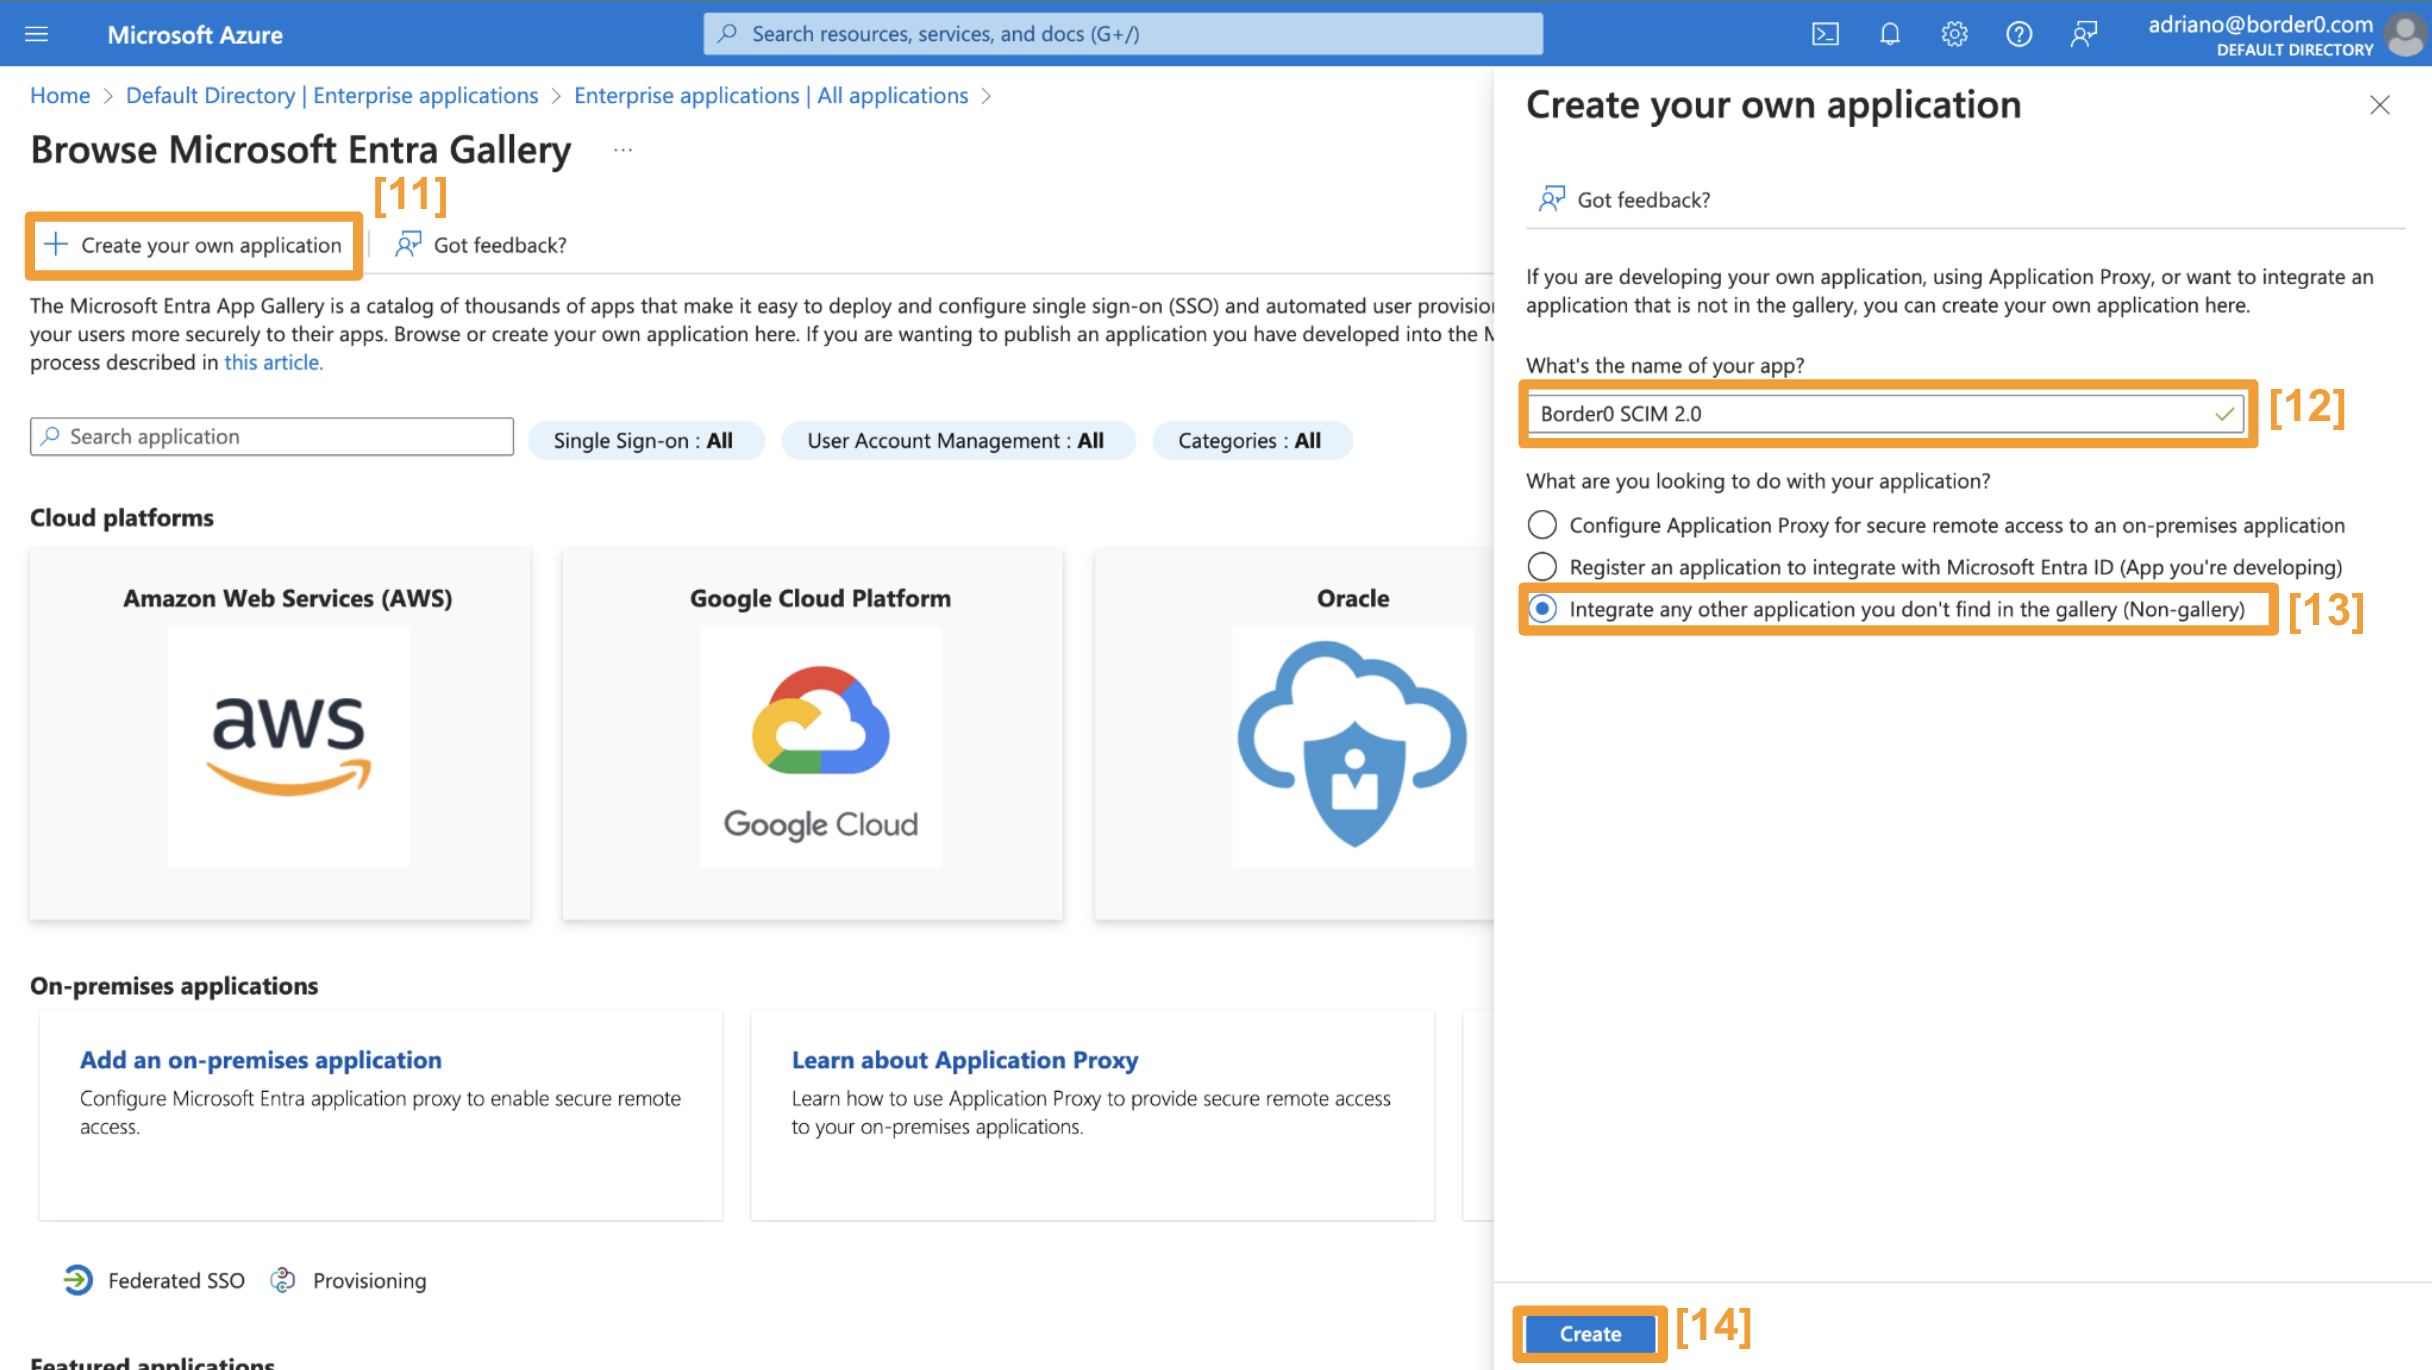
- [11] Click on the
+ Create your own applicationbutton. This will result in a new menu appearing on the right side of the page - [12] Give your app a name that identifies it as Border0. A good name is "Border0 SCIM 2.0"
- [13] Tick the "Integrate any other application you don't find in the gallery (Non-gallery)" option
- [14] Click "Create"
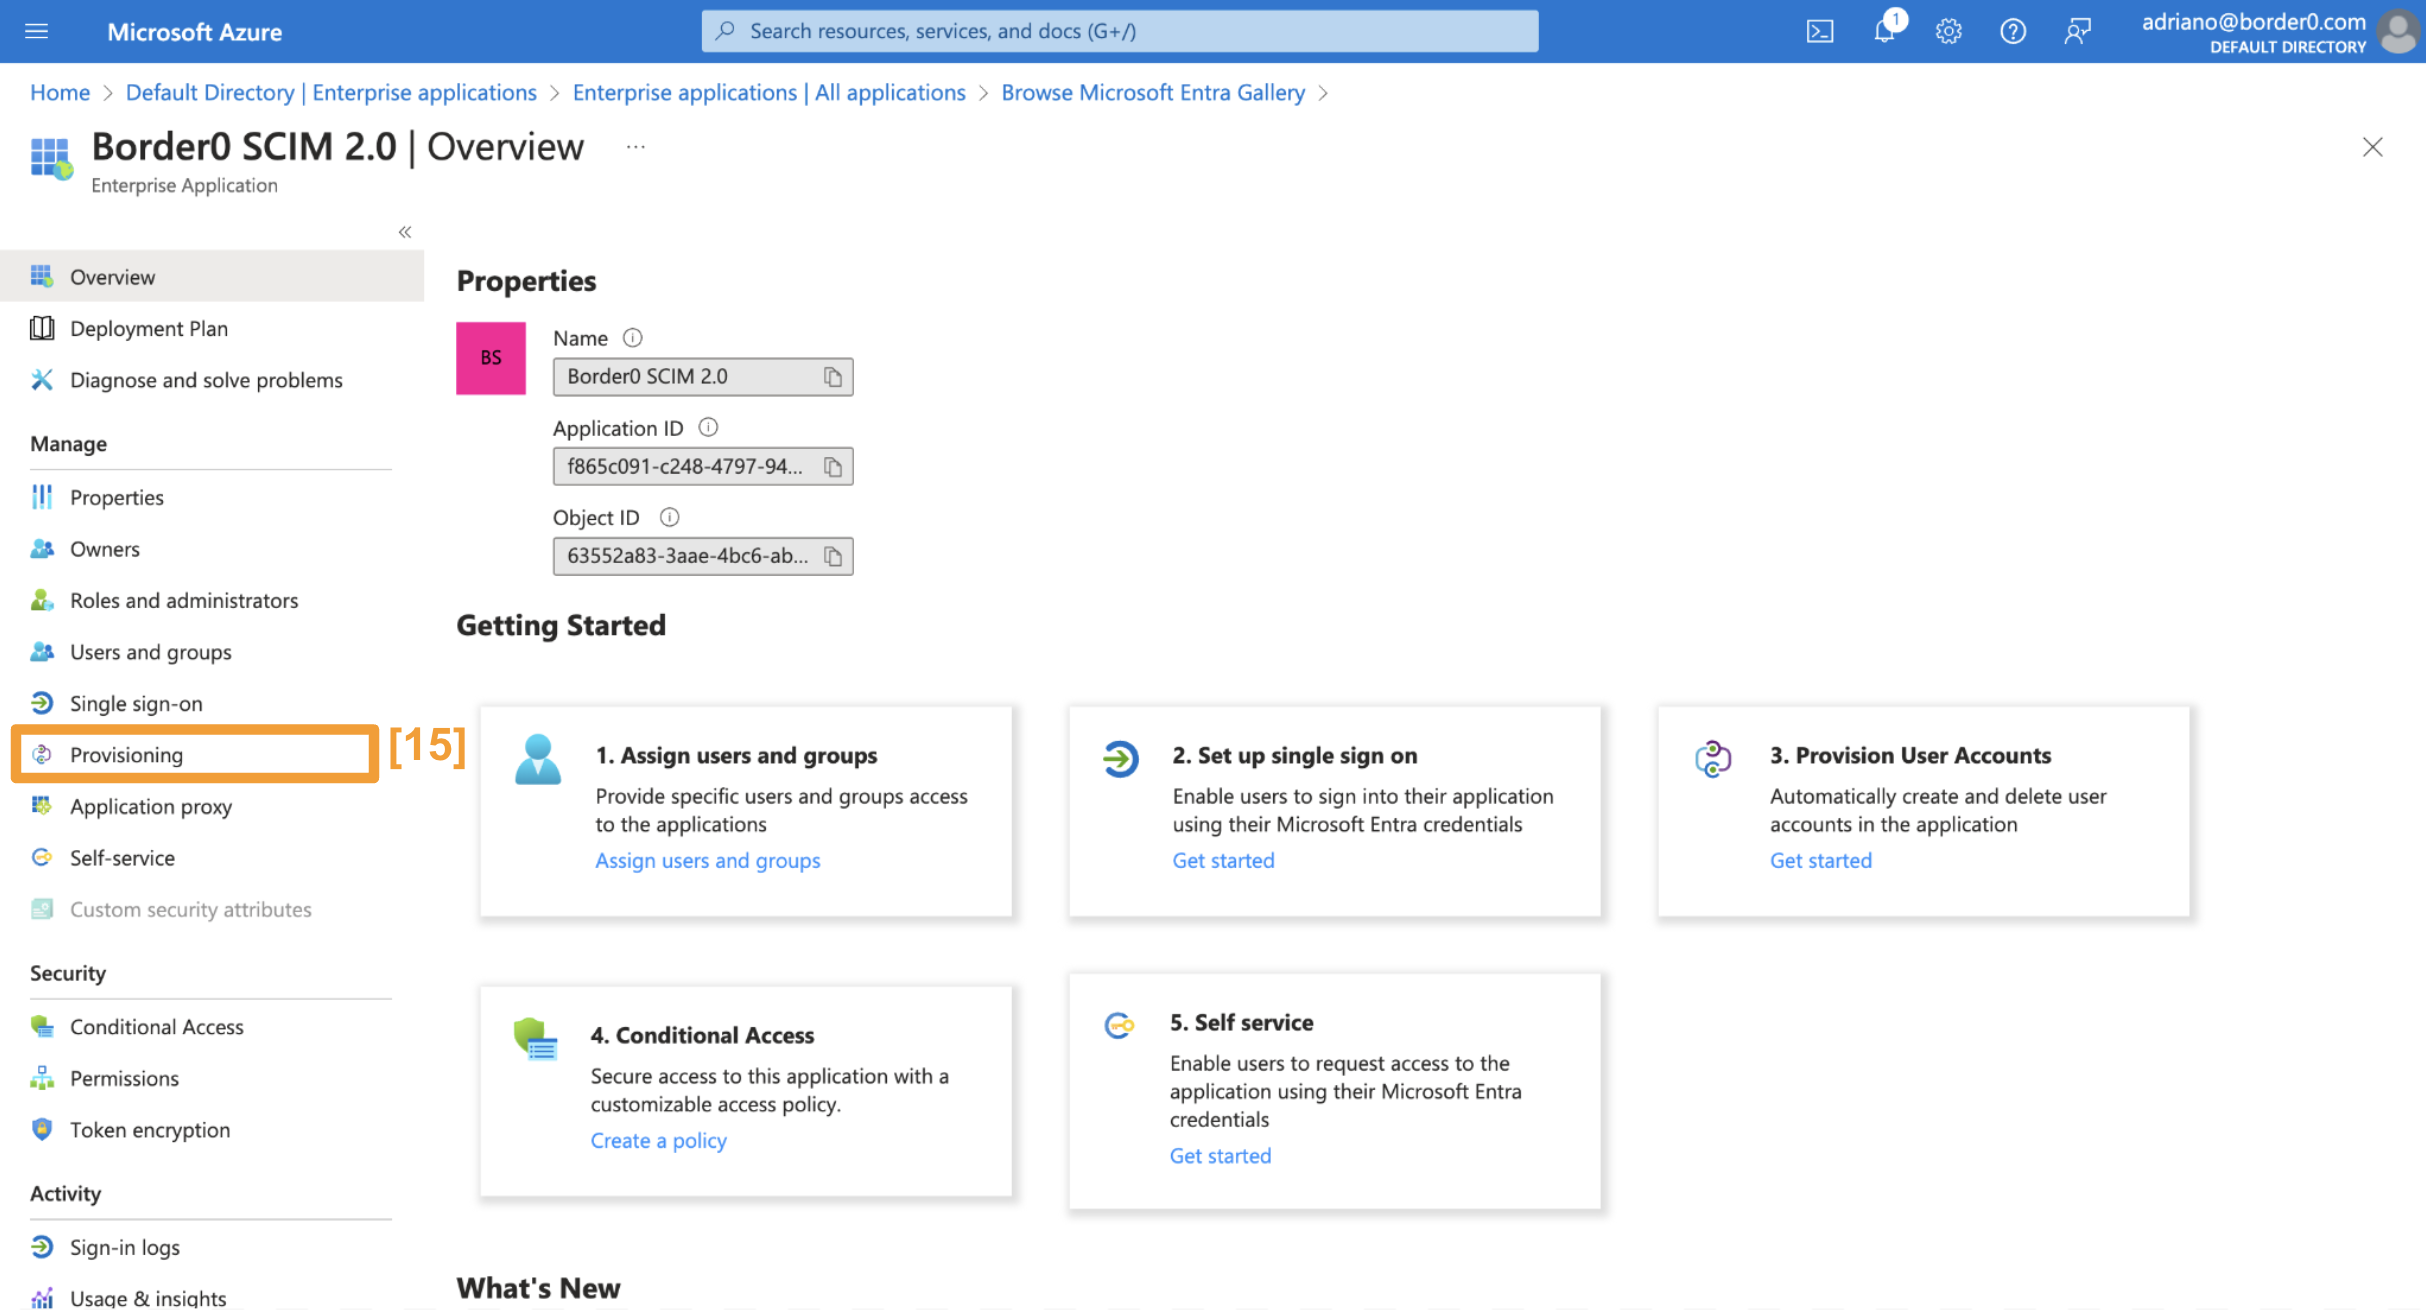
- [15] Once you click create, a period between a few seconds to a minute will go by while Microsoft prepares the new application and redirects you to the page of the new application. Once you are there, click on the "Provisioning" tab on the left side drawer
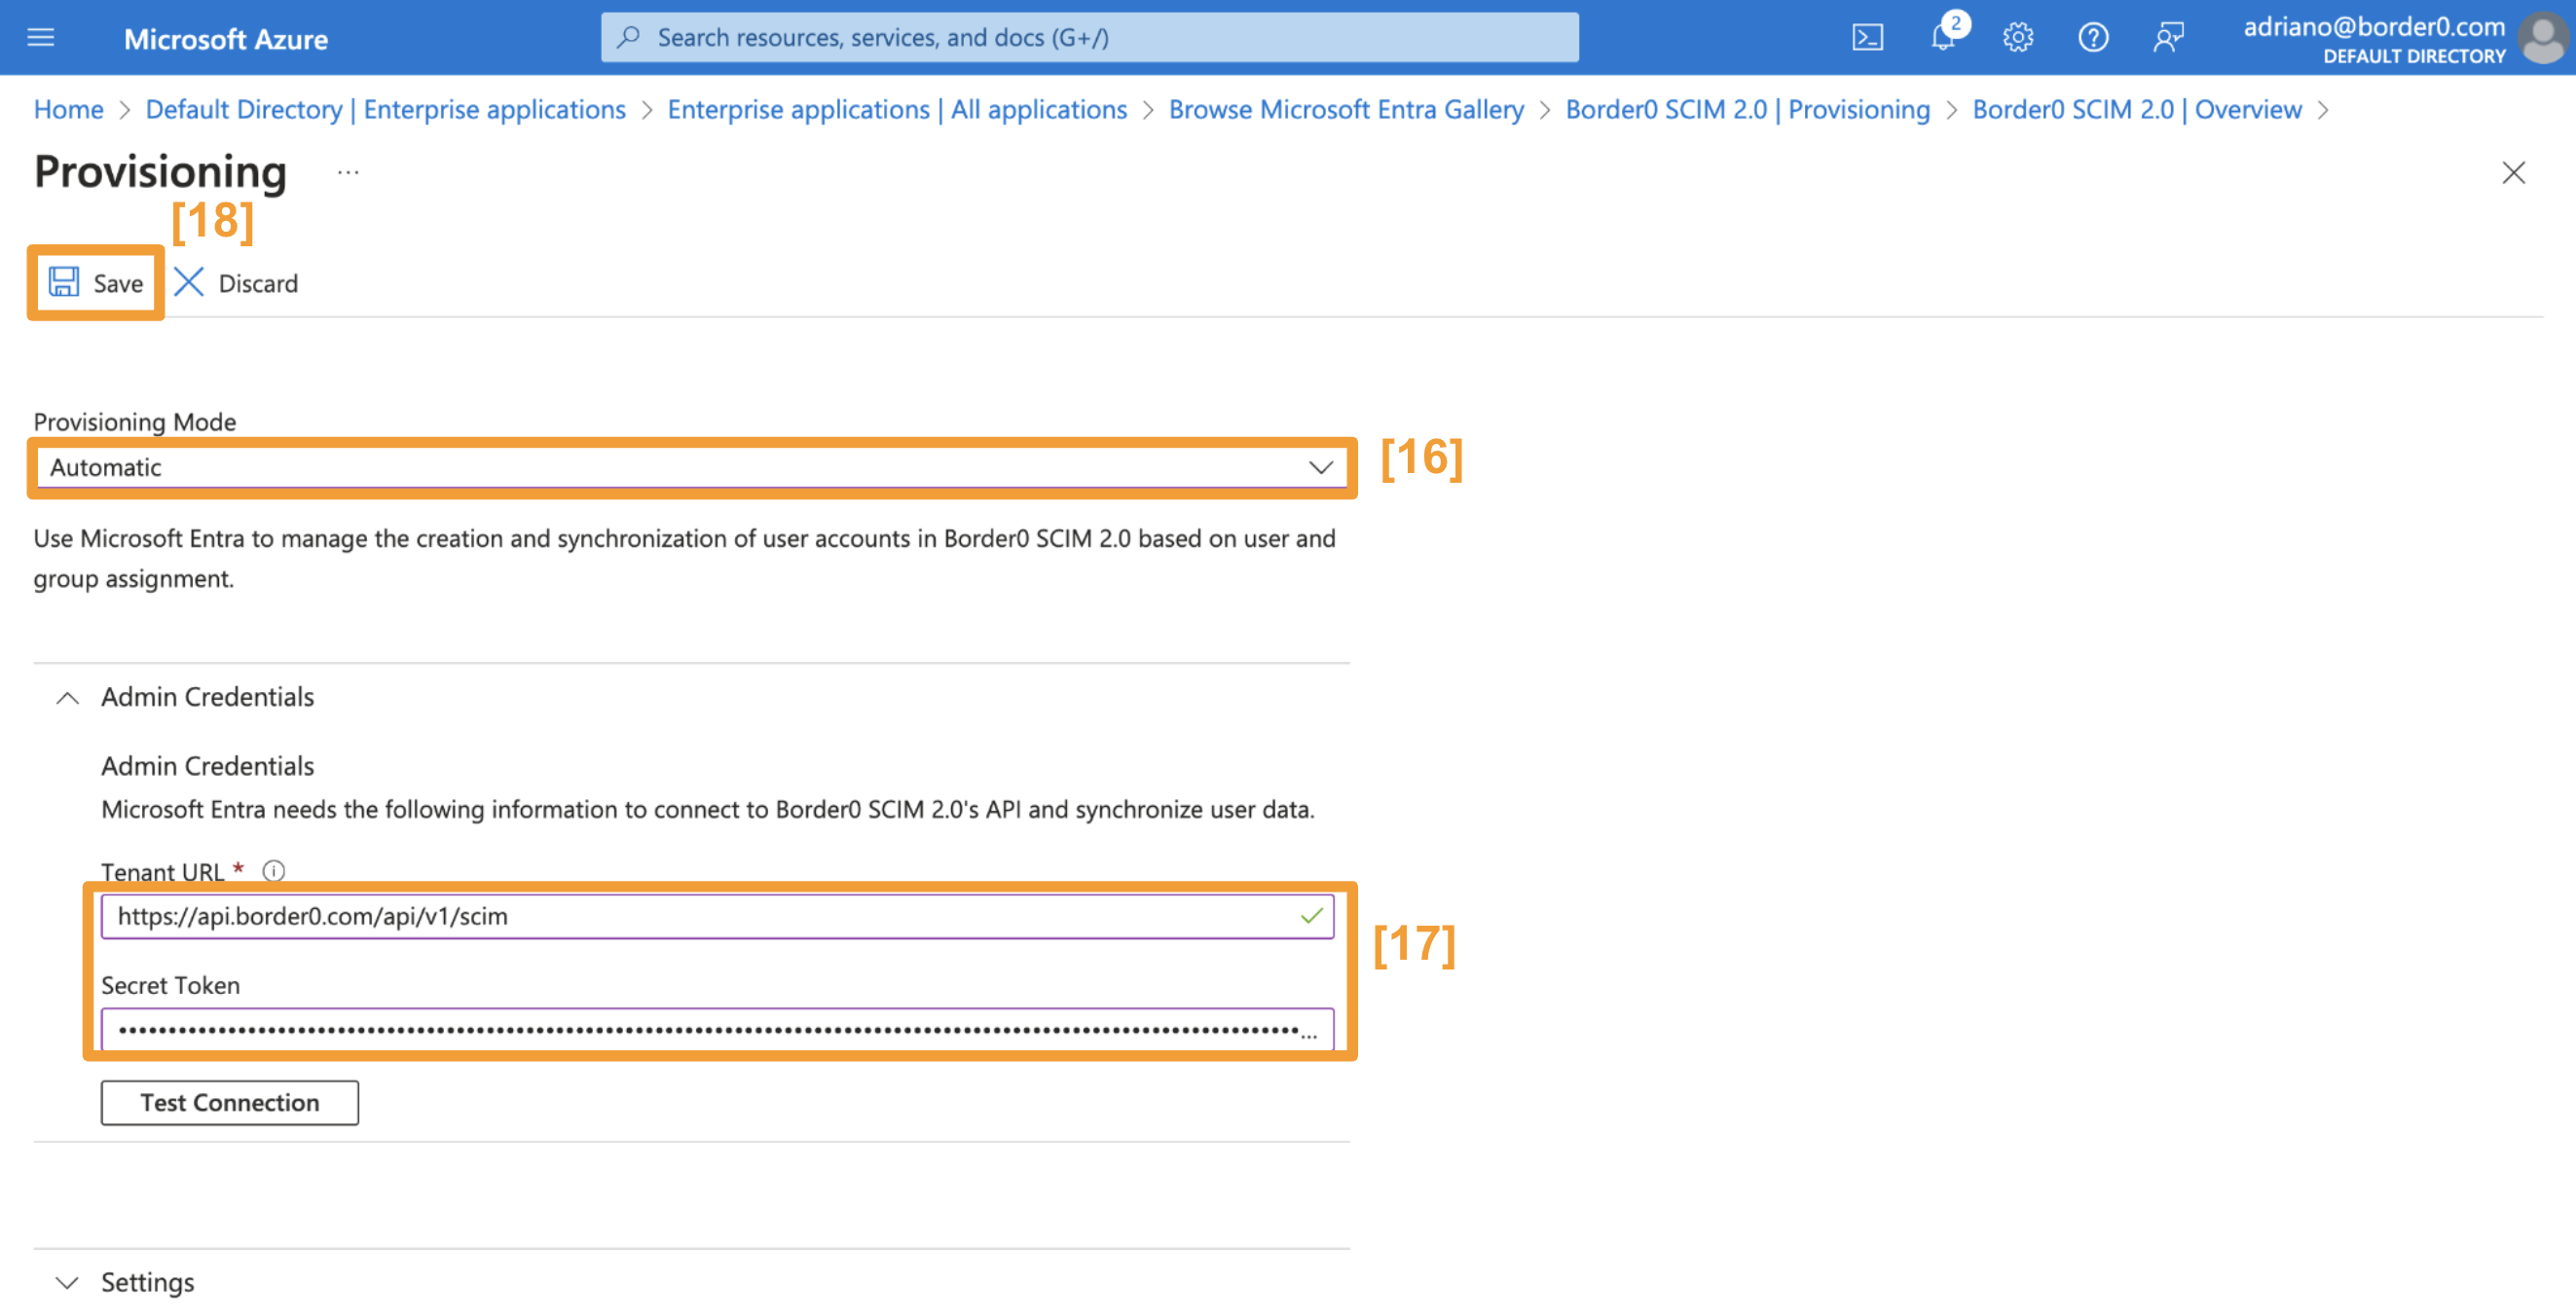
- [16] Select provisioning mode "Automatic"
- [17] For "Tenant URL" use
https://api.border0.com/api/v1/scimand for "Secret Token" use the token generated for you in step [7]. If you lost your token, you may generate a new one by navigating to the directory service page in the Border0 portal, clicking "+ Actions" and then "+ New Token". - [18] Click Save. Once saved, you may navigate back to the provisioning page by using the breadcrumbs at the top of the page (in the example below, "Border0 SCIM 2.0 | Provisioning"
- [19] Once you are back on the overview page for your application, click on the "Provisioning" tab again (see step [15] for position of tab in the page)
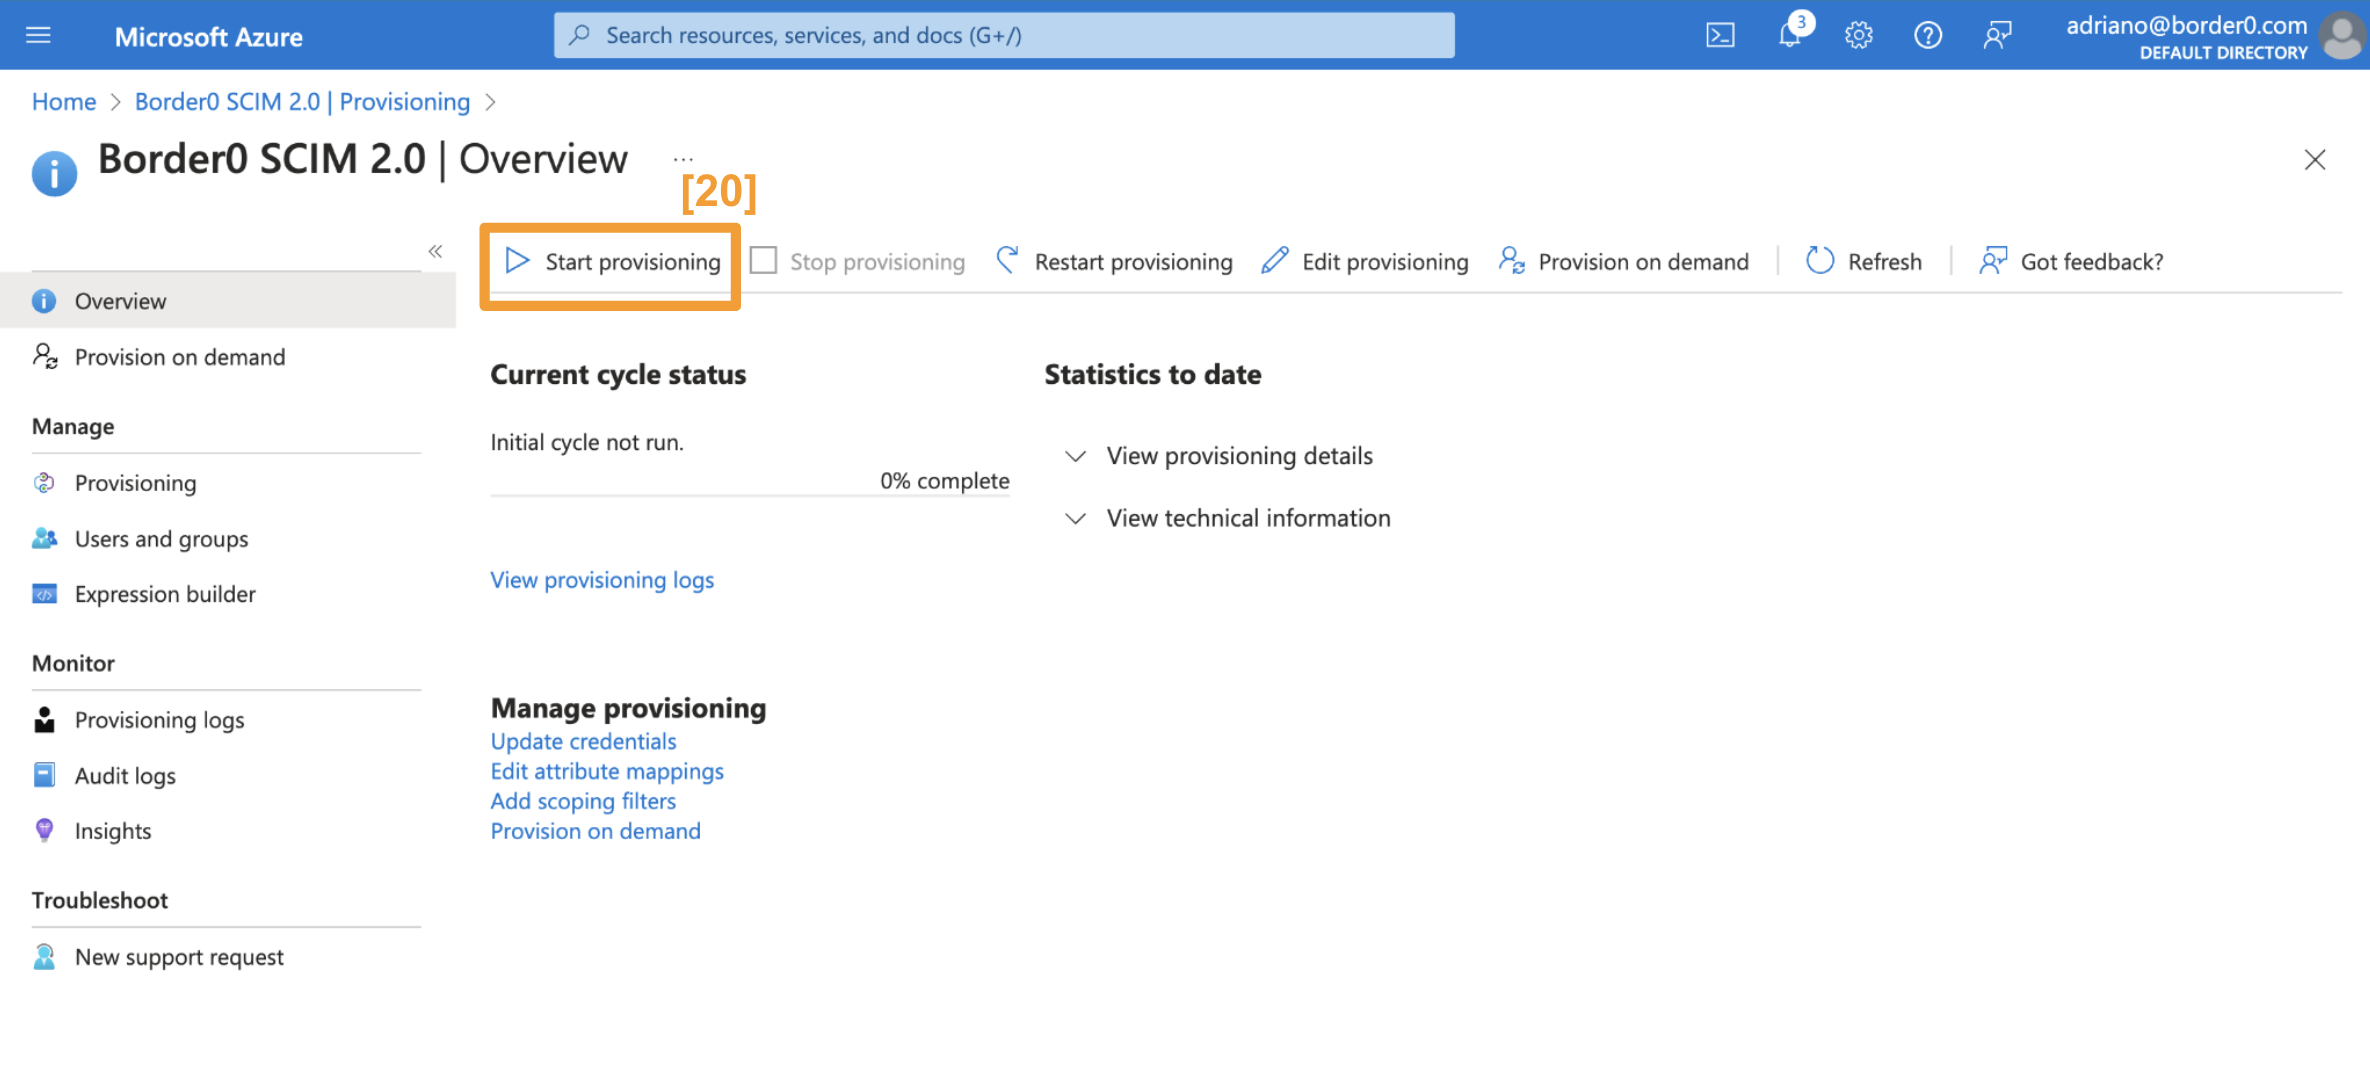
- [20] Click on "Start provisioning"
- [21] Navigate back to the overview page and click on "Assign users and groups"
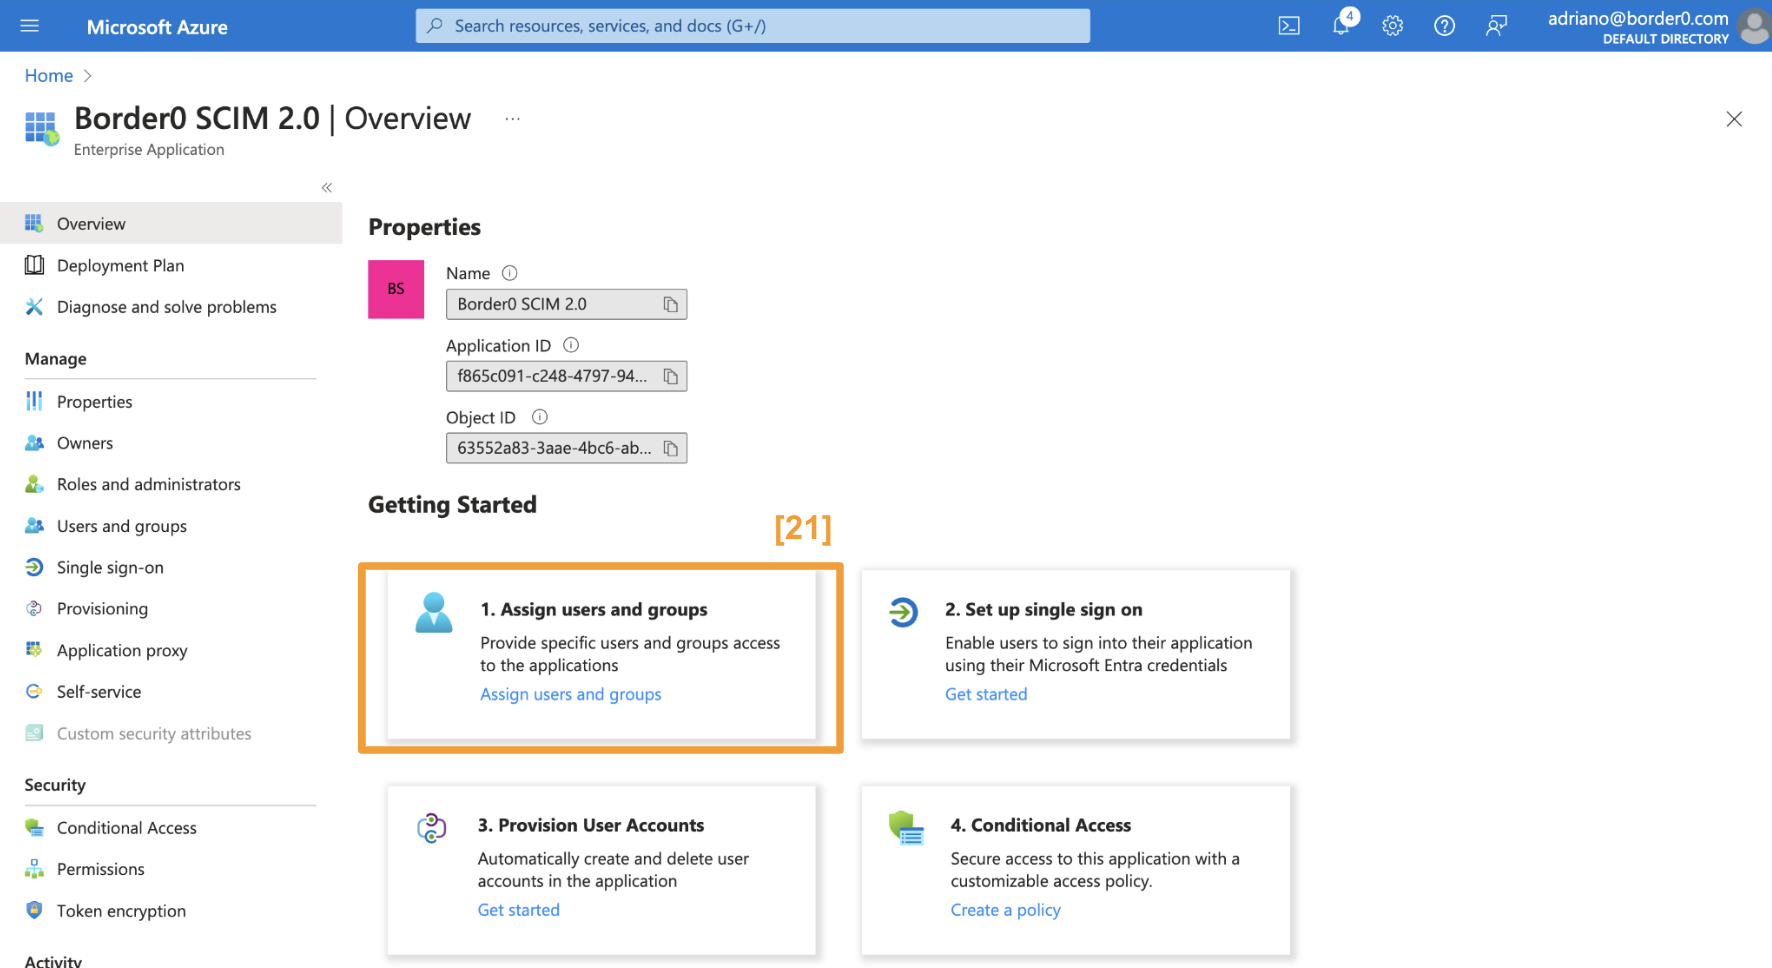
- From here you will be able to assign users and groups to your Border0 environment. After assigning users or groups, you should be able to see them in your Border0 organization in the Border0 Admin Portal.
Updated 20 days ago
Did this page help you?