
Exit Nodes
Routing Internet Traffic Through Exit Nodes
Using Border0, you can make Exit Nodes available to your clients. An Exit Node provides a default route (0.0.0.0/0 for IPv4 and ::/0 for IPv6), allowing clients to route all their traffic through your connector. This is useful for scenarios where you want all client traffic to pass through a predictable public IP address, such as for security or compliance purposes. All traffic from that Exit Node will be NAT'd to the public egress IP of the connector.
Creating an Exit Node Socket
To make an exit node socket available, follow these steps:
-
Create a New Socket: Click on "New Socket."
-
Select Exit Node: Choose the "Exit Node" socket type.
-
Configure the Exit Node:
-
Provide Socket Details:
- Name: Give your exit node a descriptive name (e.g., "corporate-exit").
- Description (Optional): Add an optional description for clarity (e.g., "Exit Node for all corporate traffic US east 1").
- Connector: Select the appropriate connector. This connector will become the egress point for all traffic routed through this Exit Node.
creating an Exit-Node
After creating the new socket, the Exit Node will be automatically available to clients that are authorized to access it via policy. Once provisioned and the user has the necessary permissions, it will show up as an available Exit Node in the user's Border0 client.
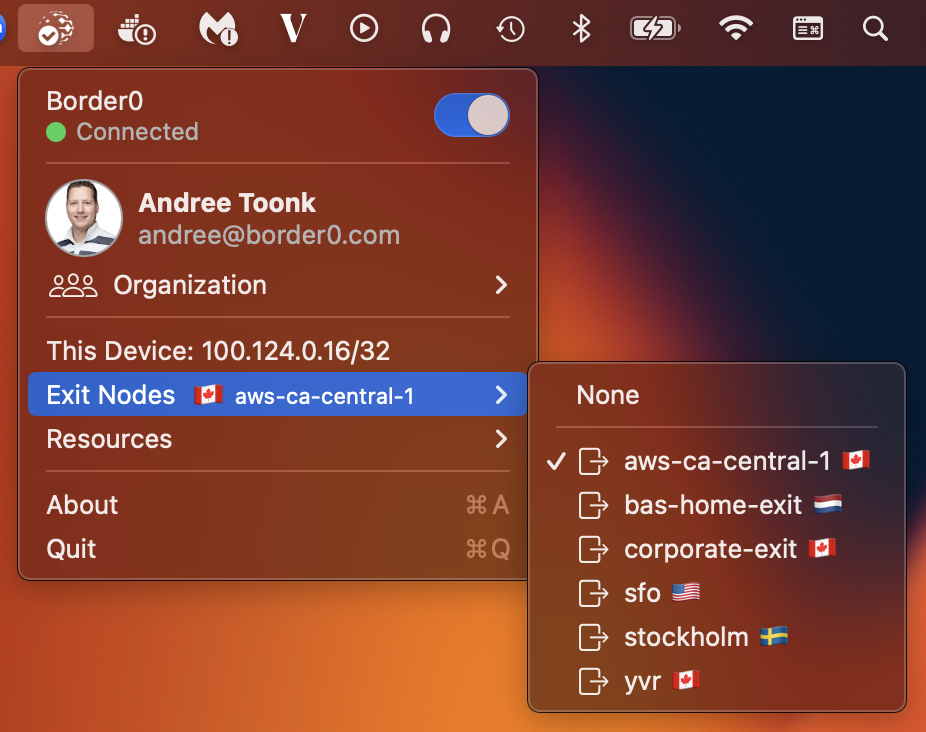
Border0 client - Select Exit Node
When selecting the exit node, all traffic for the user will be routed to the Exit Node and will be NAT'd to the connector's public IP.
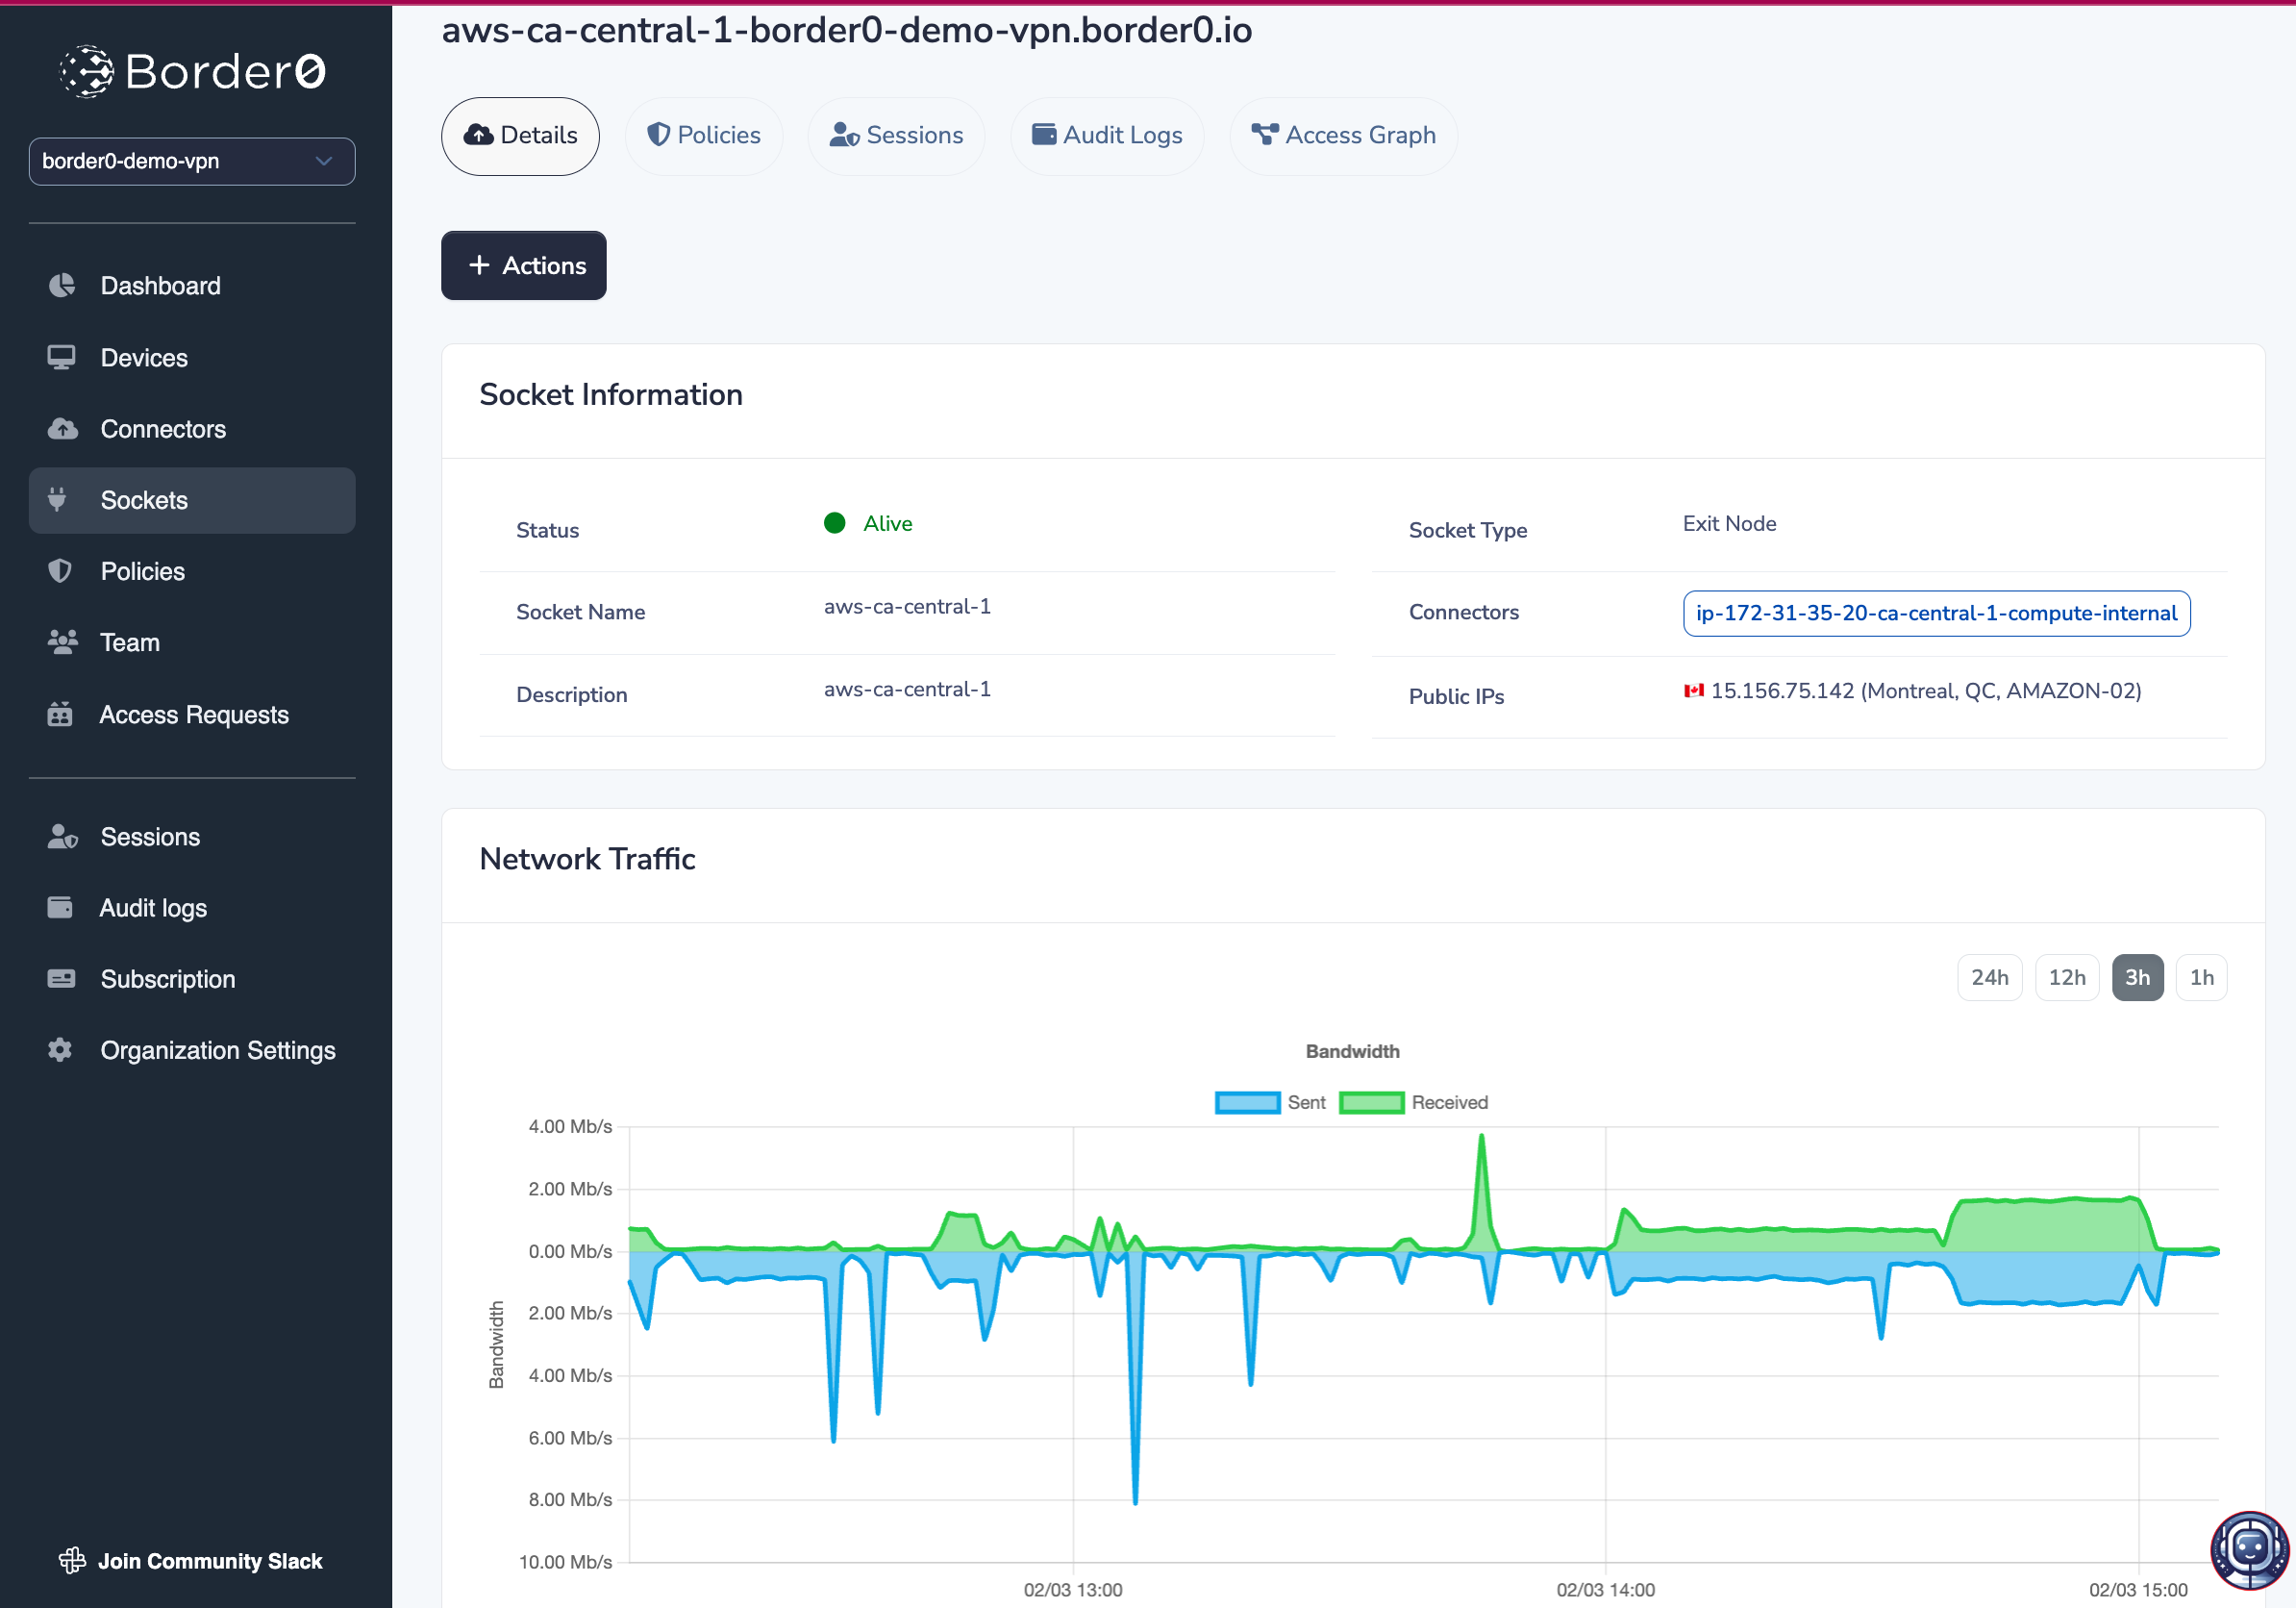
Traffic statistic
In the Border0 portal, you will find per Exit Node traffic statistics, allowing you to see how much traffic is being routed through your exit node socket.
Policies
To control which users have access to the exit node, you must configure the appropriate policies. Users who should have access to the exit node must have the network permission enabled in their policy.
This specific permission controls who receives VPN routing information, including the default route provided by exit nodes. Without this permission, even if a user is connected to Border0, they will not be able to use the exit node.
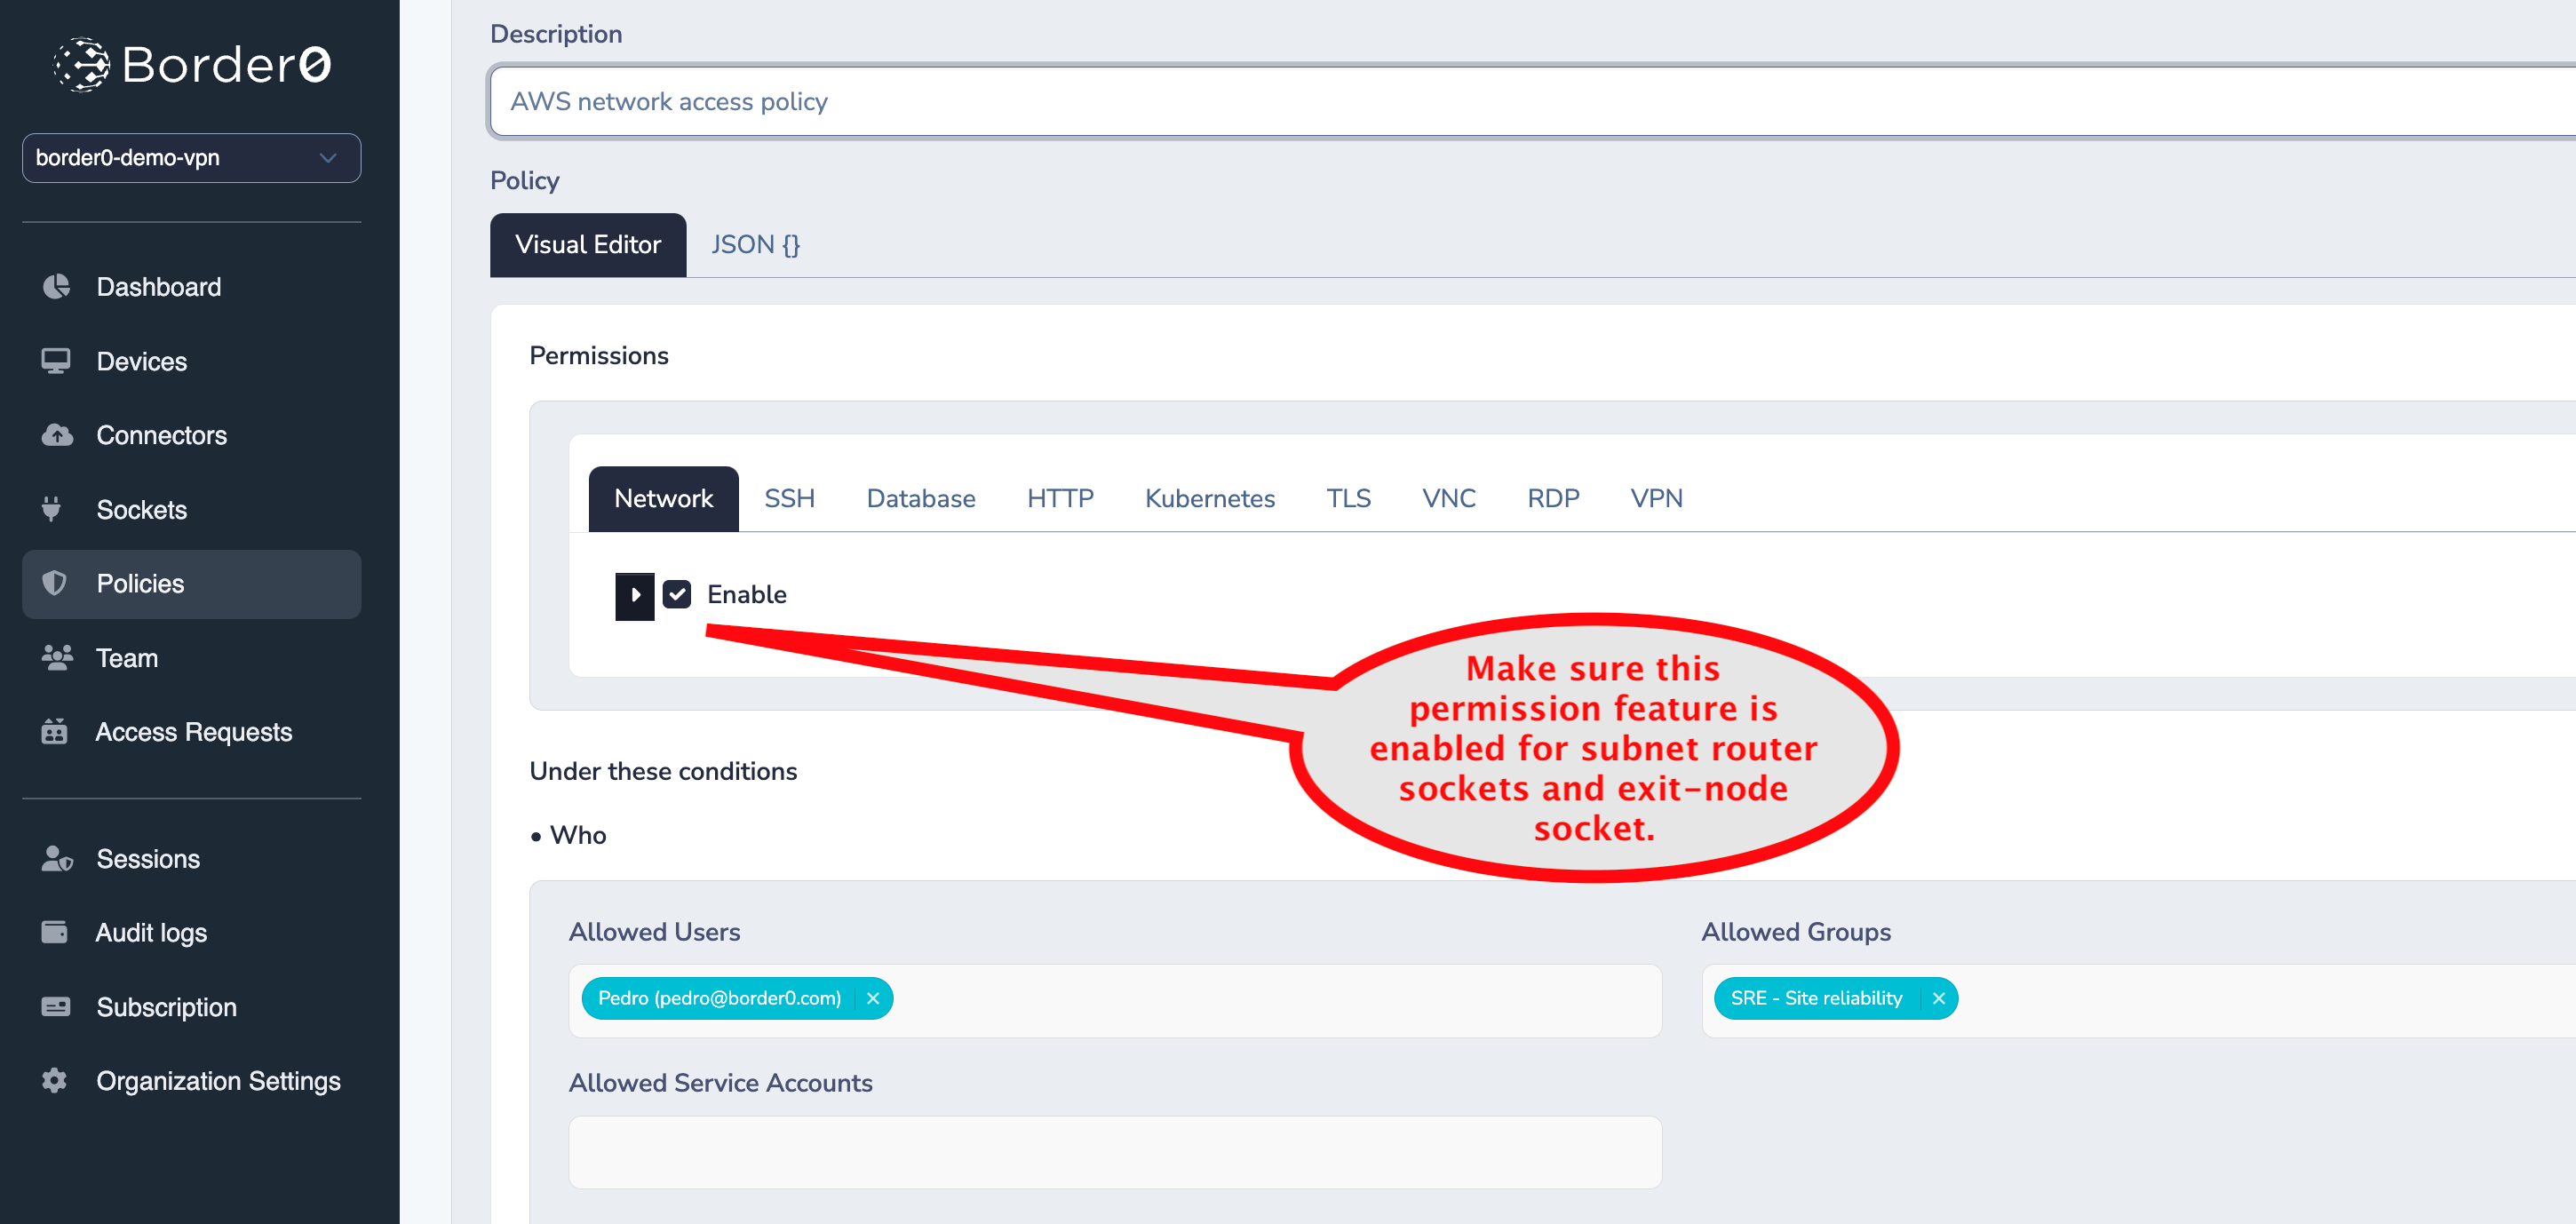
Enable Network Permission
By enabling this permission in the appropriate policy and assigning that policy to the correct users, you control who can utilize the exit node.
Troubleshooting and Validating
The easiest way to validate if the exit node is working is to check the client's routing table after connecting to the Border0 VPN and selecting the exit node.
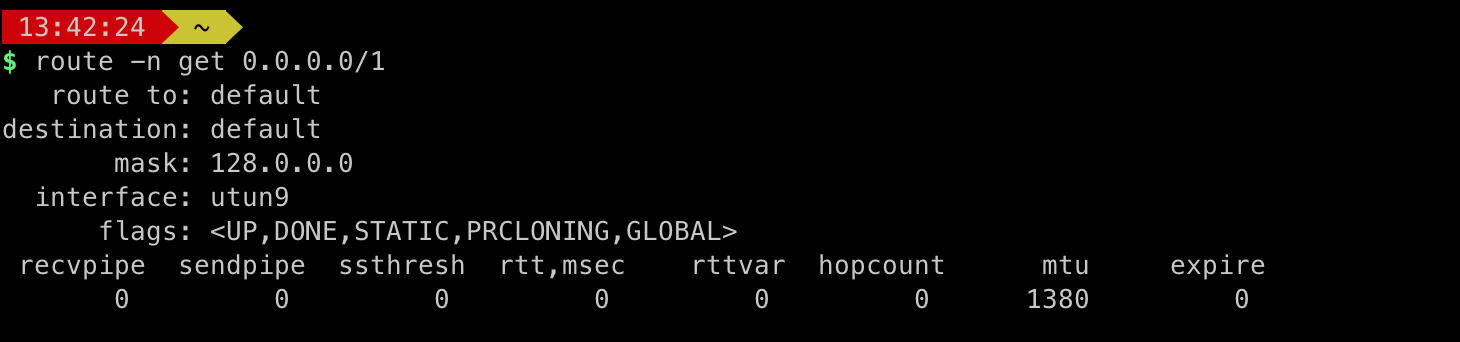
Note that the Border0 software inserts 0.0.0.0/1 and 128.0.0.0/1 as the default routes. This is to ensure we don't overlap with the OS default route. Since more specific routes are always preferred, by default, the OS will select these Exit Node routes.
macOS:
route -n get 0.0.0.0/1Validate that the route is present and points to the VPN tunnel interface, which typically starts with utun followed by a number (e.g., utun2).
Windows:
route print 10.10.0.0Linux:
ip route get 0.0.0.0/1If the routes are not present, make sure to:
- Verify Permissions: Validate that the client has been granted the network permission.
- Check Policy Linking: Ensure that the policy containing the network permission is linked to the subnet router socket. For example by checking the access graph.
- Client Connection: Confirm the client is actively connected to the Border0 VPN.
If the routes are present, but connectivity is broken, consider these additional troubleshooting steps:
- Firewall Rules: Check local firewall rules on the client machine or connector that might be blocking traffic to the target subnet.
- Validate with
tcpdumpthat the traffic arrives on the connector. - Connector Configuration: Double-check the configuration of your connector. Ensure that it has access to the target subnets and is functioning correctly and iptables is configured correctly.
- Contact Support: If you're still unable to resolve the issue, contact border0 support for assistance.