
Access to an Elasticsearch server
🛡️ Intro
In this example, we'll secure access to an Elasticsearch server using Border0.
We'll walk through the following steps together:
- Launch an Elasticsearch server using Docker
- Create a database socket and link it to our connector
- Authenticate and connect
- Watch the recording
- Use the Border0 Desktop app to access your database
1 - Run a local Elasticsearch server with Docker
You can make any Elasticsearch server available with Border0; for testing purposes, we'll use an Elasticsearch Docker container as the server.
It works through NAT and FirewallsDon't worry if your laptop is behind NAT. Border0 works perfectly fine with resources that are behind NAT.
docker run -d --rm \
  --name elasticsearch \
  -p 9200:9200 -p 9300:9300 \
  -e "discovery.type=single-node" \
  -e "ELASTIC_PASSWORD=My-secret-pw" \
  docker.elastic.co/elasticsearch/elasticsearch:8.5.0
This command starts an Elasticsearch server with My-secret-pw as the password.
Before we continue, let's make sure the Elasticsearch container started OK and test connecting to the server locally as user elastic with password My-secret-pw:
curl -k -u elastic:My-secret-pw https://localhost:9200Once connected, we can insert some data as shown below:
curl -k -u elastic:My-secret-pw -X POST "https://localhost:9200/my_index/_doc/1" \
  -H 'Content-Type: application/json' \
  -d'
{
  "title": "Hello World",
  "content": "Elasticsearch is cool!"
}
'
Then, test whether the document was inserted properly by querying for it:
curl -k -u elastic:My-secret-pw "https://localhost:9200/my_index/_search" \
  -H 'Content-Type: application/json' \
  -d'
{
  "query": {
    "match": {
      "title": "Hello"
    }
  }
}
'
2 - Create an Elasticsearch socket and link it to your connector.
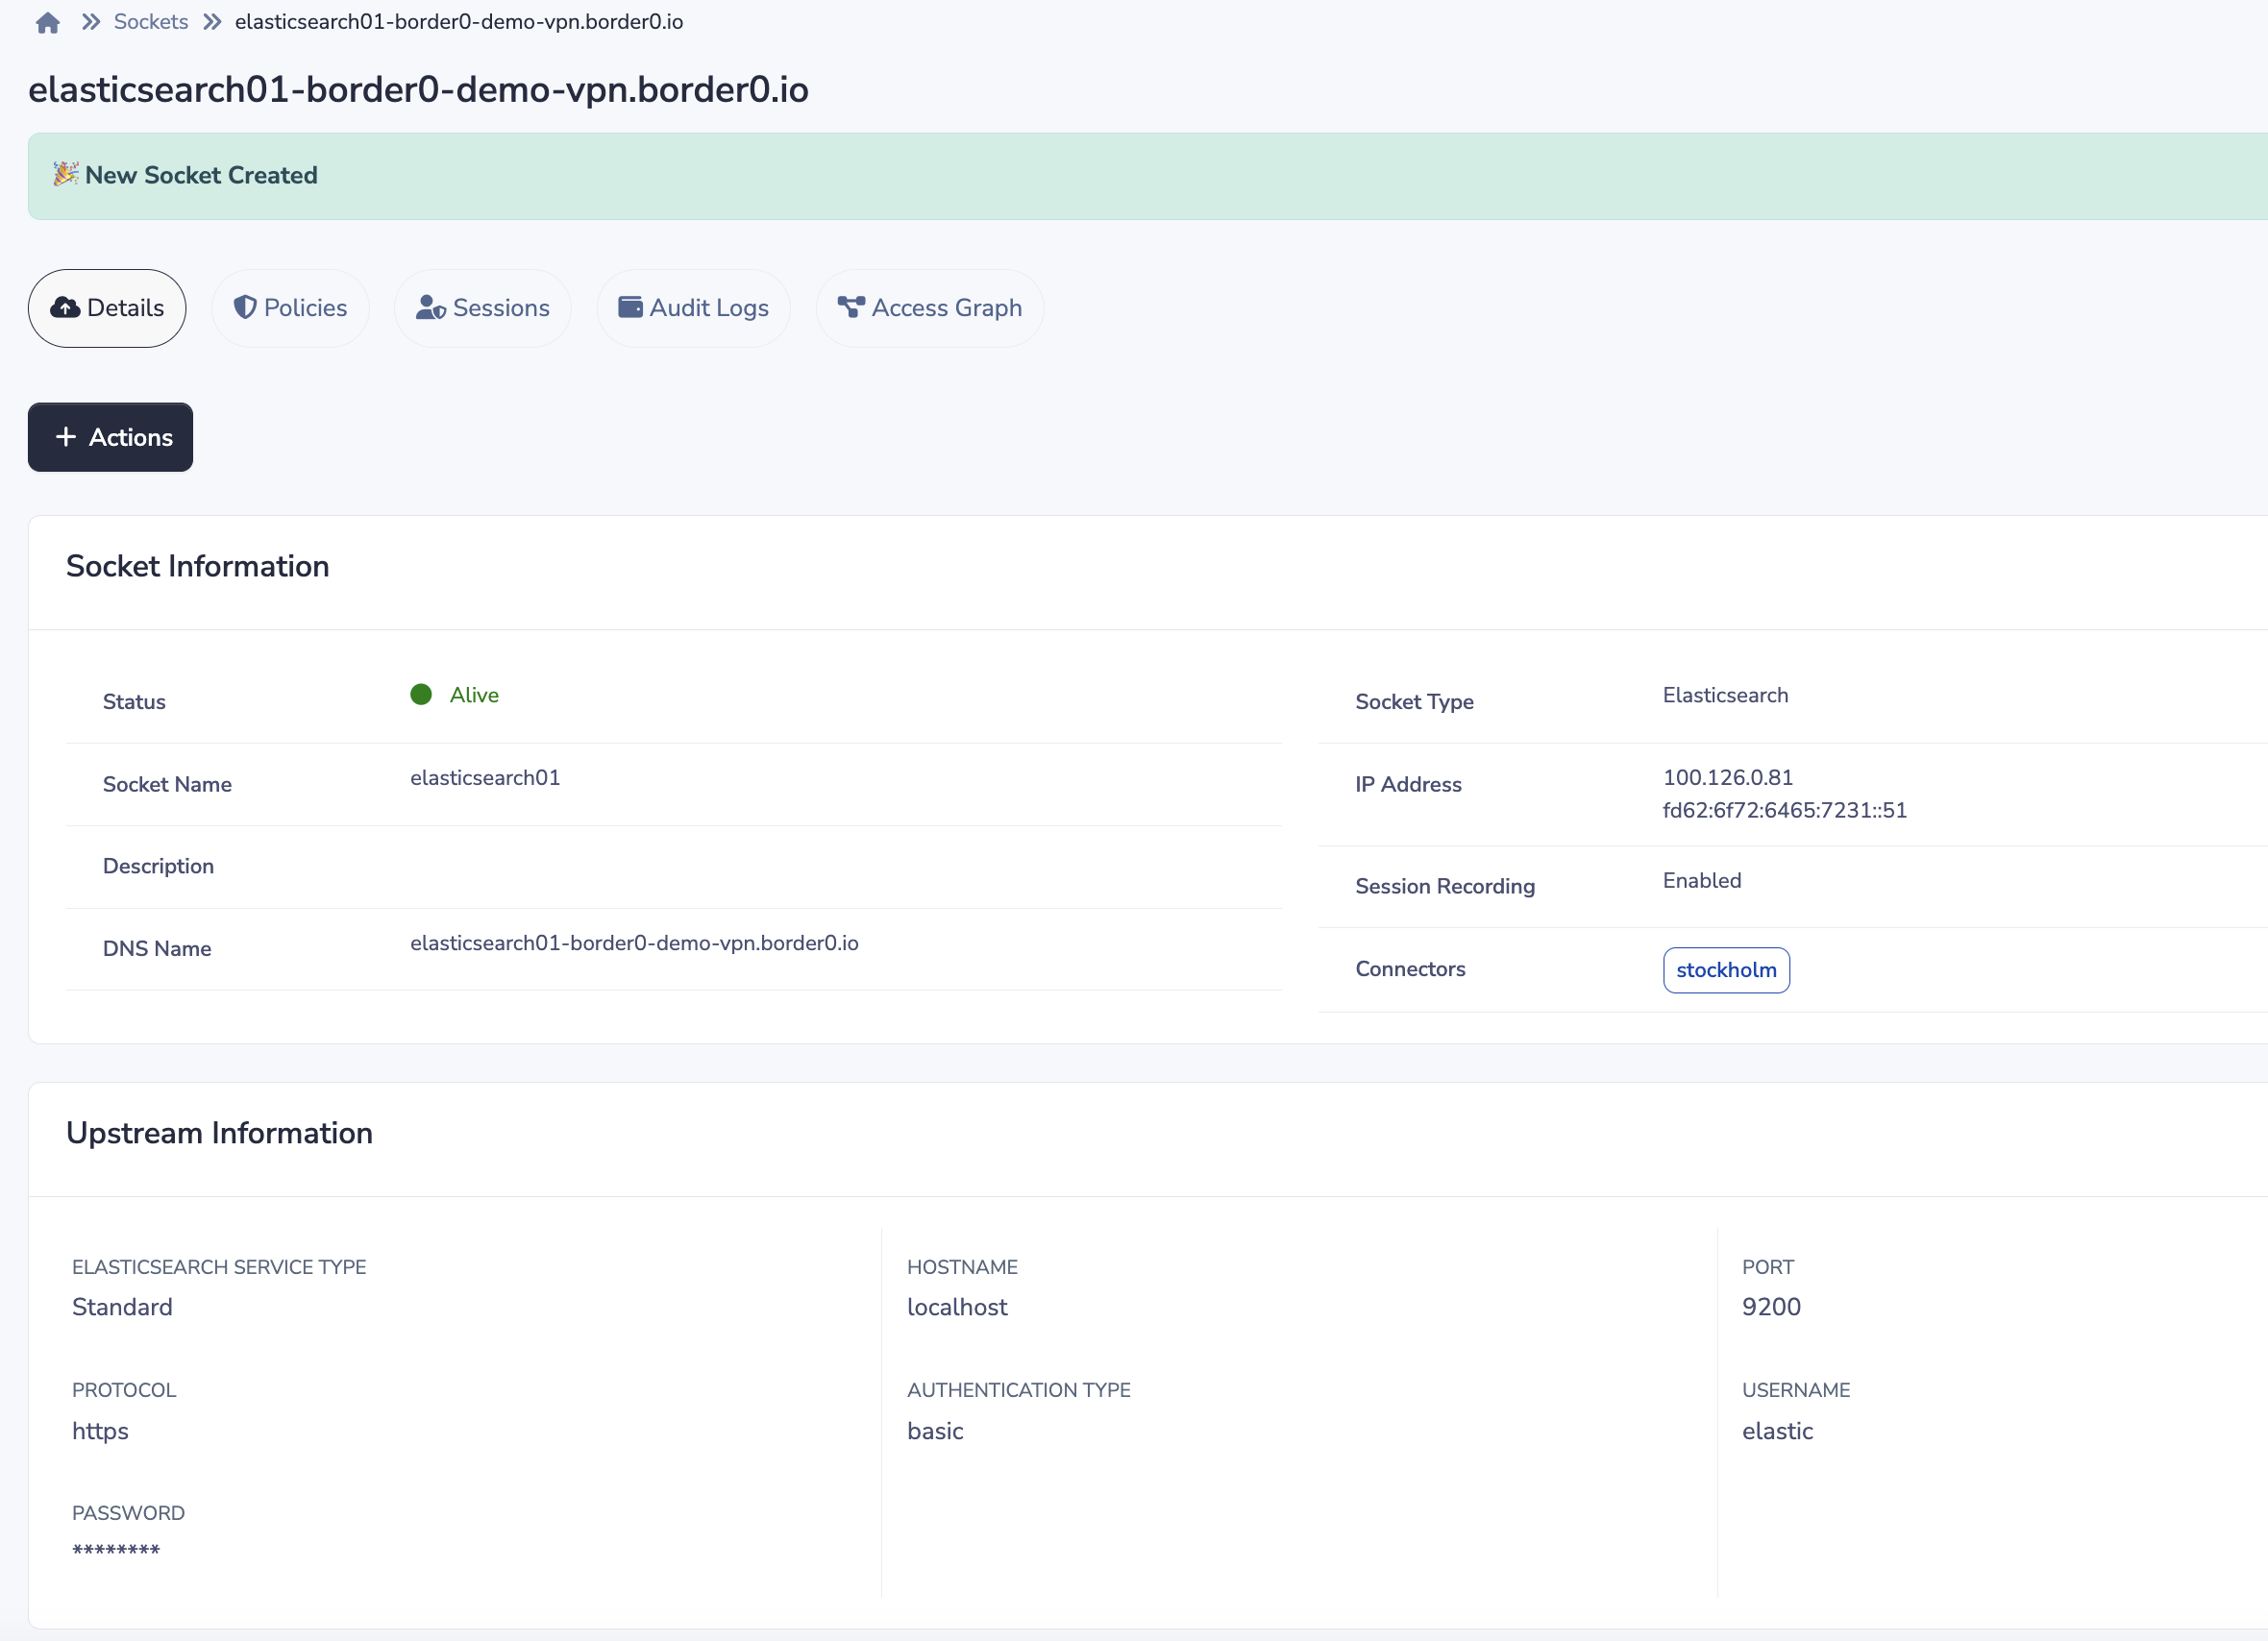
Now that we have a working Elasticsearch server for our example, it's time to create an Elasticsearch socket and link it to our connector.

- In the Sockets page, click on Add New Socket and select Elasticsearch.
- Set a name and, optionally, a description.
Upstream Configuration
Here we can configure how your connector connects and authenticates to the upstream server.
- Select standard for Service type.
- For our example, we'll use the hostname localhost and port 9200. Adjust as needed for your environment.
- For authentication we currently support Basic Auth.
- Credentials, in our example we used elastic and My-secret-pw Adjust as needed for your environment.
- Connector: Select your connector from the list.
That's it, now click the Create New Socket button. You should now have access to your Elasticsearch server.
Securing your credentialsIn this example, we provided the credentials directly to the Border0 API. These credentials are needed for the connector running in your environment to establish a secure upstream connection to the server. While Border0 stores these credentials in encrypted form, we strongly recommend that you keep them local to the connector.
You can have the Border0 connector integrated with your secret management solution for enhanced security and keep your secrets local. Learn more about this in our guide:https://docs.border0.com/docs/using-secret-managers-to-store-credentials
If you experience any issues with your new socket, it's typically because it can't connect to the upstream database. To troubleshoot, take a look at the connector logs as described here
3 - Connecting to Your Elasticsearch Server
Next up, let's connect to our Elasticsearch server through Border0.
Using policies to control access to Elasticsearch serversBorder0 policies can be used to control access to Elasticsearch servers. For Elasticsearch specifically, make sure to enable database permissions in your policy.
Unlike MySQL and PostgreSQL, Elasticsearch sockets do not support query-level authorization. Once a user is granted access, Border0 does not evaluate or restrict query types or which indices a user may access.
Border0 continues to provide strong authentication, authorization, auditing with session logs, and secure access controls for Elasticsearch resources. Fine-grained query restrictions and index-specific policy controls are not currently supported
For the fastest and most seamless experience, use our desktop app. It simplifies the process of discovering your Elasticsearch server. After finding the socket, the socket name is copied to your clipboard.
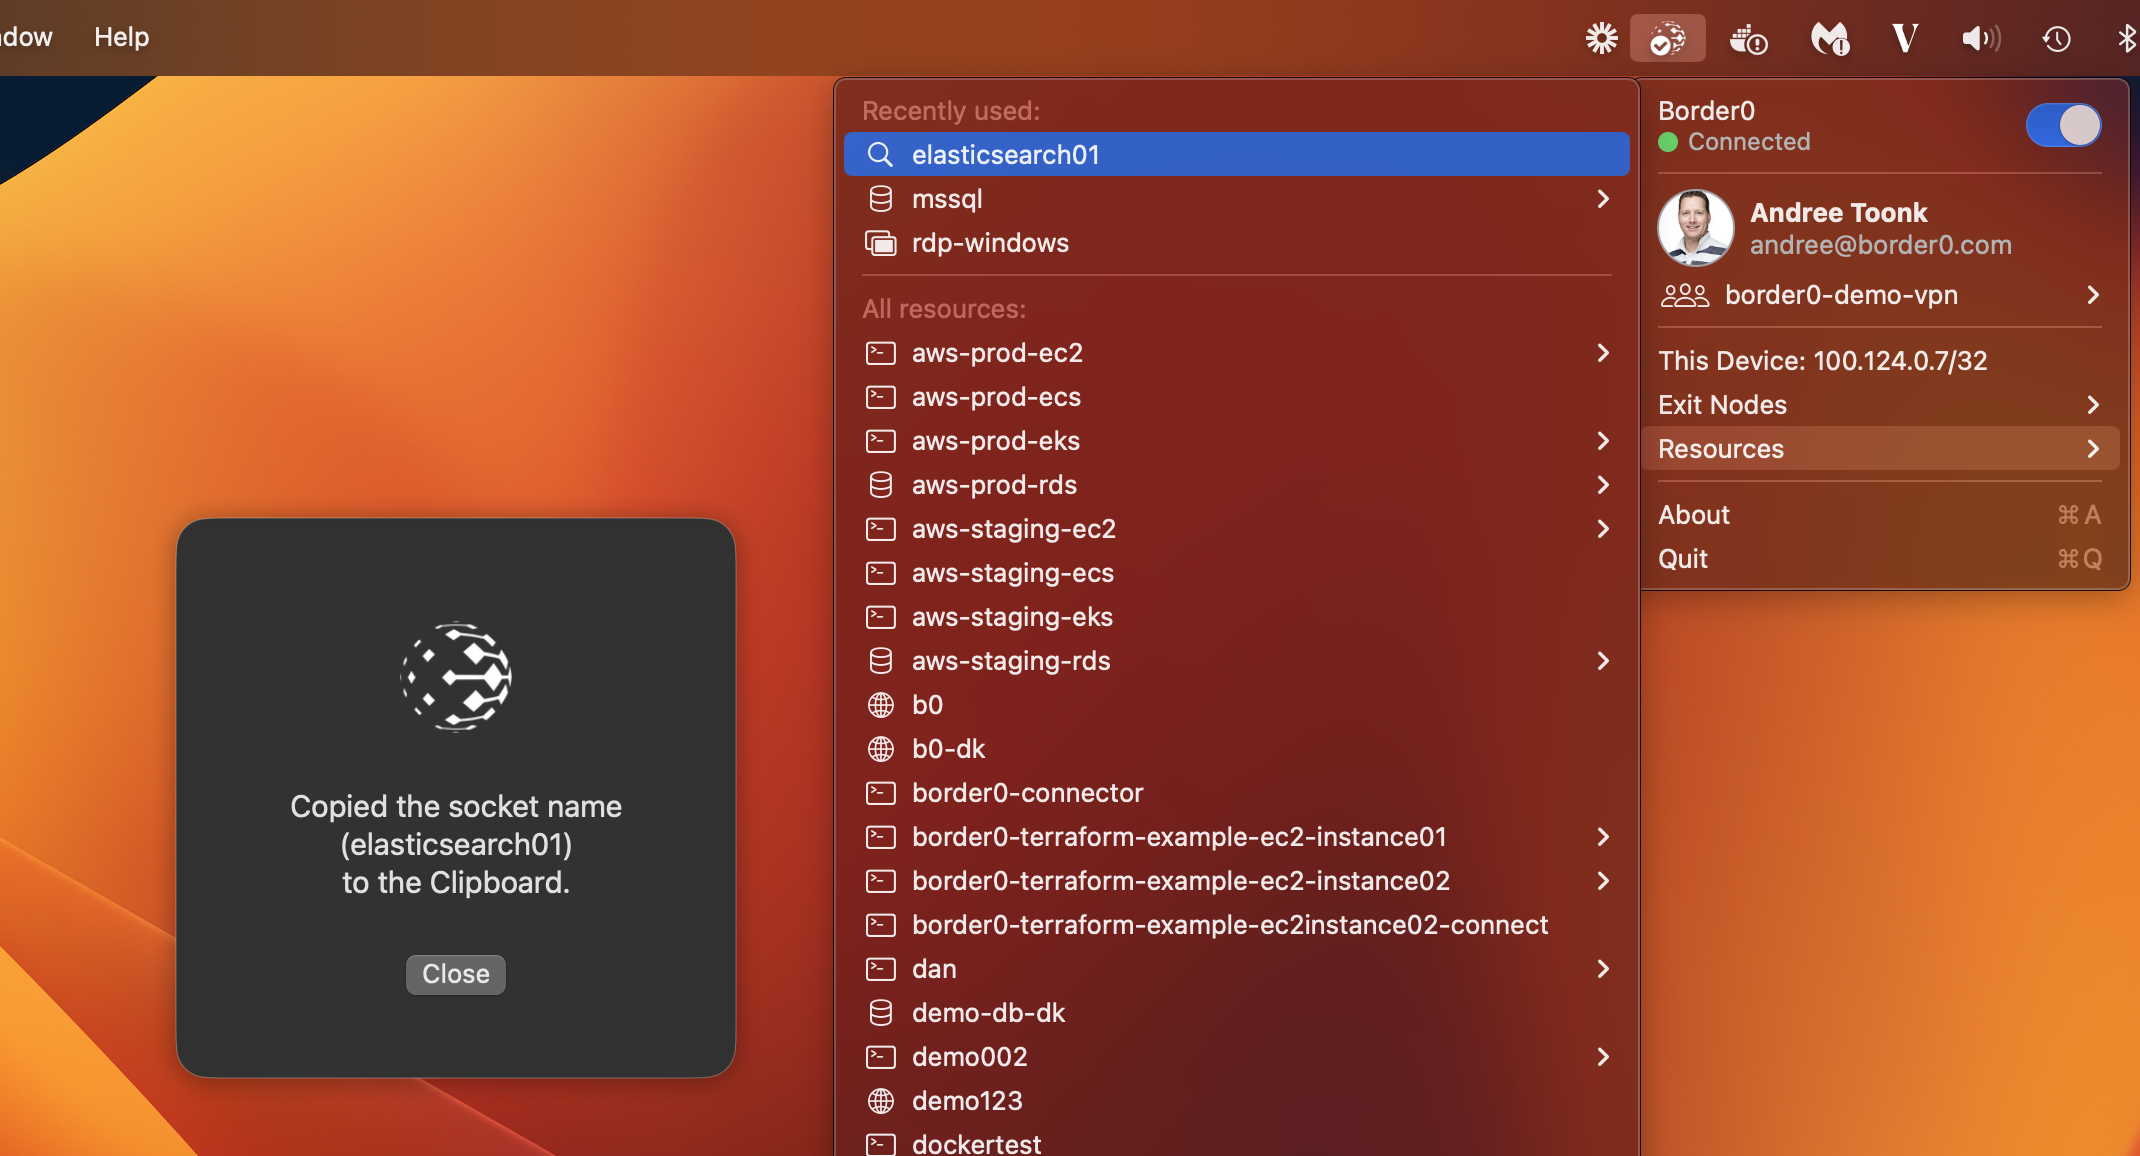
Launch access using the Border0 desktop app
Using curl to access your Elasticsearch socket
Once you have copied the socket name, open your terminal or a browser to query your Elasticsearch server:
curl elasticsearch01:9200
$ curl elasticsearch01:9200
{
  "name" : "a4a3678118e2",
  "cluster_name" : "docker-cluster",
  "cluster_uuid" : "tE17fNSDSO6uFgMPd8O39A",
  "version" : {
    "number" : "8.5.0",
    "build_flavor" : "default",
    "build_type" : "docker",
    "build_hash" : "c94b4700cda13820dad5aa74fae6db185ca5c304",
    "build_date" : "2022-10-24T16:54:16.433628434Z",
    "build_snapshot" : false,
    "lucene_version" : "9.4.1",
    "minimum_wire_compatibility_version" : "7.17.0",
    "minimum_index_compatibility_version" : "7.0.0"
  },
  "tagline" : "You Know, for Search"
}
Connecting using httpThe Elasticsearch server is made available over HTTP. This is acceptable because all traffic between the user and the Border0 connector is secured using WireGuard, ensuring end-to-end encryption. Therefore, make sure to connect using HTTP rather than HTTPS.
4 - Review Session Details and Recordings
To review your Elasticsearch session, open the Border0 portal and select the corresponding database socket. Go to the Sessions tab and find your session. Clicking on the session will display a recording of the activity. This recording details the SSO identity used (who connected), the originating IP address, the device, connection time, and a complete log of all executed queries.
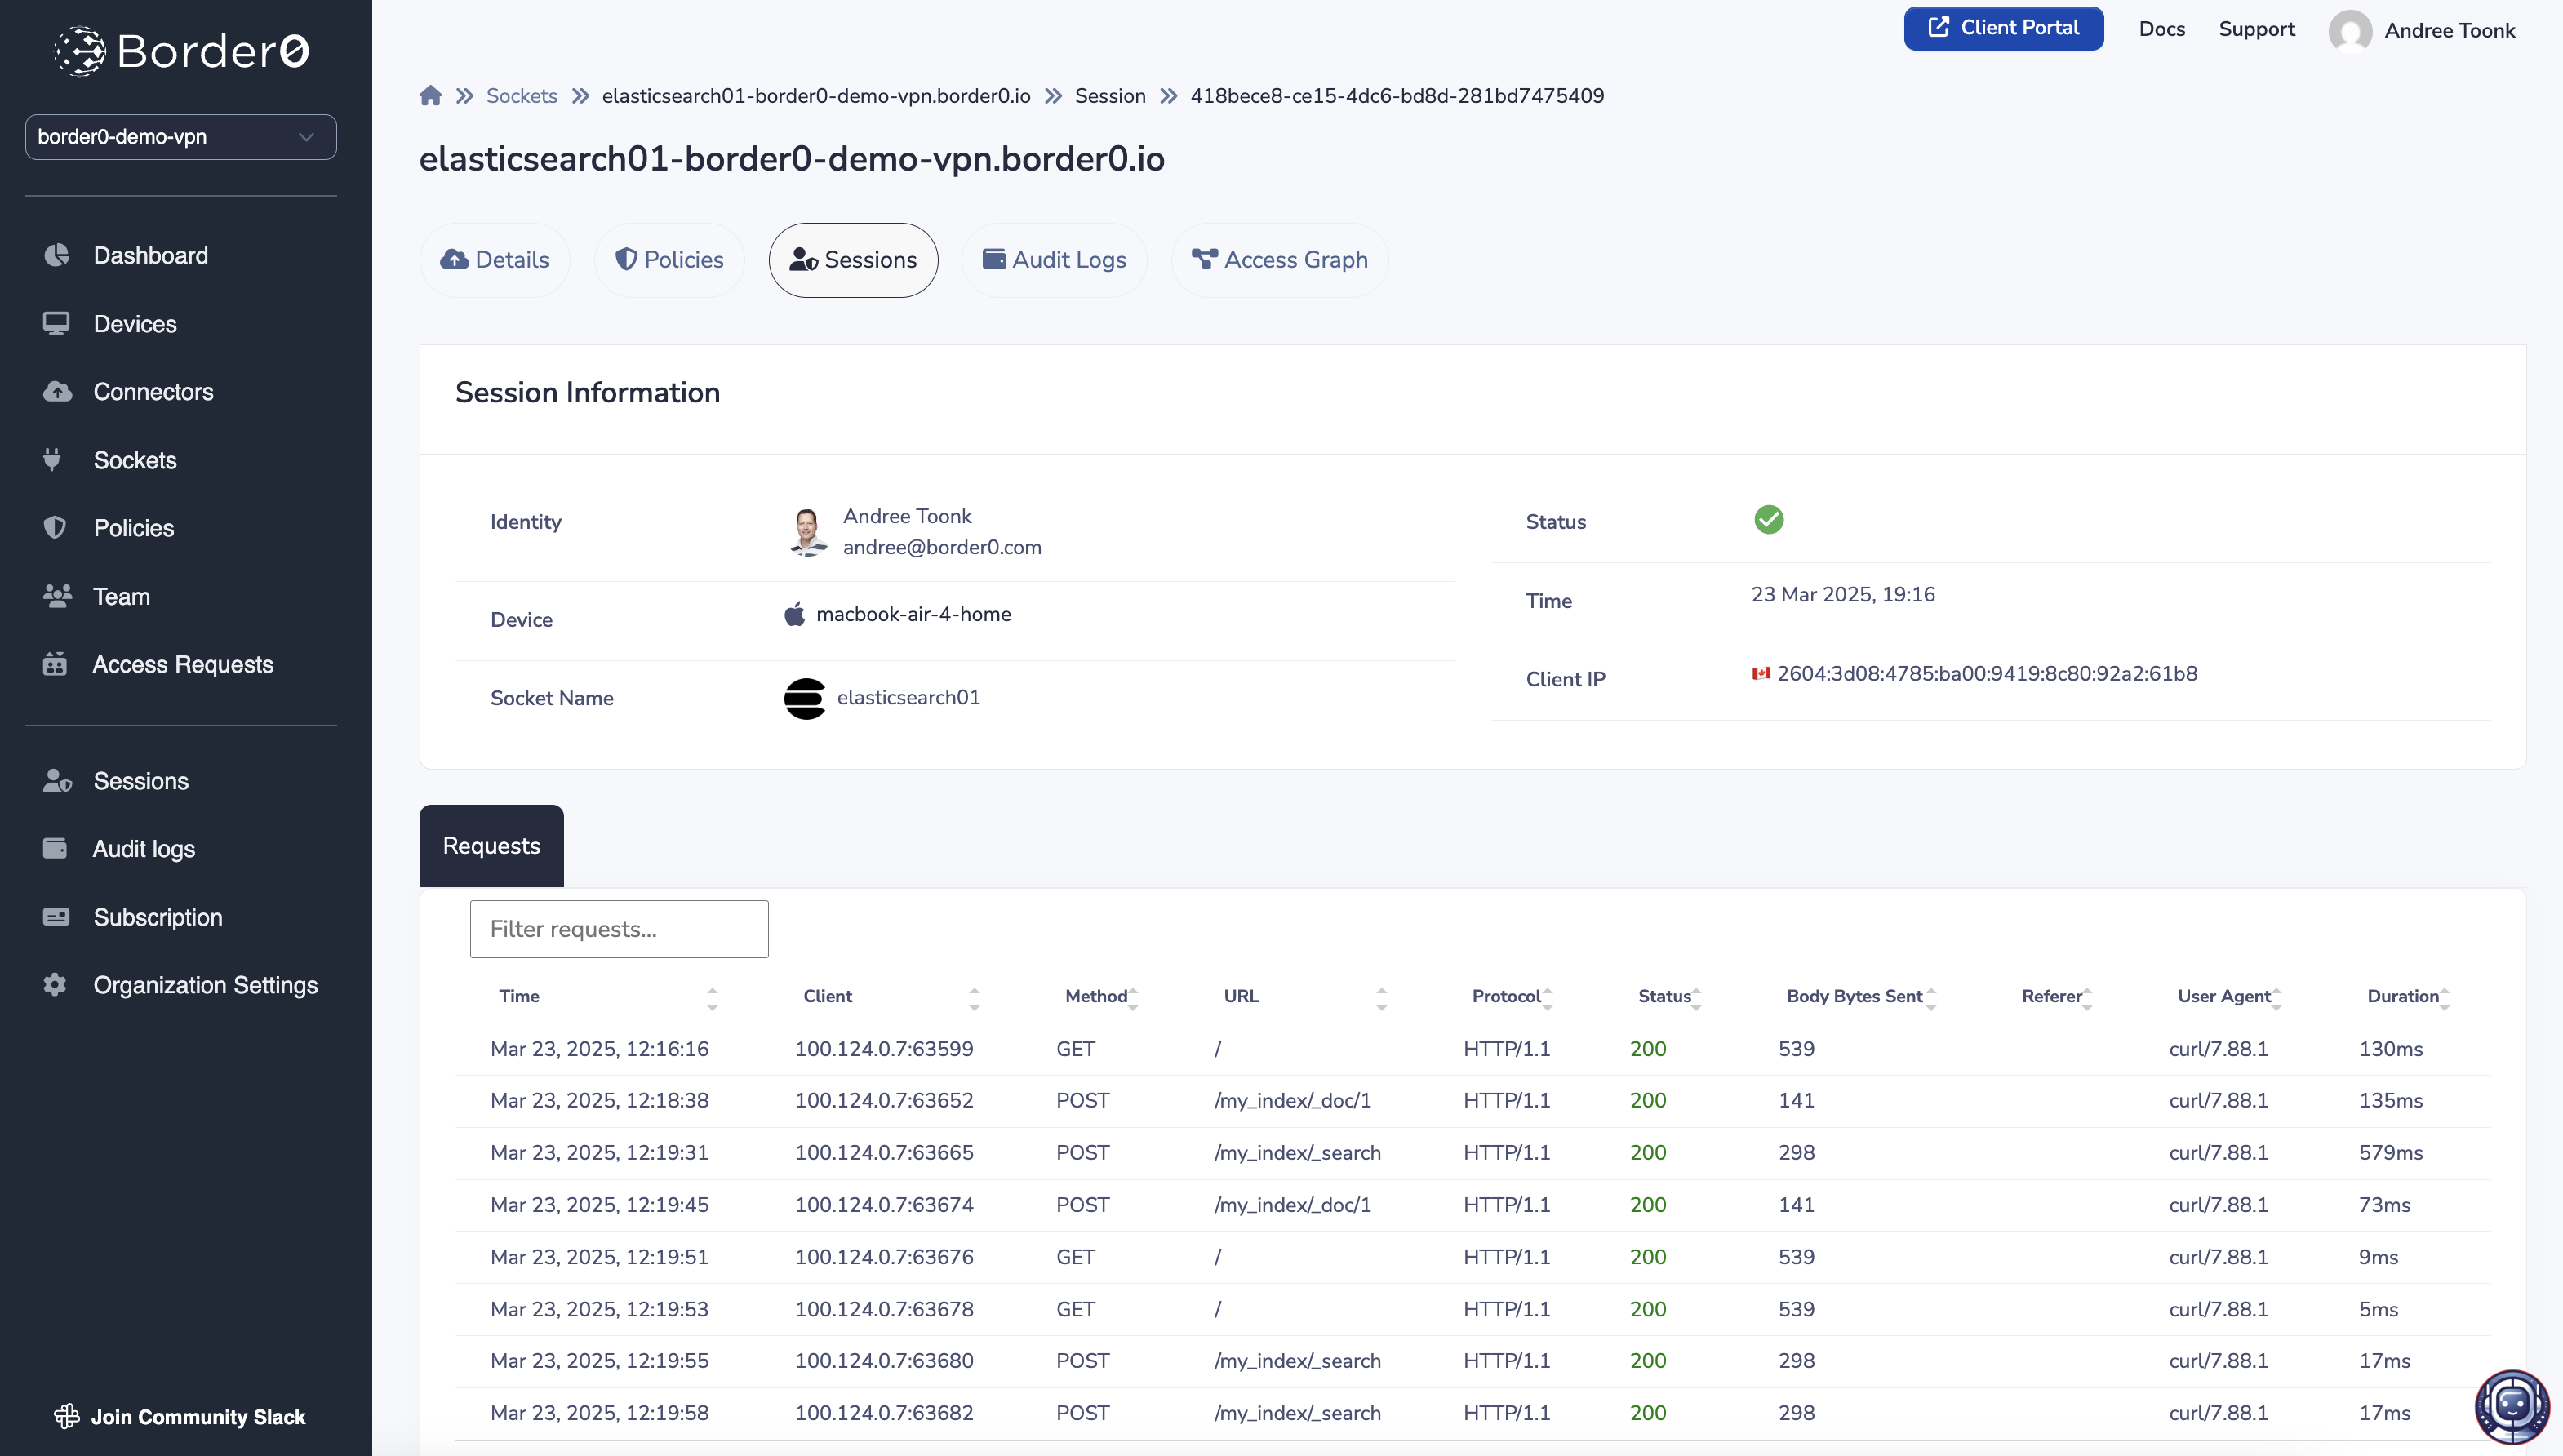
Elasticsearch Session recording in Border0 portal
Troubleshooting
If you encounter any issues with your new socket, it's typically because it can't connect to the upstream database. To troubleshoot that take a look at the connector logs as described here
If that doesn't help resolve the issue, feel free to contact us, and we'd be happy to help you troubleshoot.
Updated about 1 month ago