Enable or Disable a Custom Identity Provider
Integrating with custom identity providers is a premium feature. If you need a premium subscription or would like to learn more, kindly shoot us an email at [email protected]
Note that when there is a single (only one) enabled identity provider for a given organization, users authenticating against the organization will not be taken to the identity provider selection page. Instead, they will be taken directly to authenticate against the enabled identity provider. i.e. The behavior of the authentication flow in the context of a single identity provider will be the same behavior as if the authenticating user selected (clicked on) the identity provider from the list.
There is a limit of 5 enabled custom identity providers per Border0 organization. You can have more than 5 custom identity providers as long as at-most 5 are enabled at any given time. If you already have 5 enabled custom identity providers, you will be required to disable one in order to enable another.
When a custom identity provider is added, it starts-off as disabled unless explicitly enabled. This is by design, allowing you to verify the details of the identity provider post-addition, before flipping the switch that exposes the new identity provider as a login option to your organization's users.
As an administrator of a given organization, you may enable or disable a given custom identity provider at any given time. This takes effect virtually instantaneously.
Below are instructions for achieving this via the Border0 Portal and the Border0 CLI respectively.
Portal Instructions
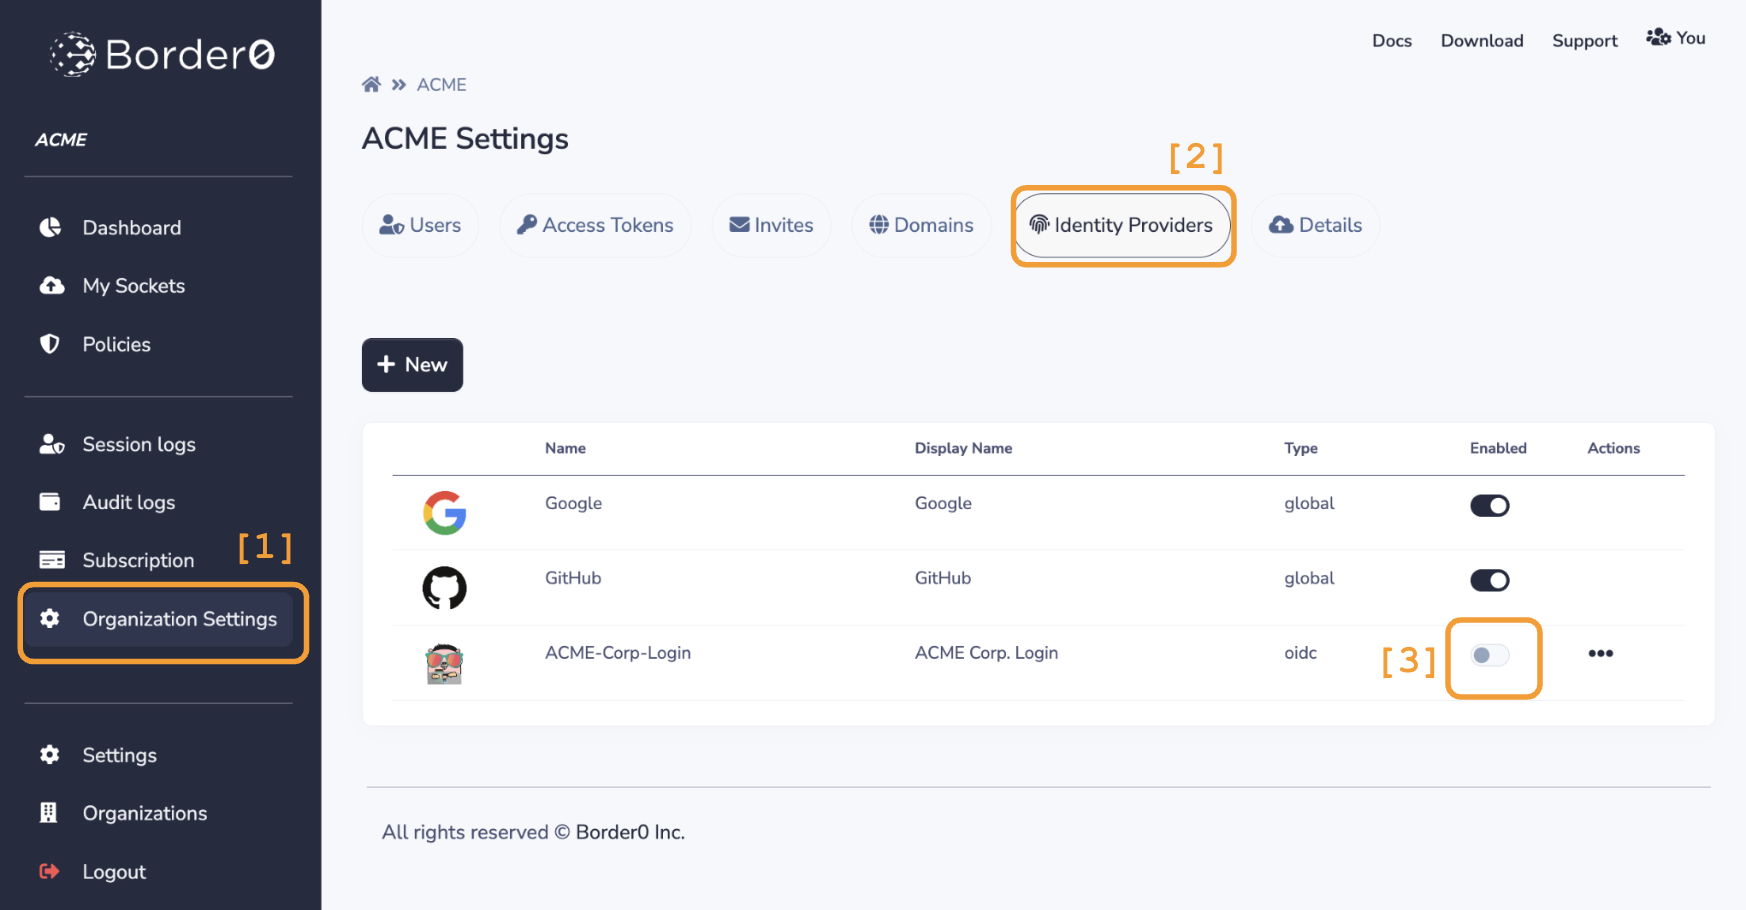
- [1] Select "Organization Settings" from the Border0 menu (left-side pane) on the Portal
- [2] Select "Identity Providers" from the Organization Settings page
- [3] In this page you will find a table where each row represents an identity provider. You may use the slide toggles in the "Enabled" column in order to enable or disable the identity provider represented by the row

Steps to enable or disable a custom identity provider.
CLI Instructions
You may use the following border0 CLI commands to enable or disable (respectively) a custom identity provider for user authentication in your Border0 organization:
border0 organization idp enableborder0 organization idp disable
Both of these commands accept the --name flag which is used to uniquely identify one of your organization's custom identity providers.
Examples
$ border0 organization idp enable --name MyCustomIDP

Successfully enabled identity provider "MyCustomIDP" for your organization!$ border0 organization idp disable --name MyCustomIDP
Successfully disabled identity provider "MyCustomIDP" for your organization!Updated 10 months ago
