Adding a Google Workspace Identity Provider
Aside from generic protocol identity provider integrations, Border0 supports authenticating organization users against a Google Workspace identity provider.
To integrate with a Google Workspace identity provider, you will first need to create a Google Application to represent Border0 integration and gather certain parameters.
Creating a Google Application for Border0
-
[1] Navigate to the Google Cloud Console and (optionally) create a new Google Cloud Project for the Border0 integration within your Google Organization. You can also choose to reuse an existing project.
-
[2] From the hamburger menu on the top left of the Google Cloud Console, select the "APIs & Services" option. Within the APIs & Services page, select the "OAuth consent screen" option on the left pane. This will walk you through setting your OAuth consent screen configuration. This is a one-time setup per Google Workspace, it is possible you may already have configured your consent screen in the past; in which case you will want to edit it.
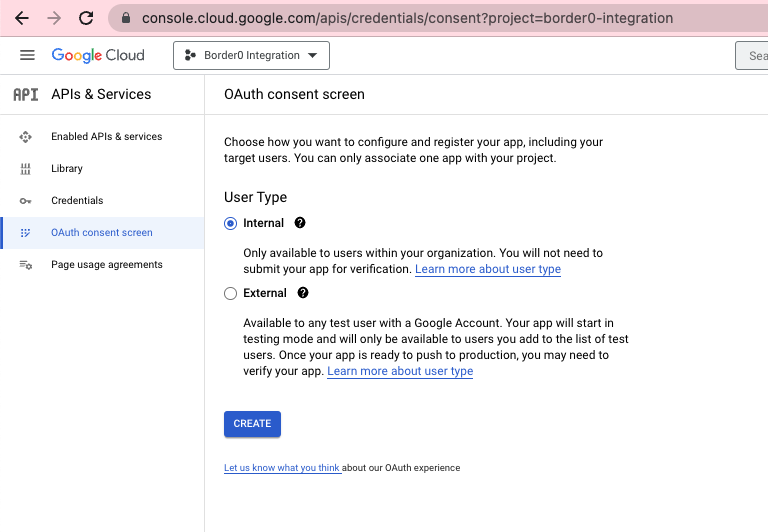
OAuth consent screen configuration in the Google Cloud Console (first-time setup)
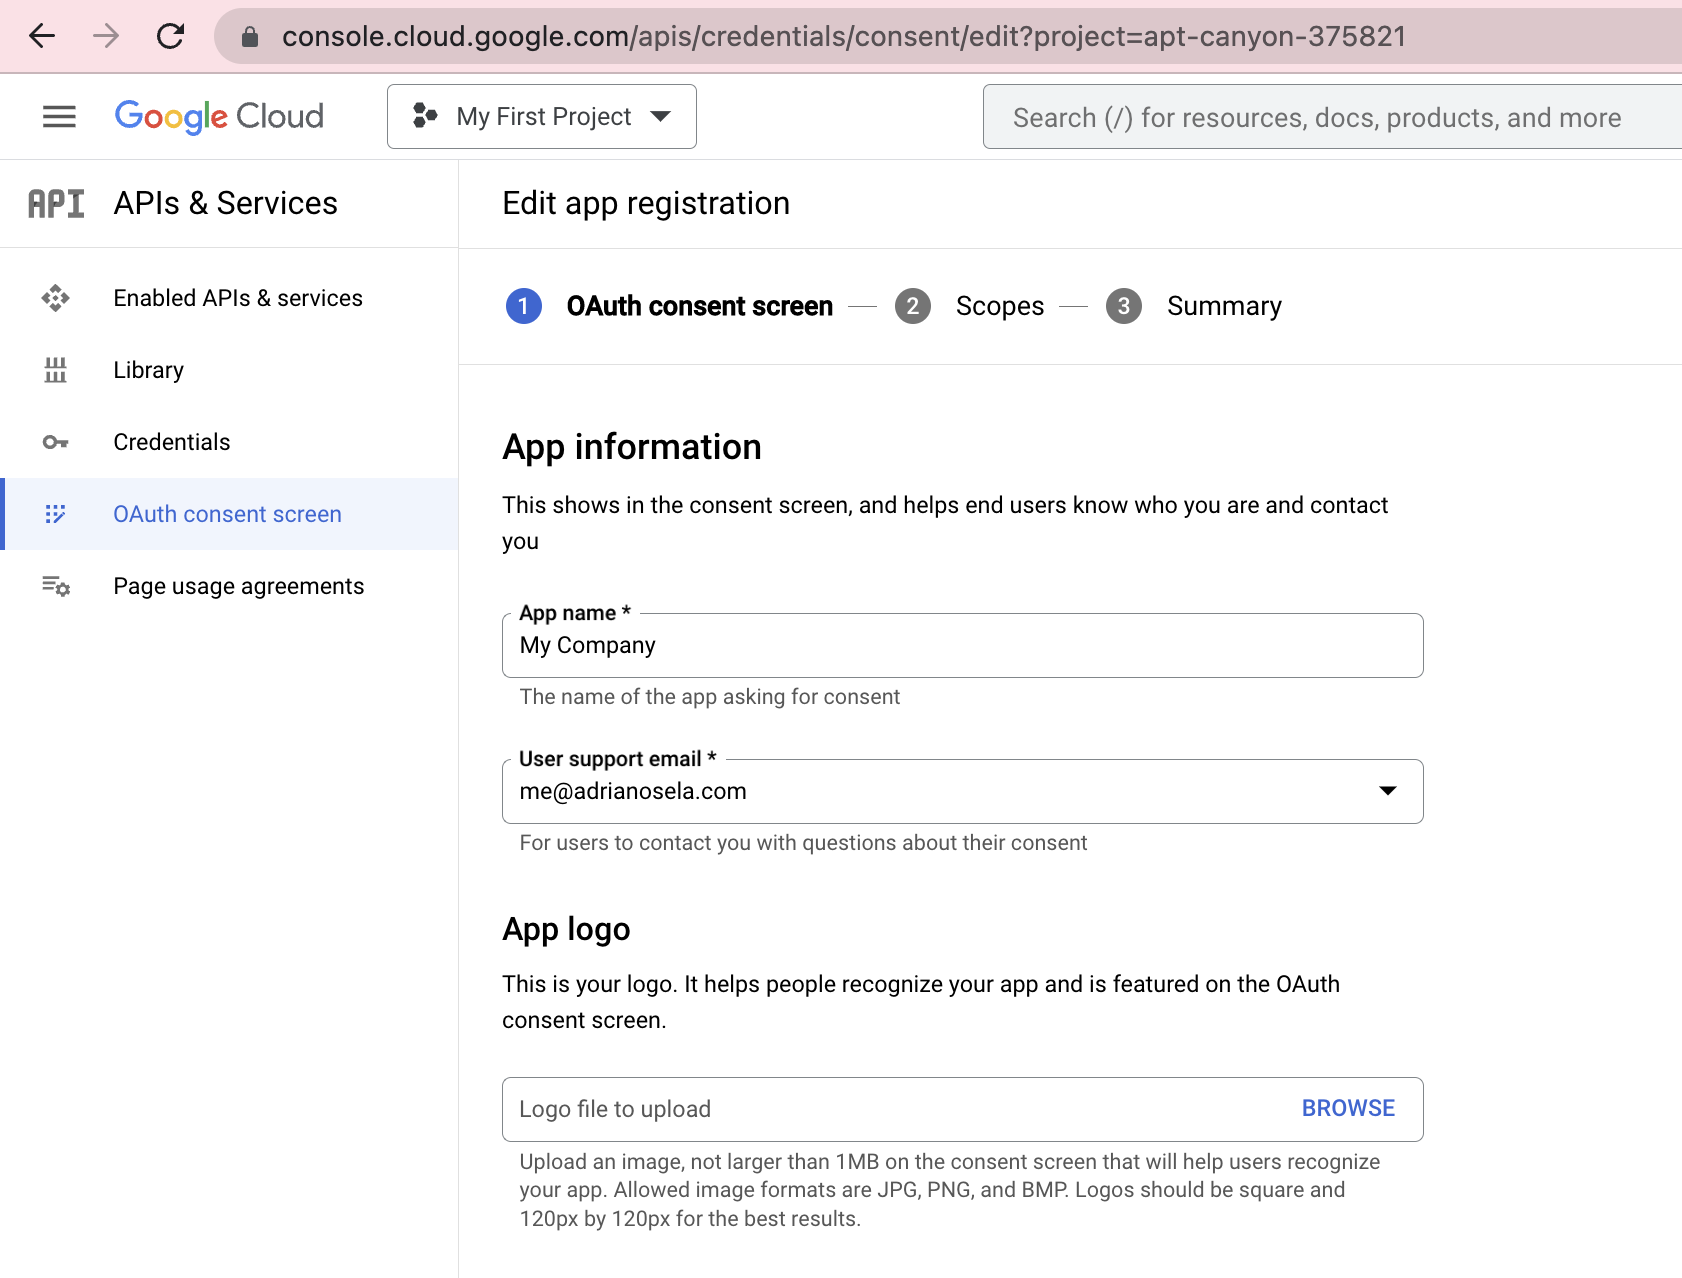
OAuth consent screen configuration in the Google Cloud Console
- [3] Scroll to the bottom of the consent screen configuration page and add
border0.comto the authorized domains list, click on "SAVE AND CONTINUE"
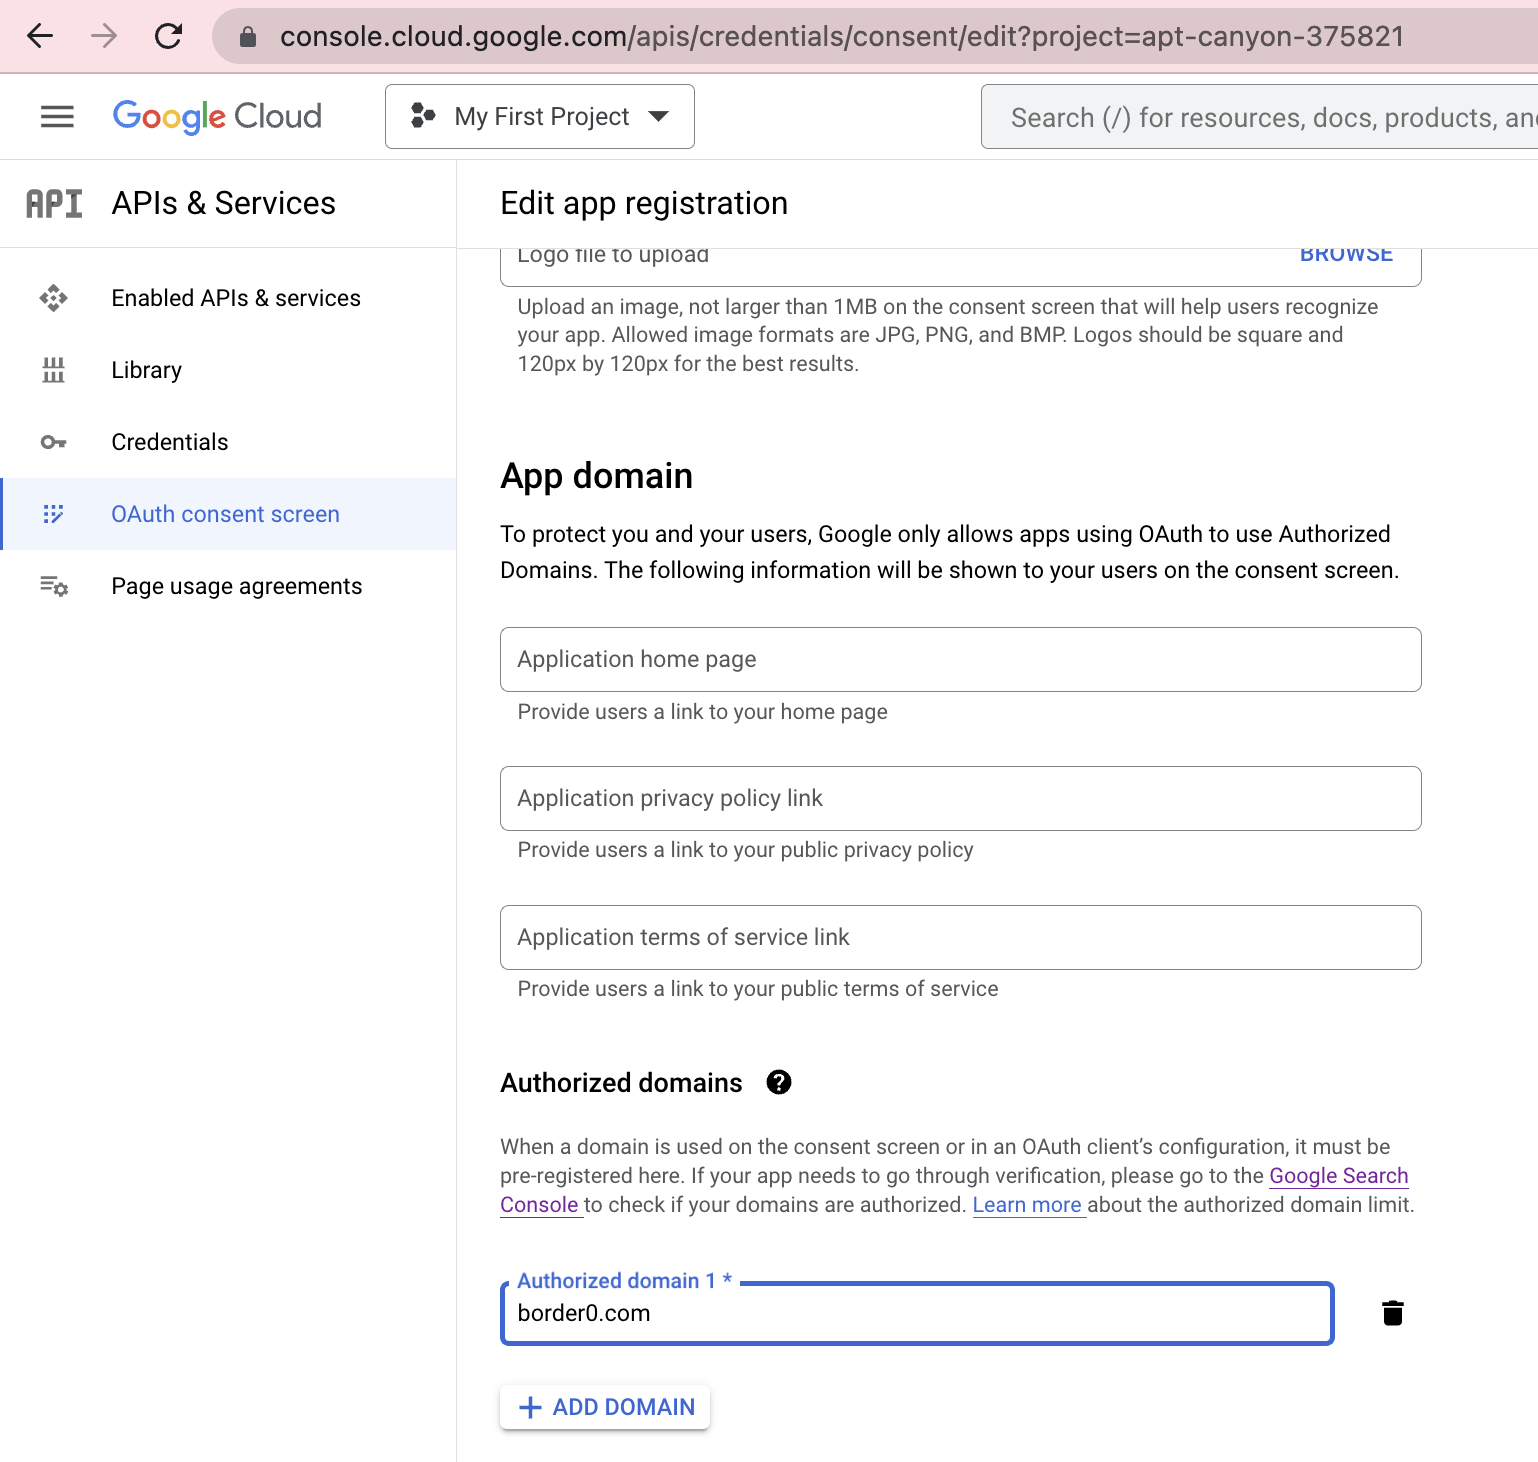
OAuth consent screen configuration in the Google Cloud Console, displaying border0.com as one of the authorized domains for the consent screen
This is crucial! Failure to addborder0.comto the list of authorized domains in your consent screen will prevent your workspace members from being able to consent to their information be read by Border0 and will result in Border0 being unable to authenticate them.
- [4] In the Scope selection page, click "ADD OR REMOVE SCOPES" and add the scopes:
.../auth/userinfo.email.../auth/userinfo.profileopenid
Click the "Update" button on the "Update selected scopes" popup on the right side. You should then see the scopes table populated with your selection.
Scroll to the bottom of the page and click "SAVE AND CONTINUE" to save your application configuration.
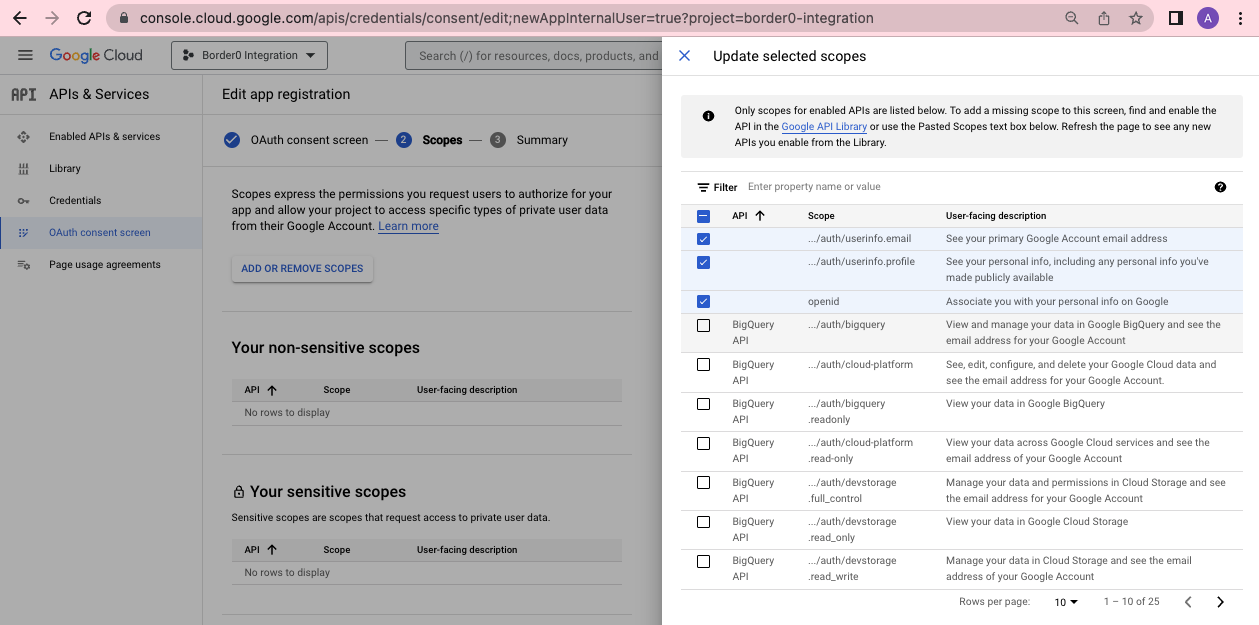
OAuth consent screen configuration in the Google Cloud Console, displaying the scope selection process
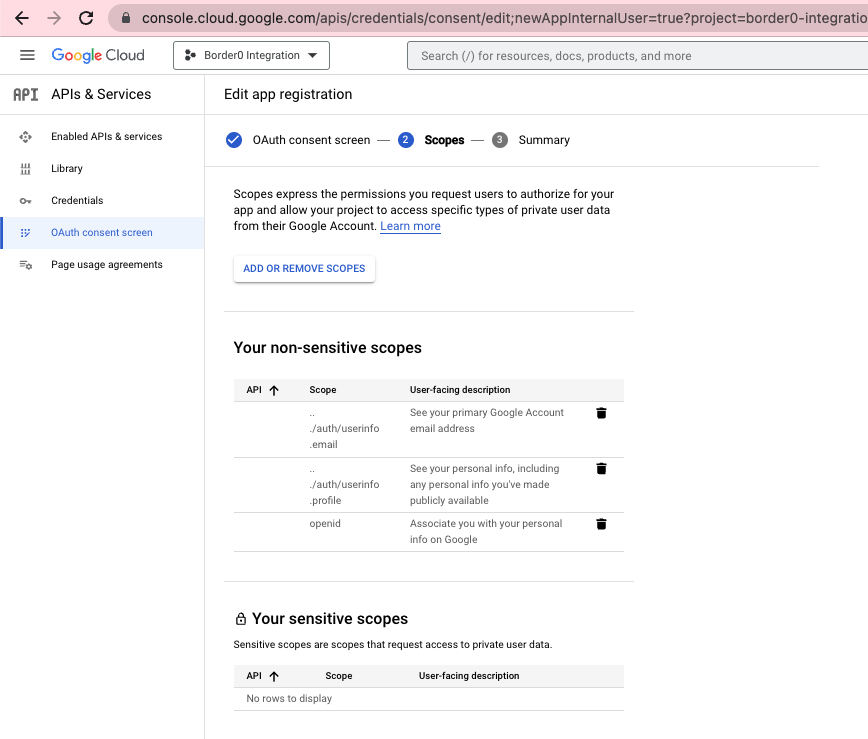
OAuth consent screen configuration in the Google Cloud Console, displaying a table with the selected scopes
- [5] On the left side pane, click on "Credentials". Click on "+ Create Credentials" to create a new set of OAuth2.0 credentials for Border0
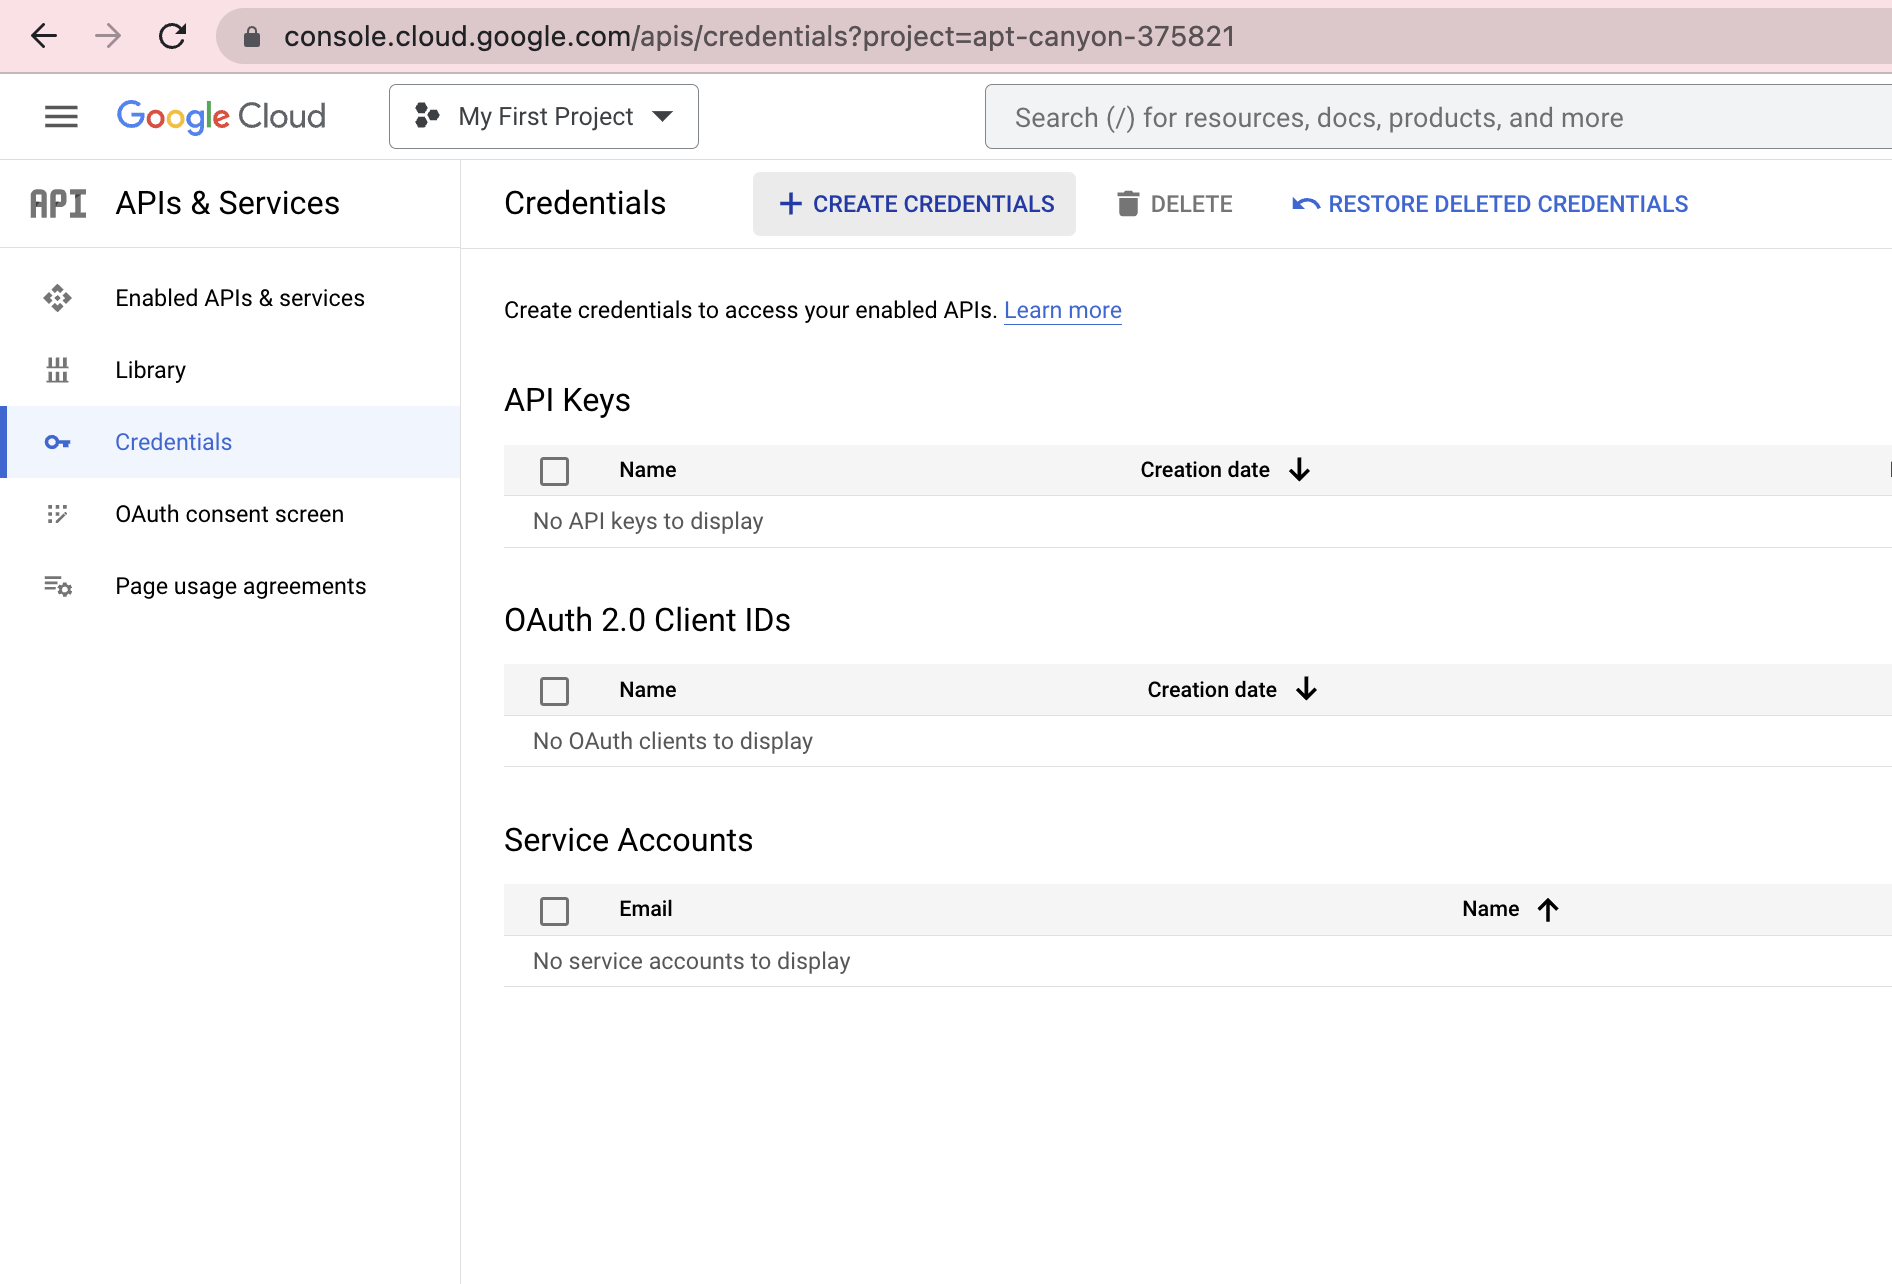
The credentials configuration page in the Google Cloud Console
- [6] On the dropdown expanded after clicking "+ Create Credentials", select "OAuth Client ID"
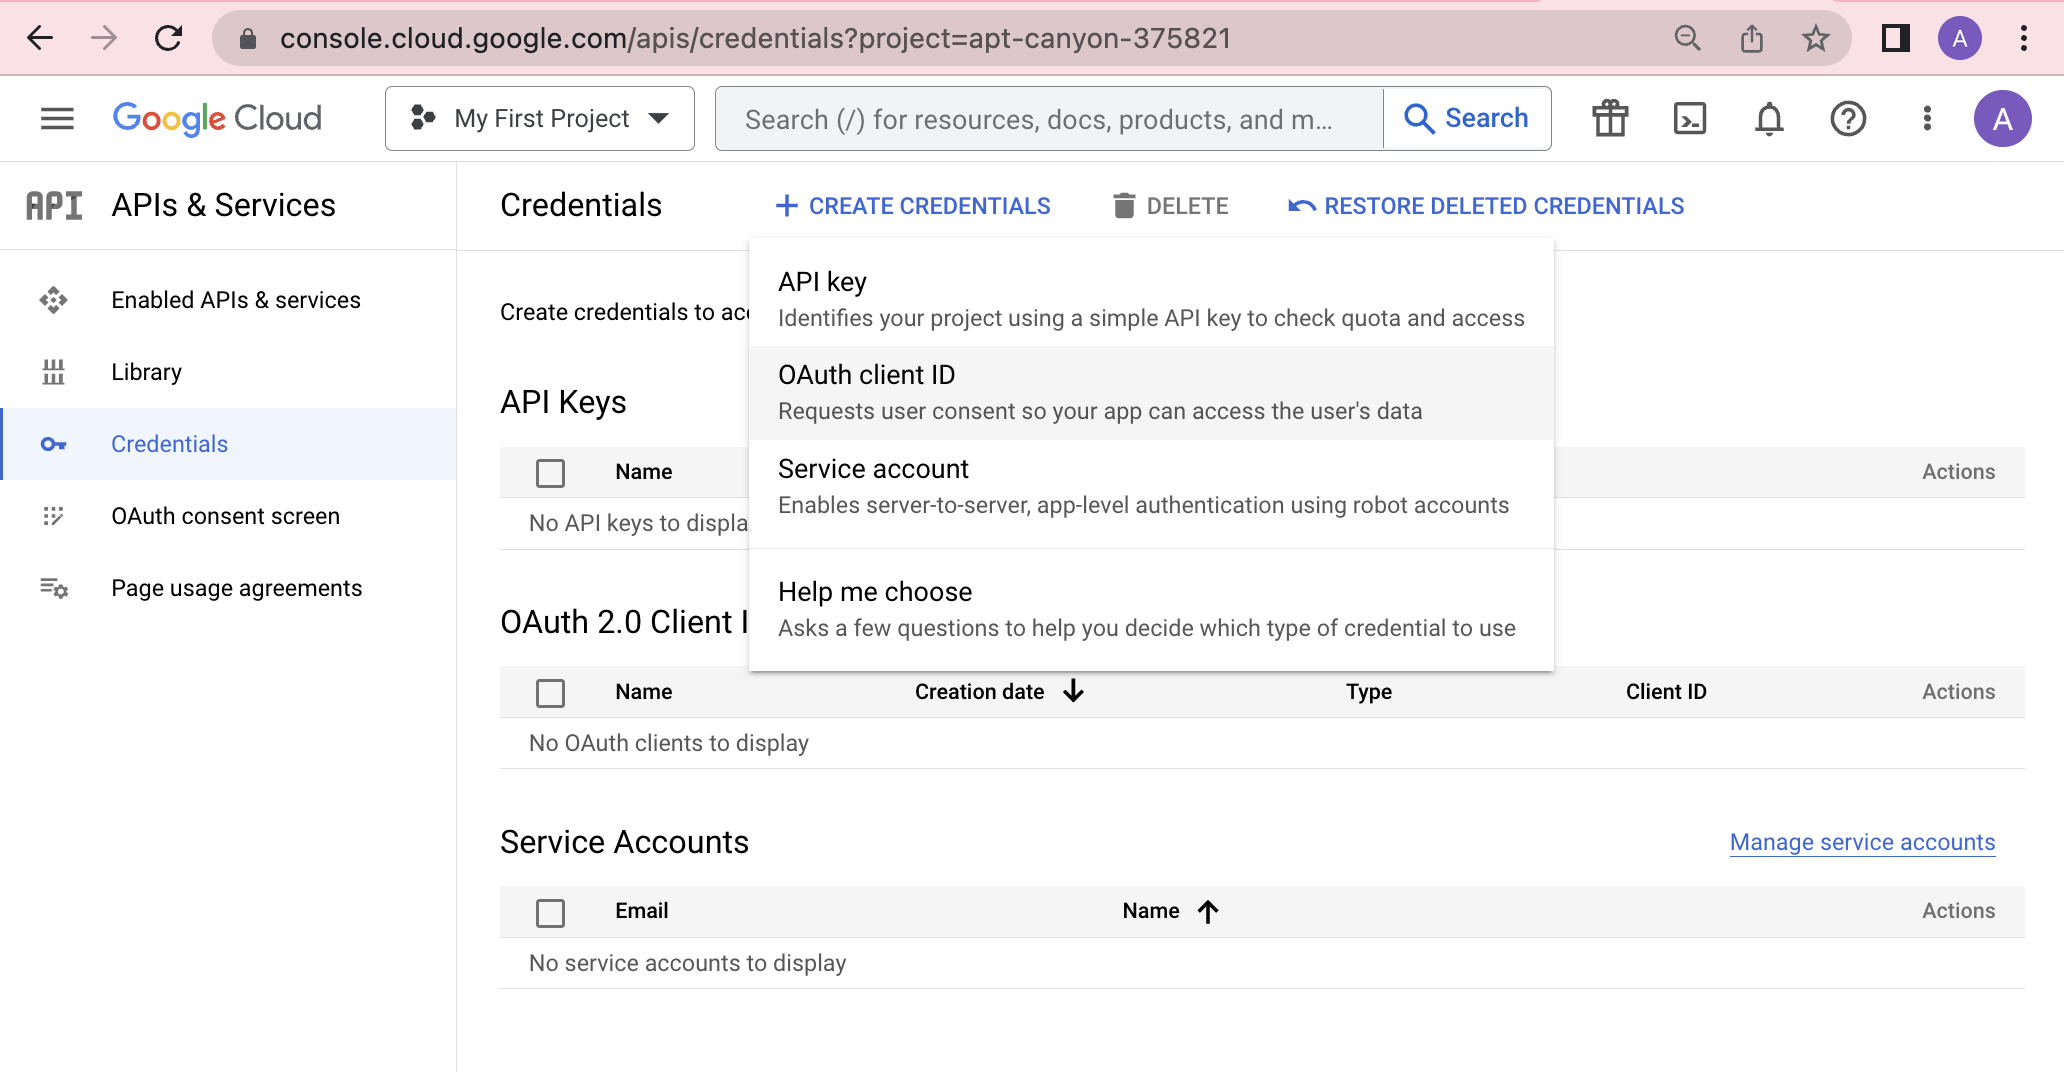
The credentials configuration page in the Google Cloud Console, displaying the possible credential types that may be generated for clients
- [7] When prompted for the "Application type" corresponding to the new OAuth2 credentials, select "Web application"
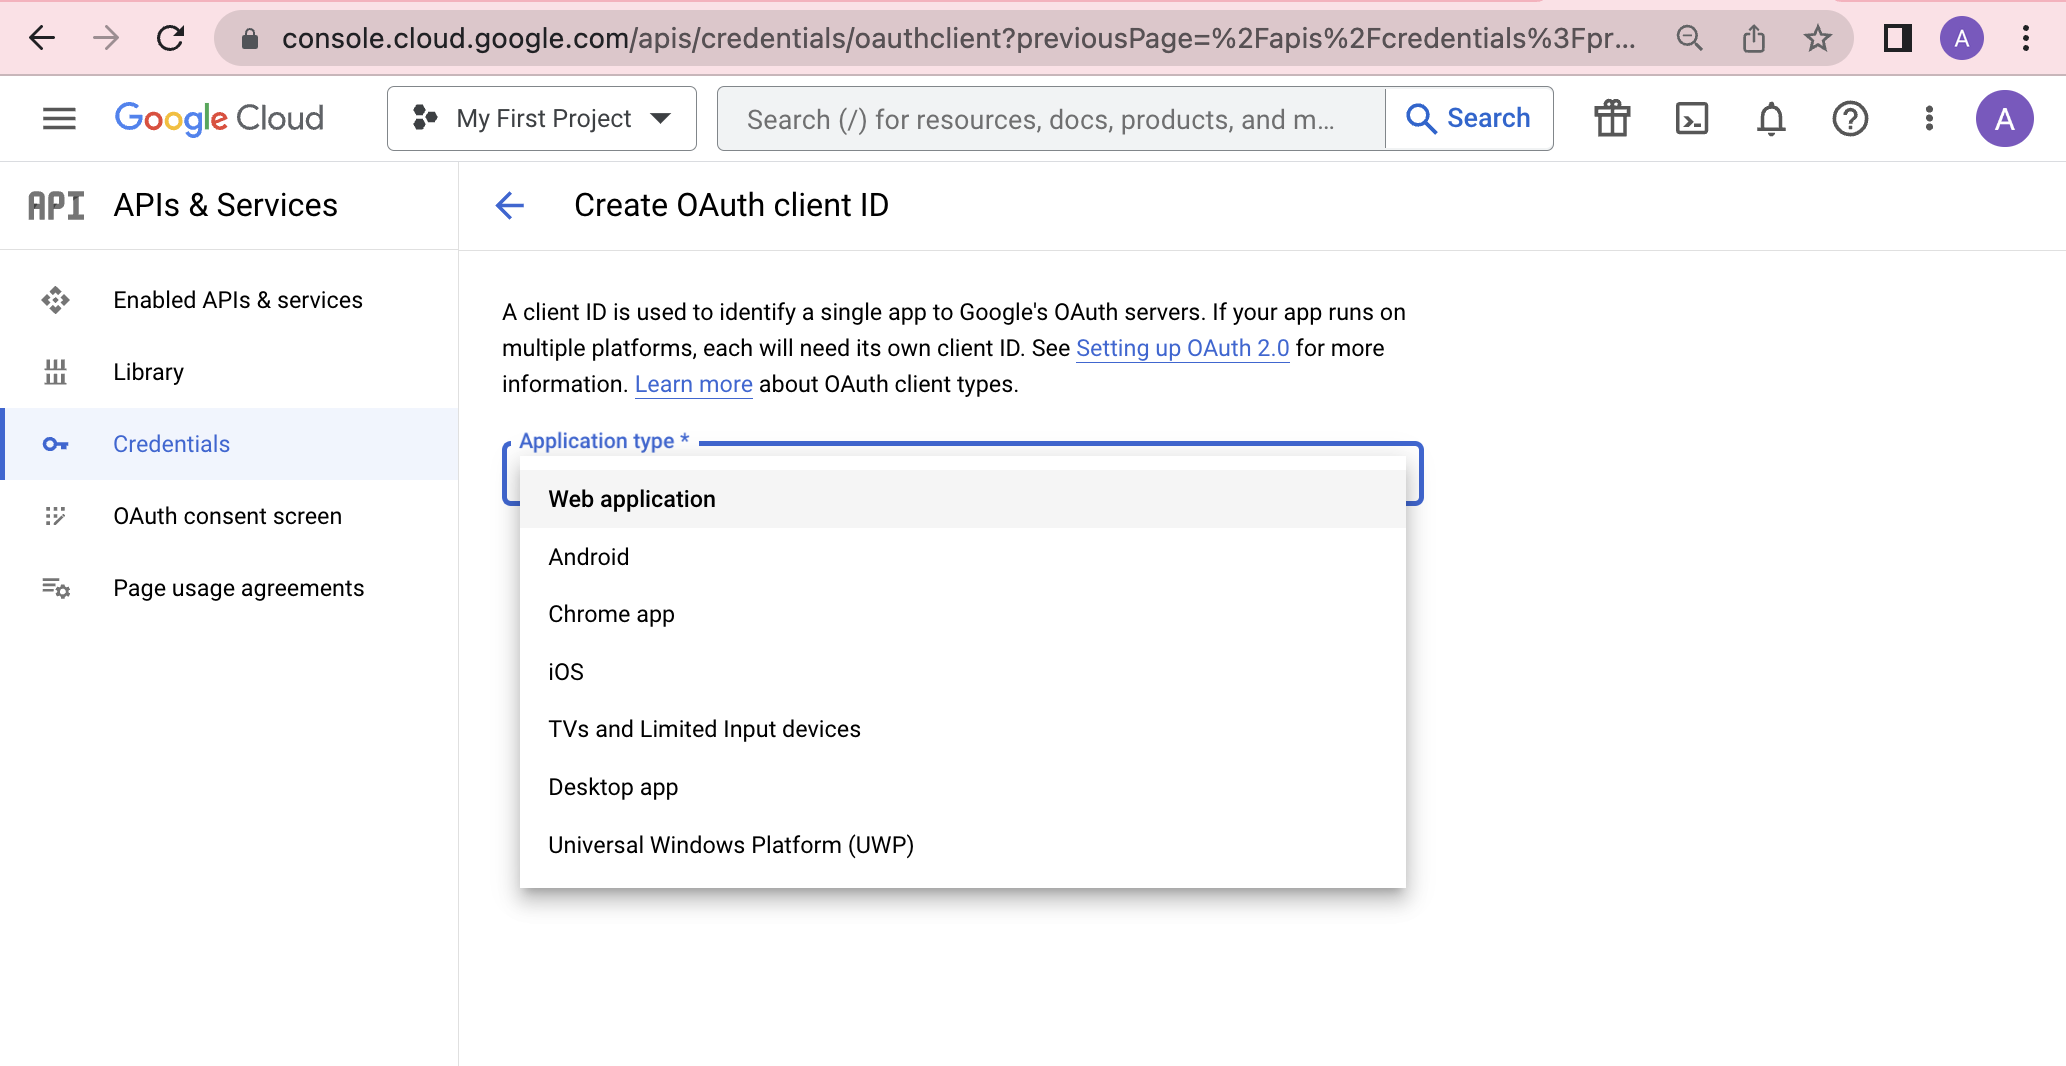
The credentials configuration page in the Google Cloud Console, displaying the possible application types for OAuth2 credentials
- [8] Next, you get to give the new application a friendly name. This name is internal to your Google Workspace and is never exposed to end-users. The name "Border0" is a good name.
- [9] Add
https://auth.border0.comto the list of "Authorized JavaScript origins" - [10] Add
https://auth.border0.com/login/callbackto the list of "Authorized redirect URIs"
Steps [9] and [10] are crucial! Failure to add the appropriate URLs to these settings will result in Border0 being unable to authenticate your users.
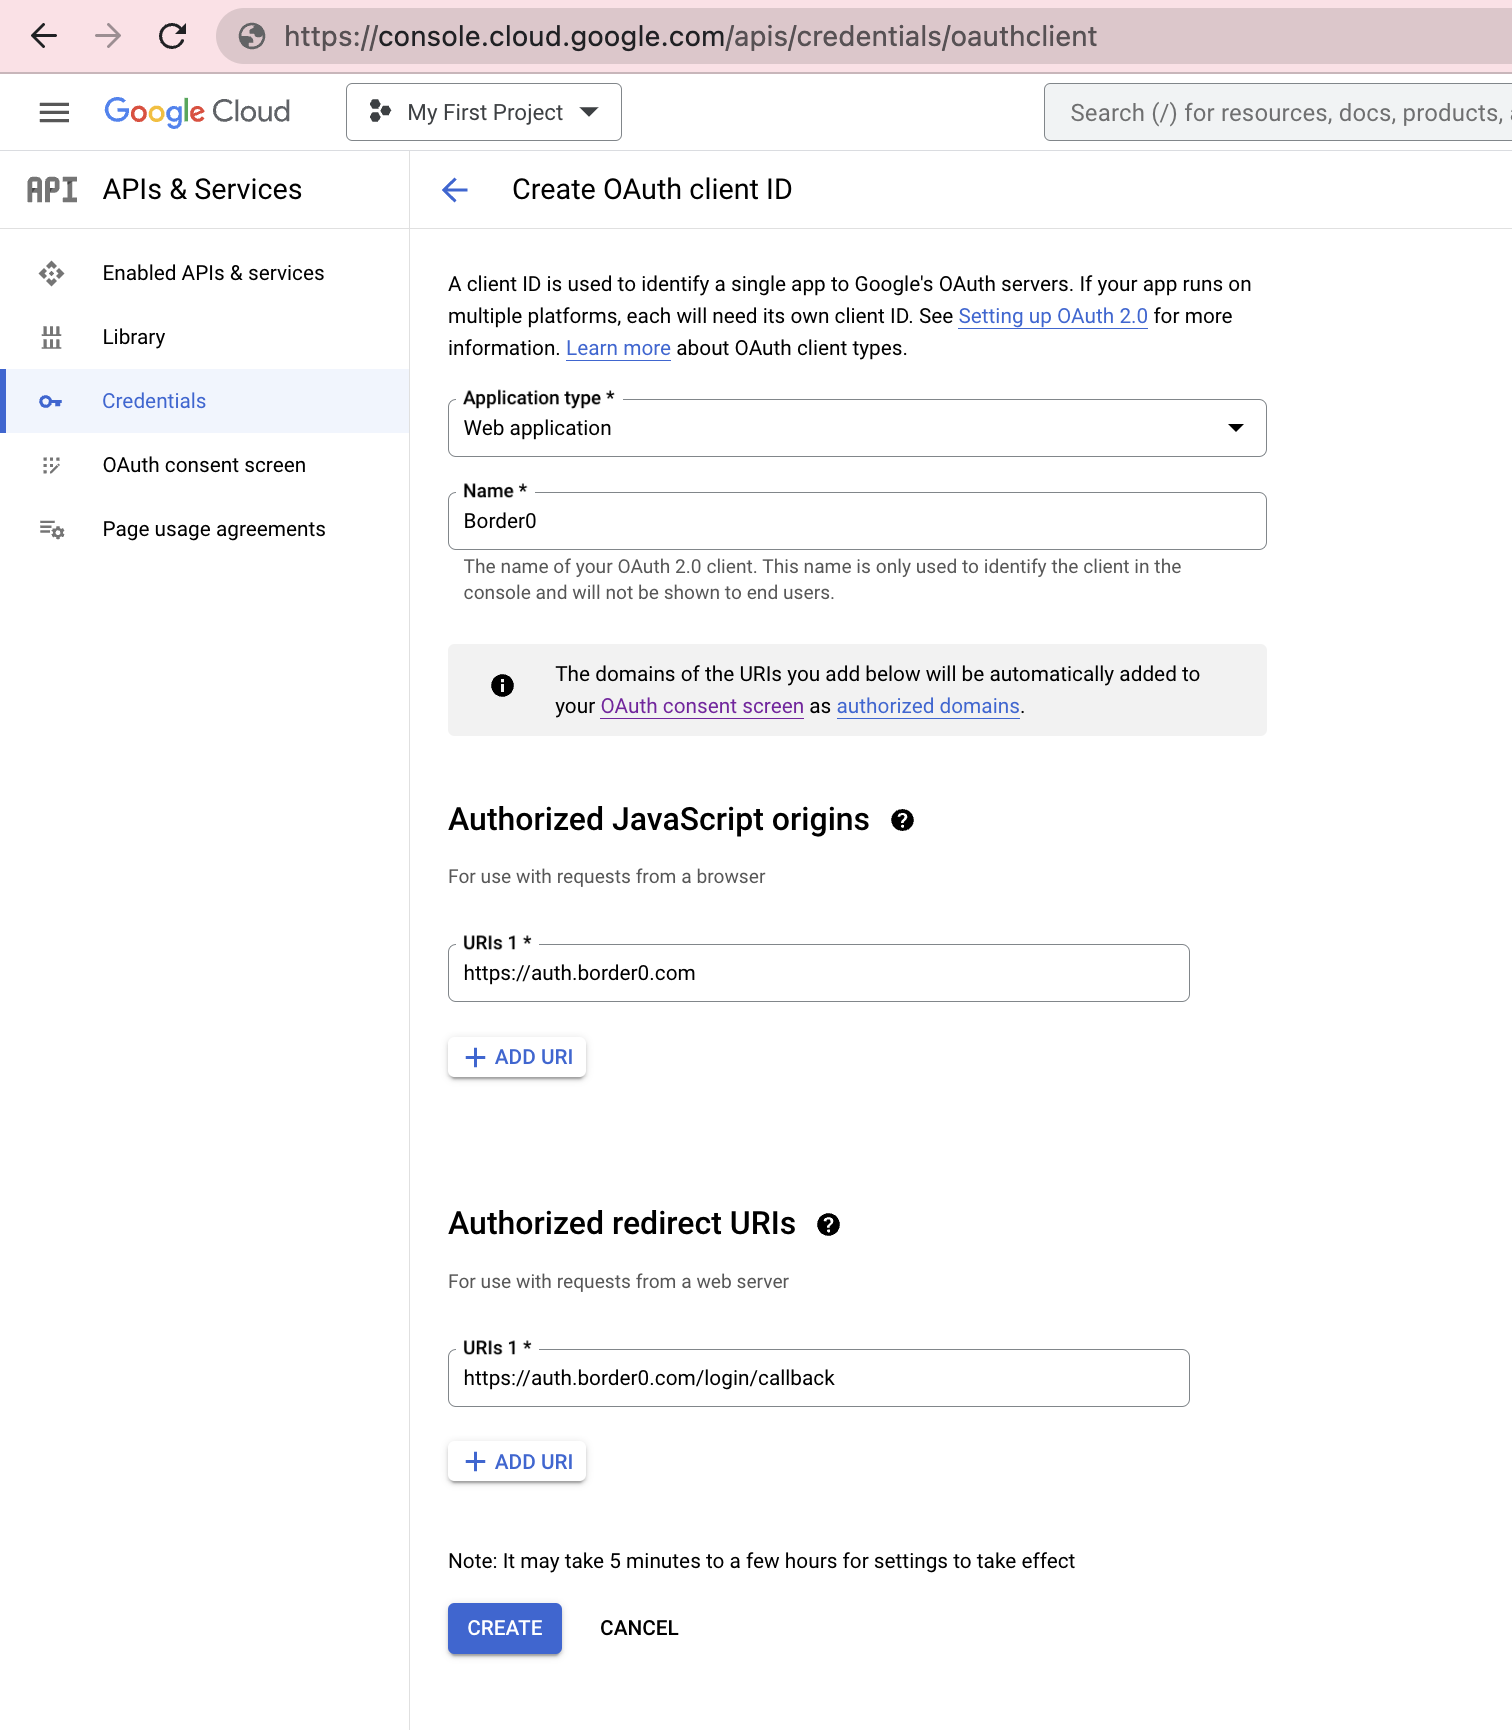
The credentials configuration page in the Google Cloud Console, displaying the final step in creation of new OAuth2 credentials for a "Web application" type application.
- [11] Once you click "Create" at the bottom of the credentials configuration, a popup will be displayed with your new OAuth2 credentials. Keep track of the client ID and client secret; you will need to supply these to Border0.
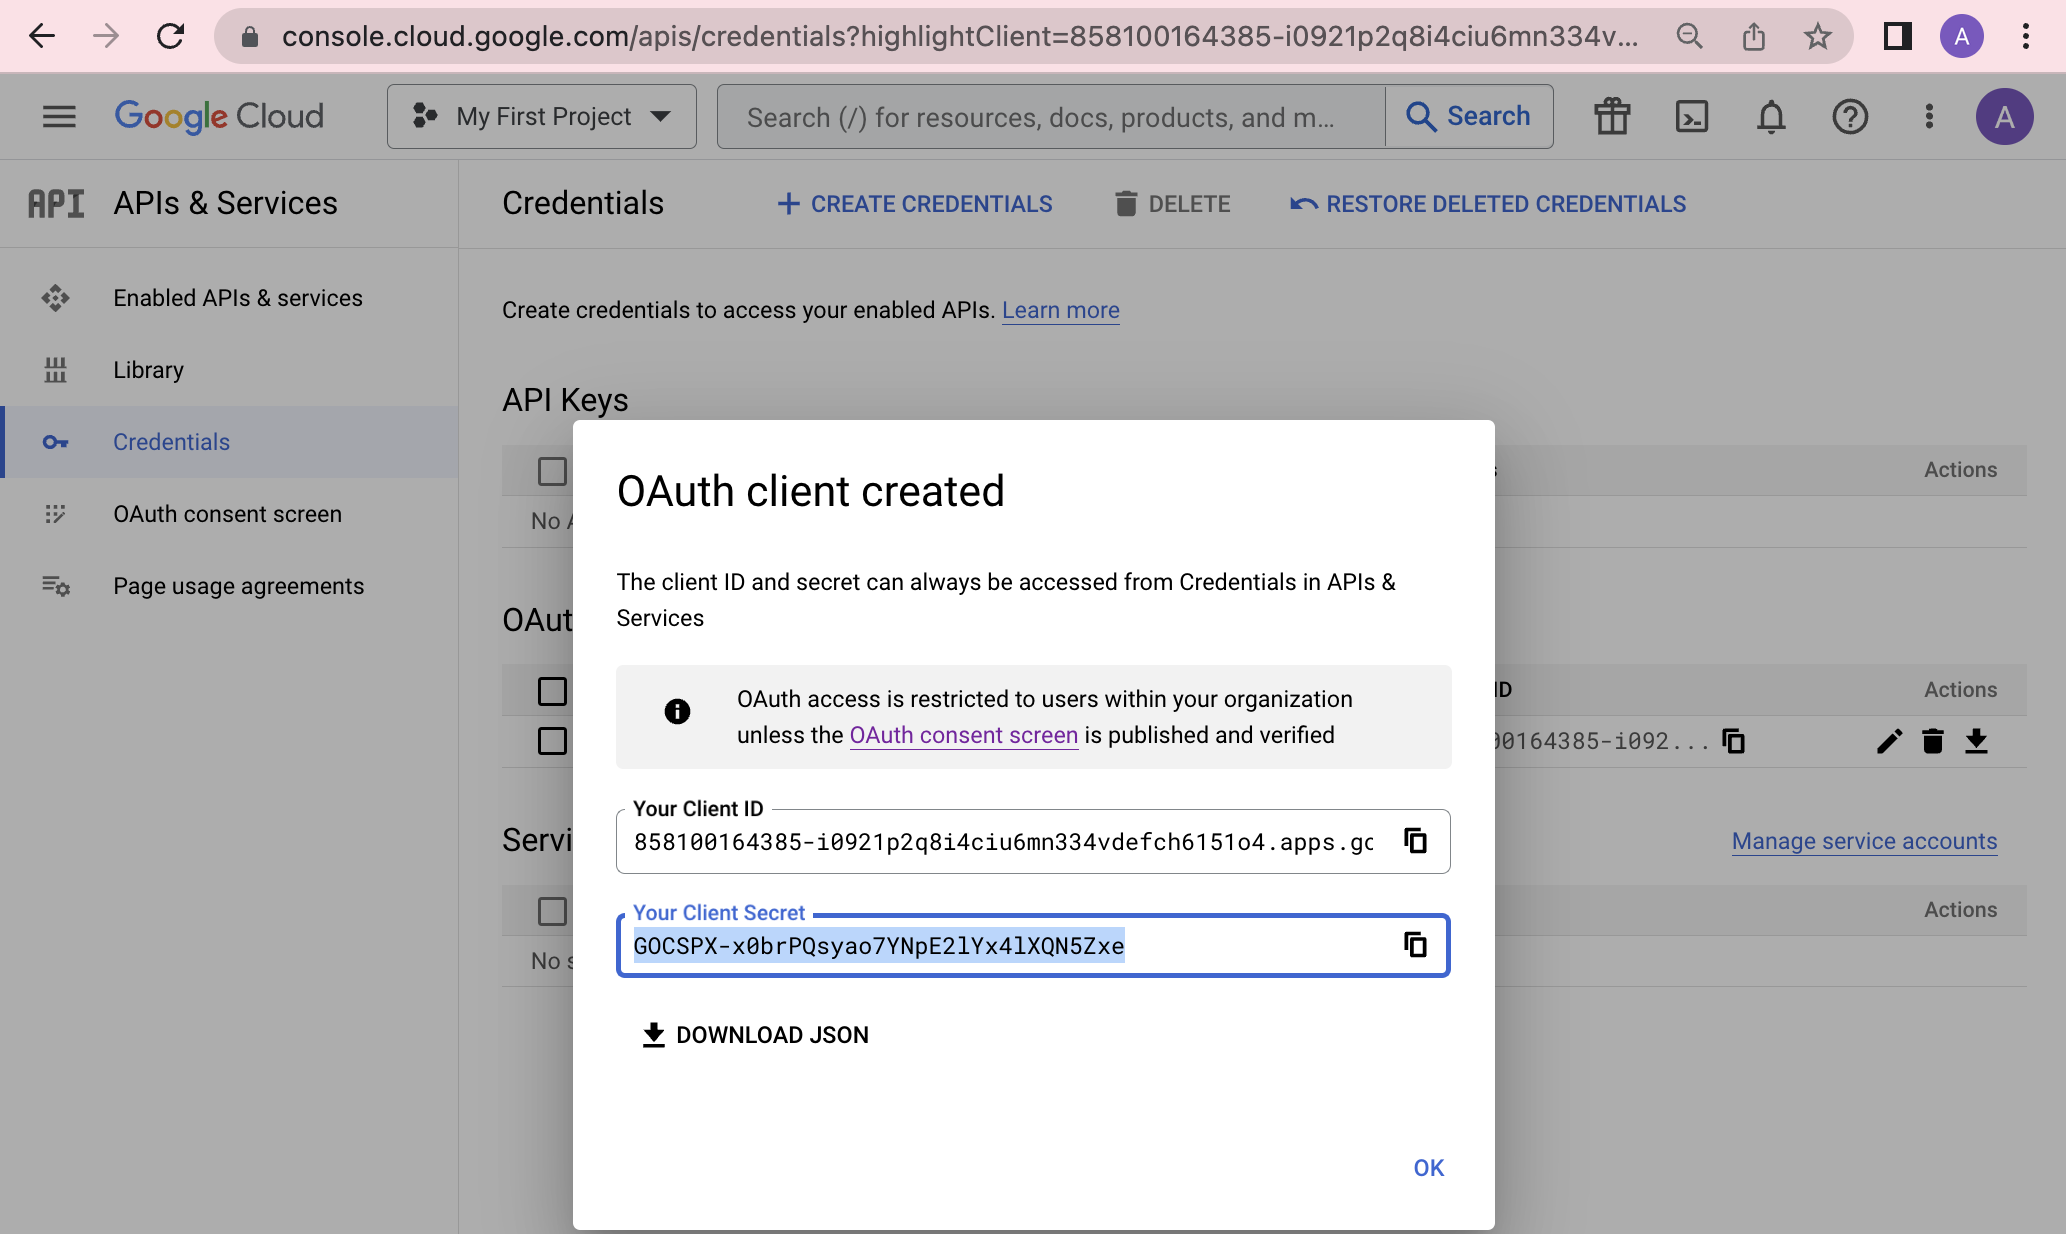
The credentials configuration page in the Google Cloud Console, displaying the view after creating new OAuth2 credentials.
Identity Provider Configuration Parameters
(1) Name (required)
The identity provider's "name" is a unique identifier for the identity provider within your Border0 organization. In other words, no two custom identity providers for the same Border0 organization can have the same name.
Name must start with an alphanumeric character [a-zA-Z0-9] and can only consist of alphanumeric characters and dashes ('-') - it must not include spaces.
Name is the only parameter which can not be changed after creation-time.
(2) Display Name
The identity provider's "display name" is the name that will appear on the button corresponding to the identity provider in the login page. As opposed to name, display name need-not be unique within an organization, and can be changed at will.
(3) Logo URL
The identity provider's "logo URL" is the URL of the icon that will appear on the button corresponding to the identity provider in the login page.
(4) Google Workspace Domain (required)
The identity provider's "workspace domain" is the domain of your Google organization.
(5) Client ID (required)
The identity provider's "client ID" is the client ID for the OAuth2.0 application you created in the Google Cloud Console - a string that Border0 will present to Google when authenticating users. Google uses this client ID to identify Border0 among all of its clients.
If you don't have a client ID and aren't sure how to get one, review the "Creating a Google Application for Border0" section above.
(6) Client Secret (required)
The identity provider's "client secret" is the client secret for the OAuth2.0 application you created in the Google Cloud Console - a string that Border0 will present to Google when authenticating users along with the client ID. The upstream identity provider uses this client ID to authenticate Border0 as a client.
If you don't have a client secret and aren't sure how to get one, review the "Creating a Google Application for Border0" section above.
Portal Instructions
Once you've gathered the necessary parameters, you can proceed to populate the "New Google Workspace Identity Provider" form. Clicking "Submit" will add the identity provider.
For instructions on how to find this page in the portal, see the generic instructions on Adding a Custom Identity Provider.
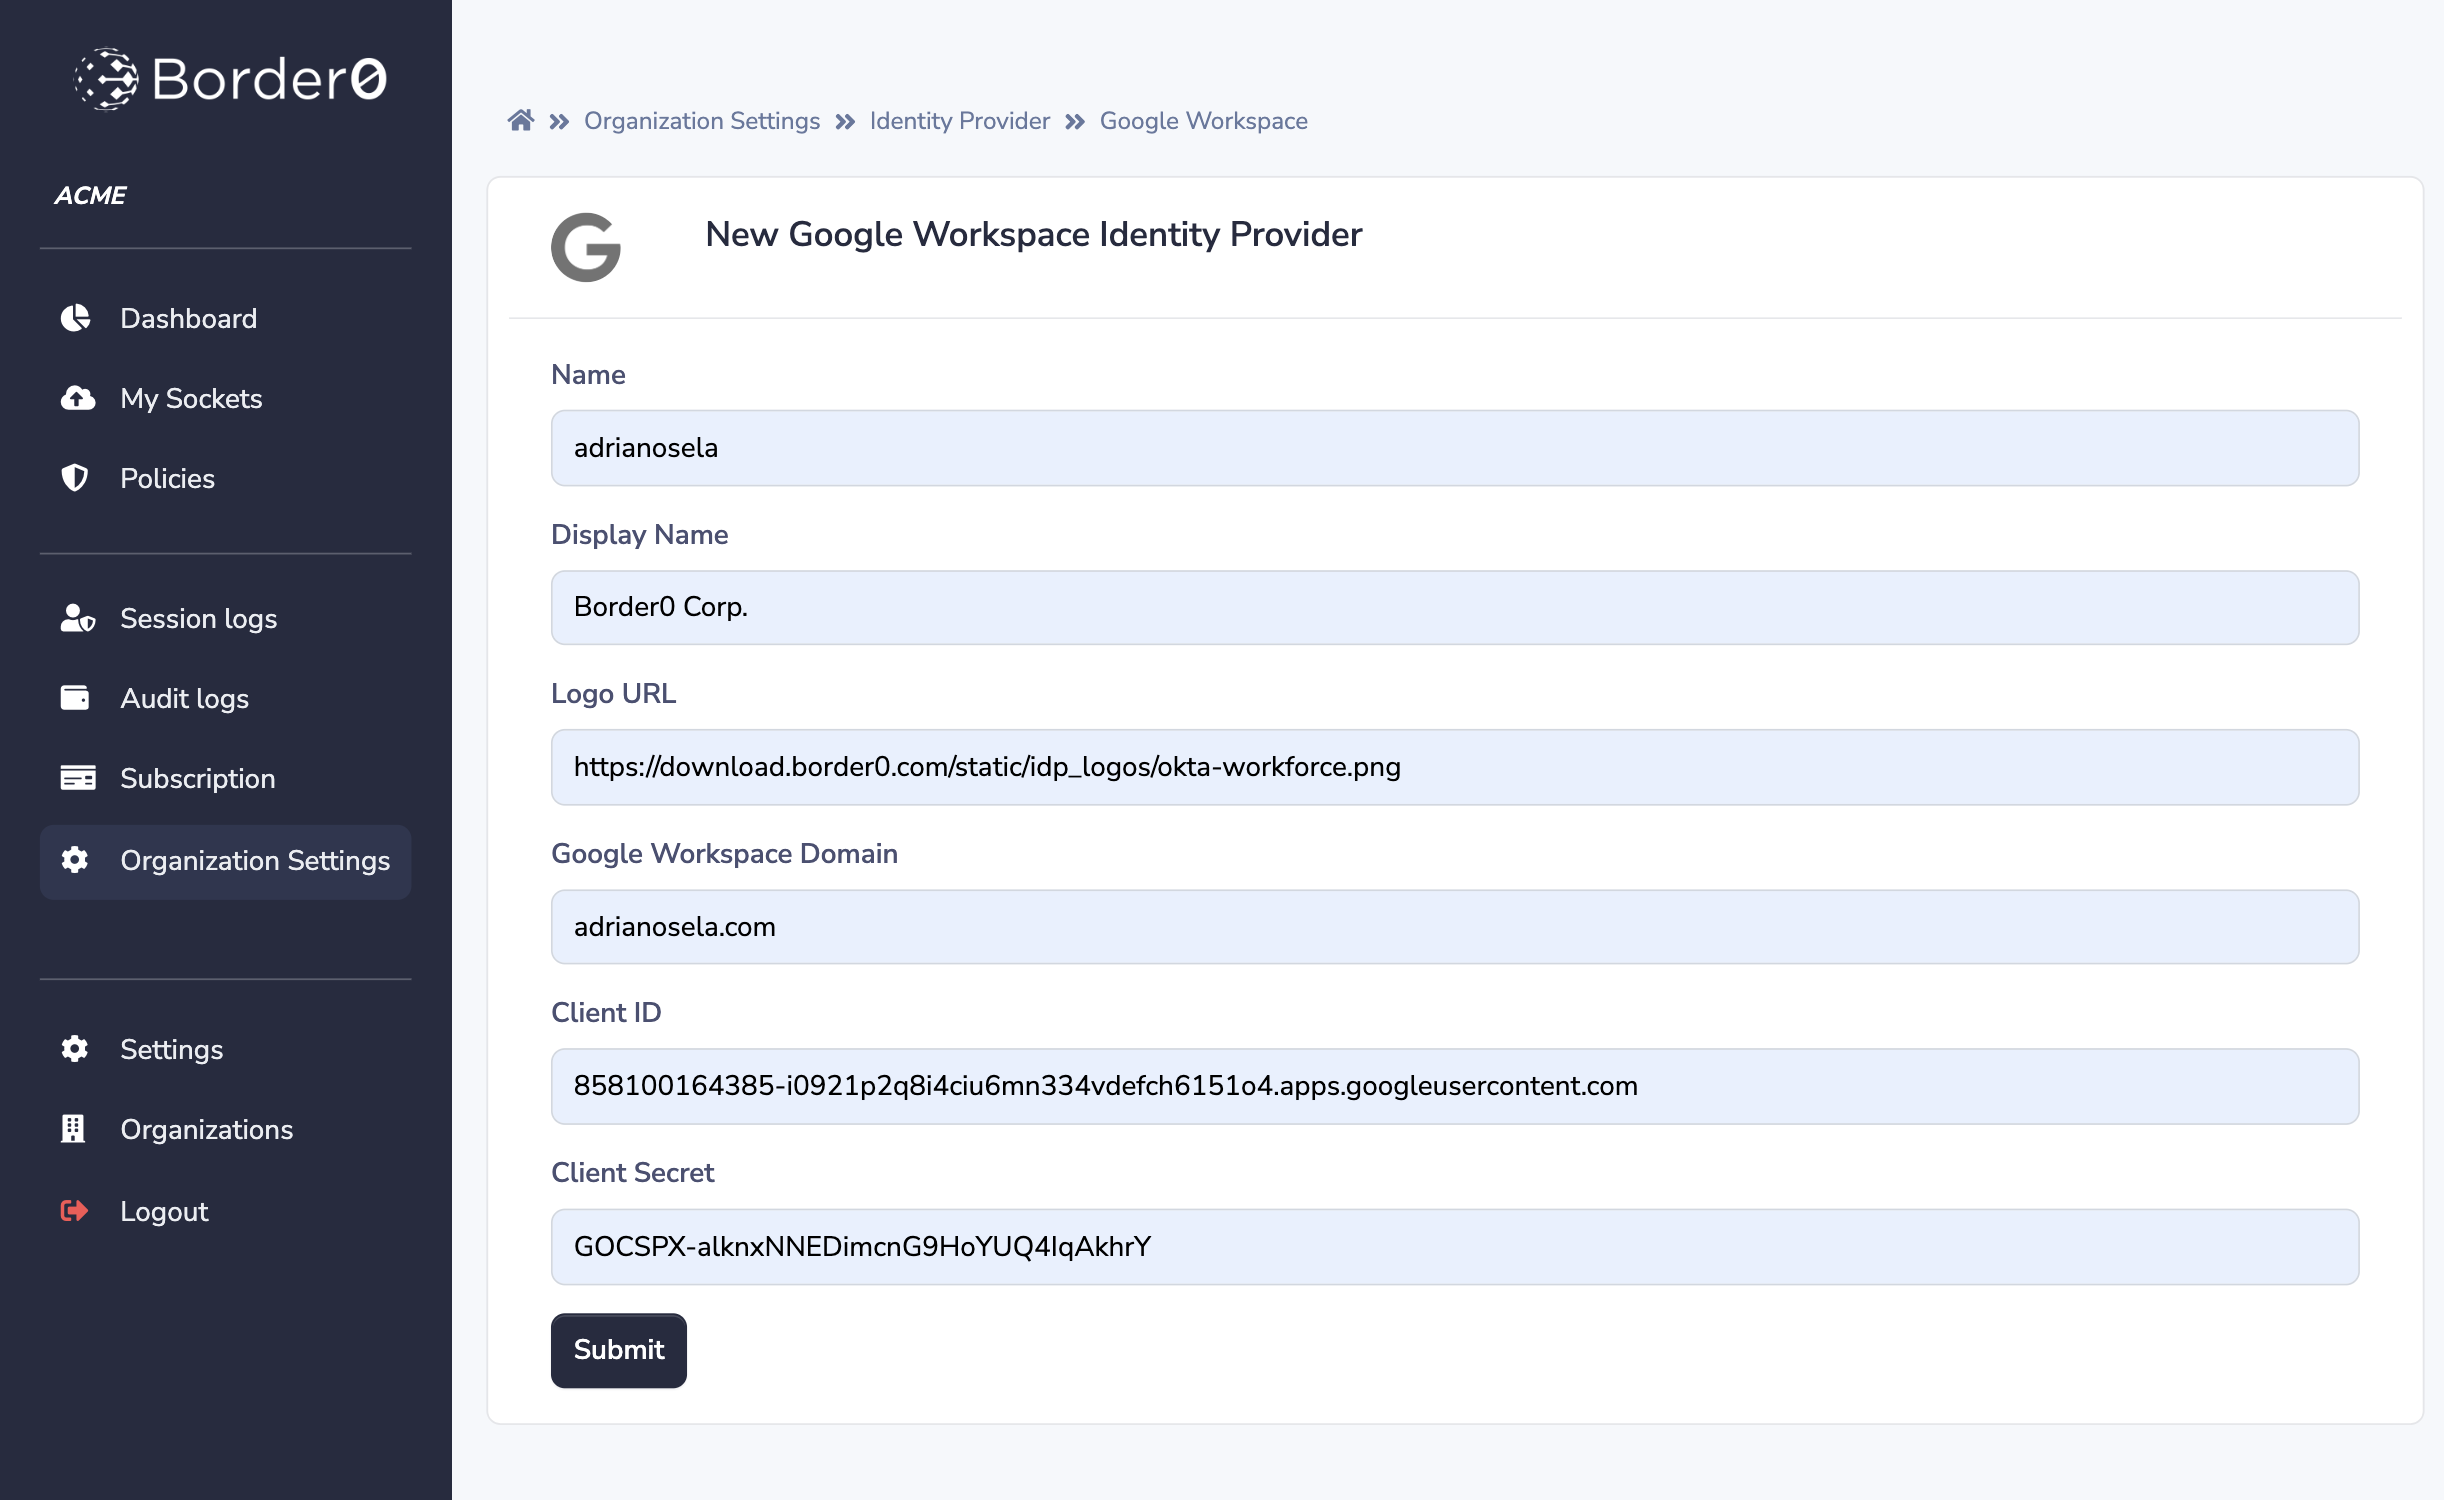
The "New Google Workspace Identity Provider" form on the Border0 Portal
CLI Instructions
Once you've gathered the necessary parameters, you can add your Google Workspace identity provider with the command border0 organization idp add google-workspace.
Example
$ border0 organization idp add google-workspace \
  --name MyGoogleWorkspace \
  --display-name "My Company Auth" \
  --logo-url https://your.logo.url.com/image.png \
  --workspace-domain your.company.com \
  --client-id 858100164385-i0921p2q8i4ciu6mn334vdefch6151o4.apps.googleusercontent.com \
  --client-secret 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

[WARNING] You may need to to configure your Google Workspace account to allow the javascript origin: https://auth.border0.com
[WARNING] You may need to to configure your Google Workspace account to allow the redirect URL: https://auth.border0.com/login/callback

New Google Workspace identity provider "MyGoogleWorkspace" successfully added to your organization!
Updated 9 months ago
