Adding an OpenID Connect Identity Provider
OpenID Connect is an identity layer on top of the OAuth 2.0 protocol. It is one of the most widely-used types of identity providers due to its ease of integration.
To integrate with a generic OpenID Connect identity provider, you will first need to gather certain parameters.
Identity Provider Configuration Parameters
(1) Name (required)
The identity provider's "name" is a unique identifier for the identity provider within your Border0 organization. In other words, no two custom identity providers for the same Border0 organization can have the same name.
Name must start with an alphanumeric character [a-zA-Z0-9] and can only consist of alphanumeric characters and dashes ('-') - it must not include spaces.
Name is the only parameter which can not be changed after creation-time.
(2) Display Name
The identity provider's "display name" is the name that will appear on the button corresponding to the identity provider in the login page. As opposed to name, display name need-not be unique within an organization, and can be changed at will.
(3) Logo URL
The identity provider's "logo URL" is the URL of the icon that will appear on the button corresponding to the identity provider in the login page.
(4) Discovery URL (required)
The identity provider's "discovery URL" is the URL of the OpenID Connect "Discovery Document". This is typically (but not always) found at https://idp-hostname.com/.well-known/openid-configuration.
To learn more about what an OpenID Connect discovery document looks like, see https://swagger.io/docs/specification/authentication/openid-connect-discovery/
(5) Client ID (required)
The identity provider's "client ID" is some string that Border0 will present to the OpenID Connect identity provider when authenticating users. The upstream identity provider uses this client ID to identify Border0 among all of its clients.
The process of getting a client ID from an OpenID Connect identity provider varies across providers. Read your provider's documentation to learn where/how to get a client ID.
(6) OpenID Connect Flow Type (required)
The identity provider's "open id connect flow type" can have one of two possible values, "back_channel" or "front_channel".
Back channel will perform the OIDC protocol with response_type=code. Front channel will perform the OIDC protocol with response_mode=form_post and response_type=id_token.
For more information regarding OpenID Connect flow types refer to flows #1 and #3 in this article for back channel and front channel respectively.
It is recommended to use "front_channel" whenever the upstream OpenID Connect identity provider supports it. It is simpler to reason about and does not require giving Border0 any credentials (client secret).
(7) Client Secret (required when OIDC Flow Type is "back_channel")
The identity provider's "client secret" is some string that Border0 will present to the OpenID Connect identity provider when authenticating users. The upstream identity provider uses this client ID to authenticate Border0 as a client.
The process of getting a client secret from an OpenID Connect identity provider varies across providers. Read your provider's documentation to learn where/how to get a client secret.
Find something lacking or confusing? Need help getting set-up?We're happy to help! Shoot us an email at [email protected].
Once you've gathered all of your parameters you are ready to add a new OpenID Connect identity provider. Below are instructions for achieving this via the Border0 Portal and the Border0 CLI respectively.
You may need to configure your OpenID Connect identity provider to allow redirecting to Border0's callback/redirect URL: https://auth.border0.com/login/callbackIdentity providers typically maintain an "allowlist" or a "callback URLs" list of URLs where it is allowed to redirect authenticated users to. Your IDP might require you to add the URL above to such a list in order for it to allow Border0 to authenticate users against it.
Portal Instructions
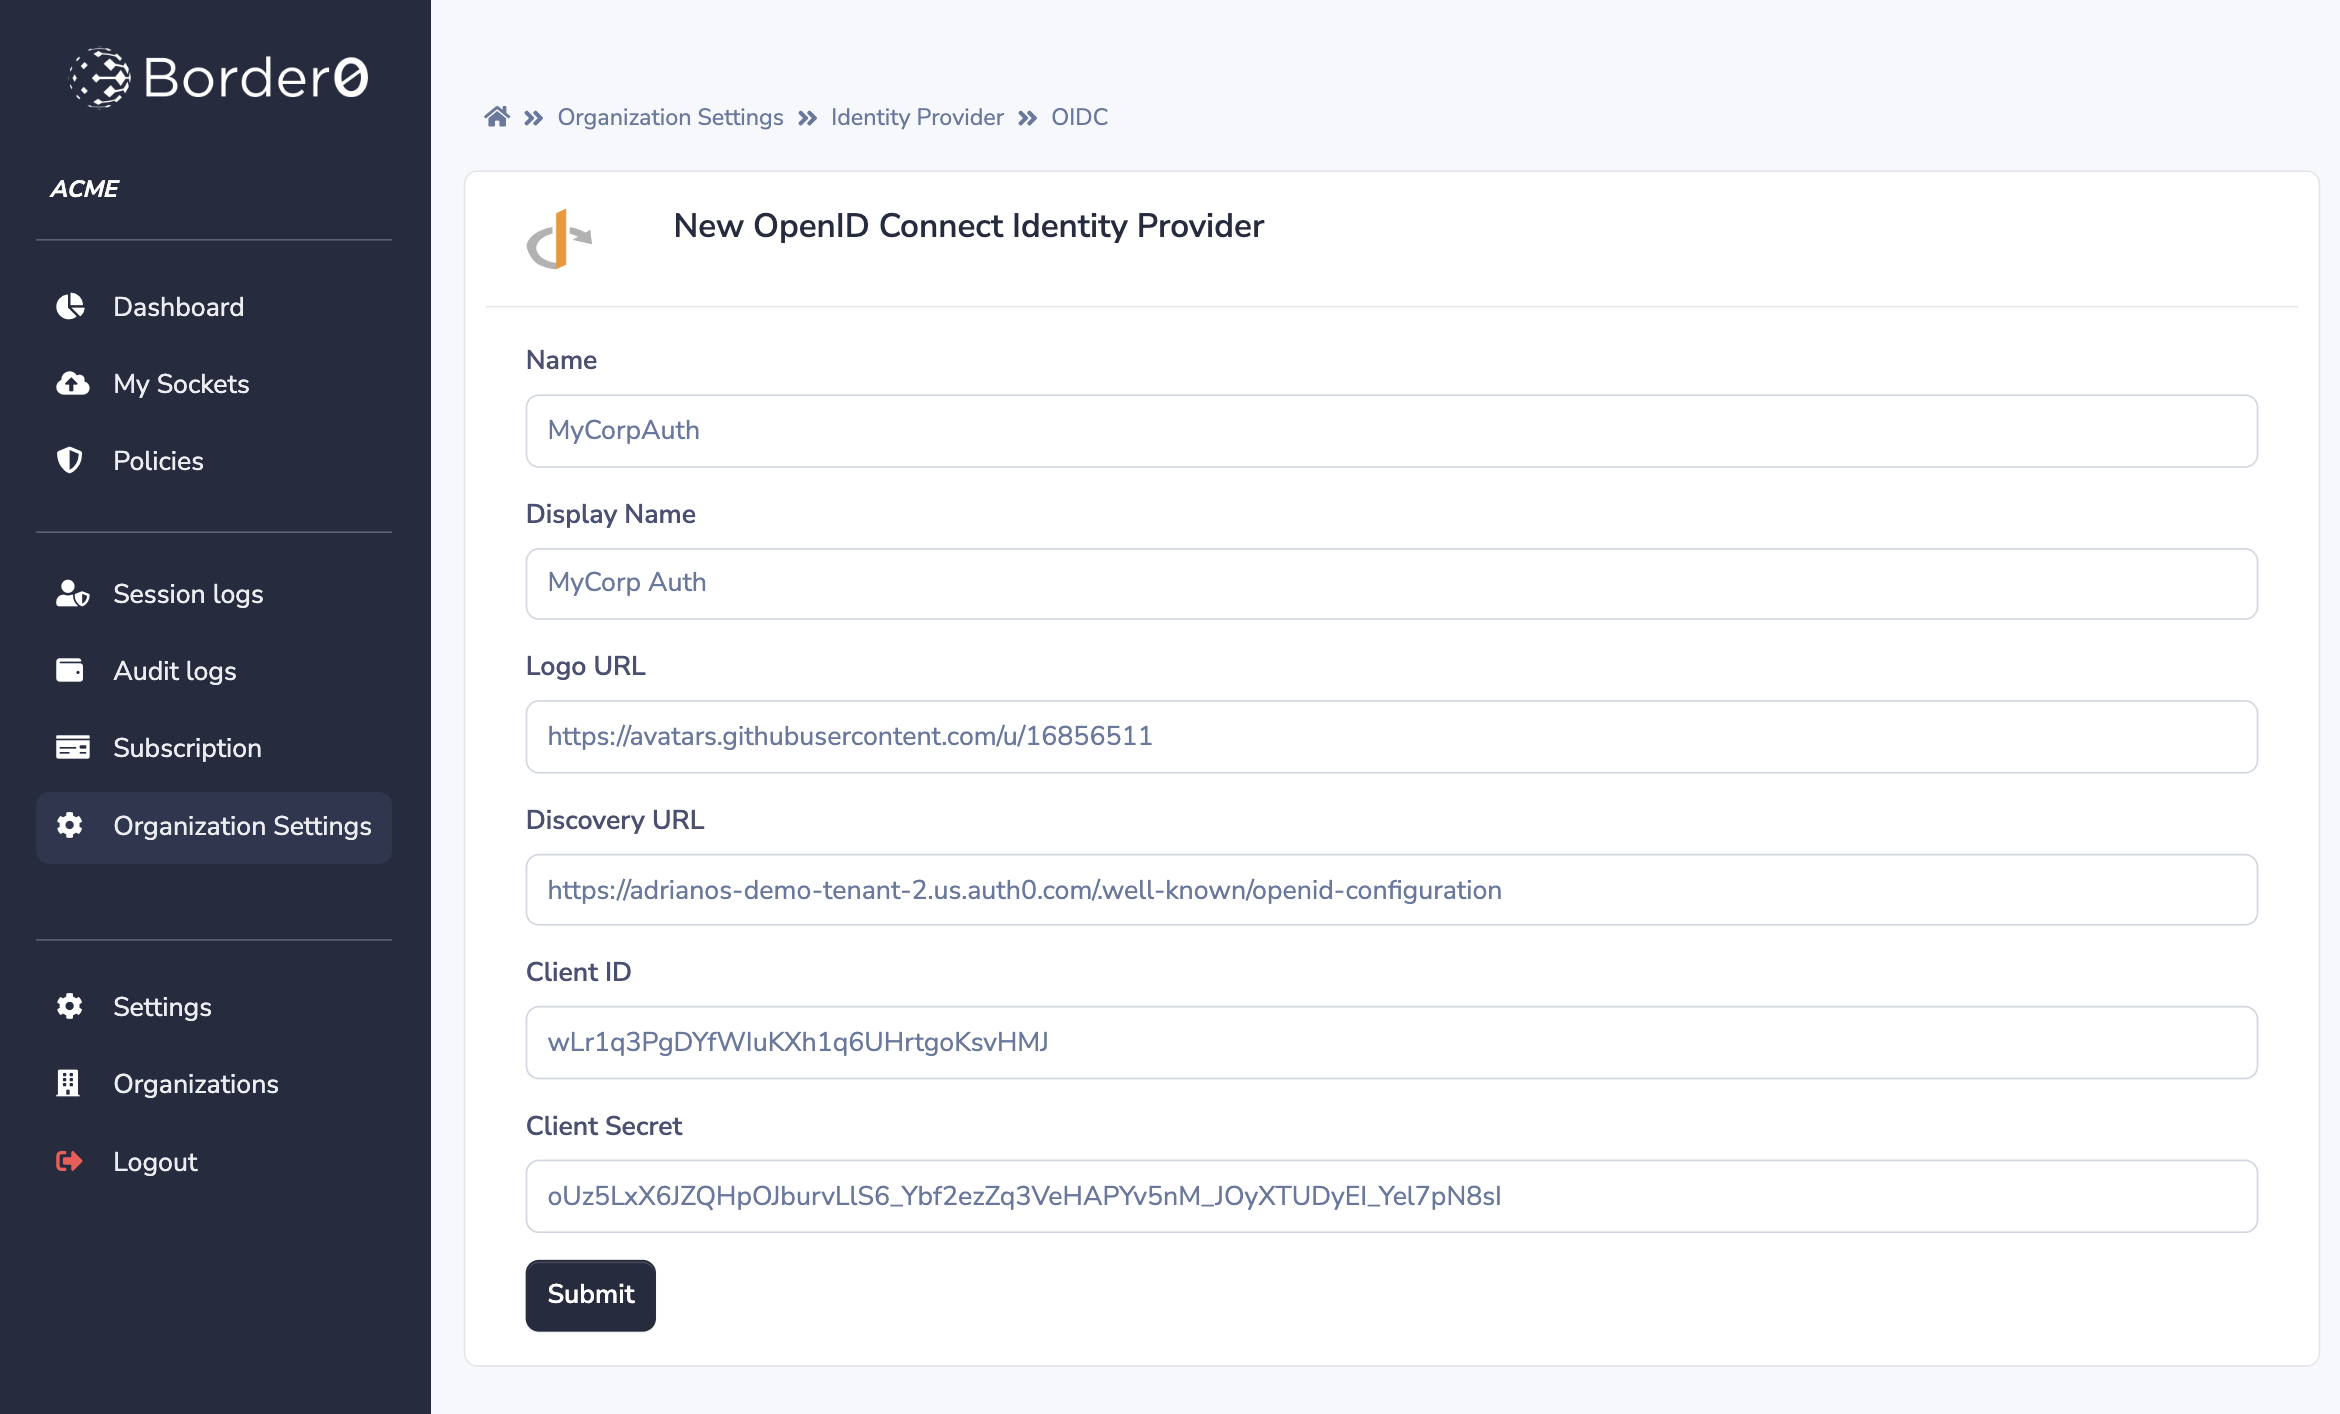
Once you've gathered the necessary parameters, you can proceed to populate the "New OpenID Connect Identity Provider" form. Clicking "Submit" will add the identity provider.
For instructions on how to find this page in the portal, see the generic instructions on Adding a Custom Identity Provider.
Note that the identity provider will be added as "disabled", and you will need to enable it before your organization's users are able to authenticate against it.

The "New OpenID Connect Identity Provider" form on the Border0 Portal
CLI Instructions
Once you've gathered the necessary parameters, you add your OpenID Connect identity provider with the command border0 organization idp add oidc.
Back Channel OIDC Example
$ border0 organization idp add oidc \
	--name MyBackChannelOIDC \
	--display-name "My Back Channel OIDC" \
	--logo-url https://your.logo.url.com/image.png
	--discovery-url https://your.openid.issuer.com/.well-known/openid-configuration \
	--client-id wLtgoKsr1q3vHKXh1qfWIu6UHrPgDYMJ \
	--oidc-flow-type back_channel \
	--client-secret 1a0234fdc56789ffa05432fa98764fdc56789ffa05432f4fdc56789ffa05432fdc

[WARNING] You may need to configure your OpenID Connect 1.0 provider to allow the redirect URL: https://auth.border0.com/login/callback

New OpenID Connect 1.0 identity provider "MyBackChannelOIDC" successfully added to your organization!
Front Channel OIDC Example
$ border0 organization idp add oidc \
	--name MyFrontChannelOIDC \
	--display-name "My Front Channel OIDC" \
	--logo-url https://your.logo.url.com/image.png
	--discovery-url https://your.openid.issuer.com/.well-known/openid-configuration \
	--client-id wLtgoKsr1q3vHKXh1qfWIu6UHrPgDYMJ \
	--oidc-flow-type front_channel

[WARNING] You may need to configure your OpenID Connect 1.0 provider to allow the redirect URL: https://auth.border0.com/login/callback

New OpenID Connect 1.0 identity provider "MyFrontChannelOIDC" successfully added to your organization!
Updated 10 months ago
