GitLab via Border0
Border0 connector integration with GitLab(community edition)
In this HOW-TO we will walk through setting up Border0 connector with self-hosted GitLab-ce
AssumptionsBasics Linux knowledge and skills to be able to install a minimal functioning instance of GitLab-ce
We used following GitLab manuals:
Before we start
A little planing goes a long way, if you are starting from scratch like we did.
Our GitLab instance will require at least 2 sockets, one for web portal access and one for SSH
If you already have GitLab setup in your Organisation that's fine, just skip the optional steps.
- The web portal socket will be simply named "gitlab"
- SSH endpoint of the instance will require a separate socket with suitable name of "ssh-gitlab"
Install Border0 binaries
sudo curl https://download.border0.com/linux_amd64/border0 \
-o /usr/local/bin/border0 \
&& sudo chmod +x /usr/local/bin/border0
We more detailed on installing the border0 binary in Using the Border0 Connector and on our Download Page
Once that's done we can login to our account from the server and obtain temporary admin token
border0 loginyou should be presented with a URL to copy into your browser and authenticate with your Identity provider
please login with the link below:
https://portal.border0.com/login?device_identifier=ImZhZTc5NmsahdfgsdfHSDGHsdgsNkMDEyOSI.Y2wl6A.vpRhqM-PR5VsZ_k_WhZXp2mBJ_w
failed opening browser. Open the url (https://portal.border0.com/login?device_identifier=ImZhZTc5NmU4sdghDghdgHDFhgE3ZTNkMDEyOSI.Y2wl6A.vpRhqM-PR5VsZ_k_WhZXp2mBJ_w) in a browser
We could now be able to get our Organisation SSH Authority we will place in "/etc/ssh/border0.pub" file
border0 organization show | grep ecdsa-sha2-nistp256 | awk '{print $5,$6}' | sudo tee -a /etc/ssh/border0.pubwith our border0 cli tool working and Org Public Key ready we can move to setting up SSH access
Border0 SSH Config
Similarly to setting up Access to an SSH server we need to enable Border0 SSH access.
We will add following lines at the end of "/etc/ssh/sshd_config"
TrustedUserCAKeys /etc/ssh/border0.pub
AuthorizedPrincipalsFile %h/.ssh/authorized_principals

Match User git
    AuthorizedPrincipalsCommandUser root
    AuthorizedPrincipalsCommand /opt/gitlab/embedded/service/gitlab-shell/bin/gitlab-shell-authorized-principals-check %i sshUsers mysocket_ssh_signed
/etc/ssh/border0.pub fileNote how we are instructing SSH daemon to look for Trusted Keys in our border0.pub file.
You can add multiple organisation Keys in there
We also need to configure Border0 authorised principle in our User's home directory
echo "mysocket_ssh_signed" > /root/.ssh/authorized_principalsLastly, restart SSH service to apply the changes
sudo systemctl daemon-reload
sudo systemctl restart ssh
Border0 Connector Service
We have detailed description on installing the border0 binary in: Using the Border0 Connector
Once you set that up create a systemd service file like so:
[Unit]
Description=Border0.com connector Service

[Service]
User=root
ExecStart=/usr/local/bin/border0 connector start --config /etc/border0_connector.yaml
Restart=on-failure
TimeoutStartSec=60
RestartSec=60
SyslogIdentifier=border0_connector

[Install]
WantedBy=multi-user.target
create corresponding Border0 connector config file in "/etc/border0_connector.yaml"
connector:
   name: "gitlab-connector"
credentials:
   token: eyJhbGciOiJIUzI1NiIsInR5cCI6IkpXVCJ9.ey<...>J9.s44q65XmRihPHqS4359Z6wTLyJdazdI6yuVvtQ58BDM
   #user: [email protected]
   #password: AVeryLongAndSecurePassword

sockets:
  - gitlab:
      port: 80
      type: http
      upsrtream_type: http
      #upsrtream_host: my-gitlab.my-domain.io
  - git-gitlab:
      port: 22
type: tlsFor details on authentication and tokens we have a page here: Creating Admin Tokens
Last step is to enable and start our border0_connector service
sudo systemctl daemon-reload
sudo systemctl enable border0_connector
sudo systemctl restart border0_connector
GitLab package configuration (new install)
If you are starting from scratch we can do some planing ahead, make our life easier.
before installing gitlab-ce create "/etc/gitlab/gitlab.rb" file with following content
external_url 'http://gitlab-rnd.border0.io'
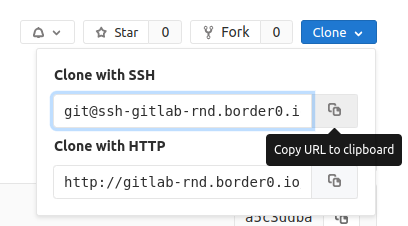
gitlab_rails['gitlab_ssh_host'] = 'ssh-gitlab-rnd.border0.io'
GitLab configuration (existing install)
For the the socket creation we need to check the current gitlab config, we are mainly interested in the external url
this command
sudo gitlab-ctl show-config | grep external-urlshould return "external-url": "https://my-gitlab.my-domain.io",
we need to update the "/etc/border0_connector.yaml" file accordingly
Update gitlab-shell-authorized-principals-check file
The "glue" of our integration is the AuthorizedPrincipalsCommand file
"/opt/gitlab/embedded/service/gitlab-shell/bin/gitlab-shell-authorized-principals-check"
we configured the usage of it at the end of "/etc/ssh/sshd_config"
The stock version needs to be extended to parse out username from the email address, since Gitlab does not support the usage of emails as usernames .
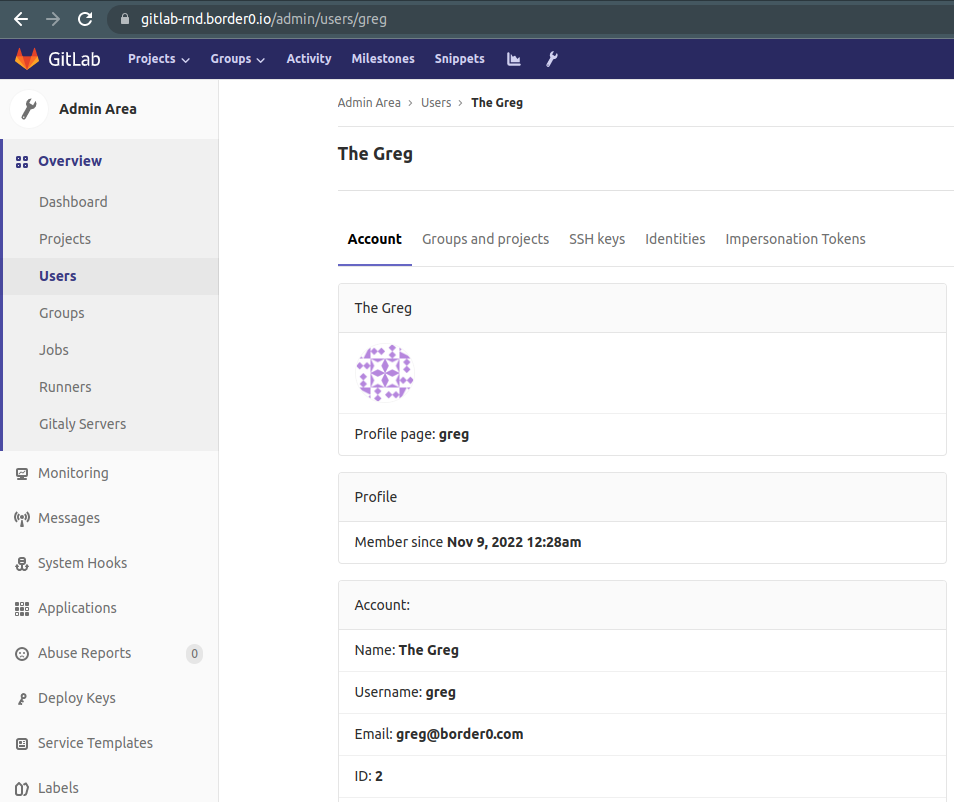
for example: "[email protected]" maps to GitLab user: "greg"

below updated "/opt/gitlab/embedded/service/gitlab-shell/bin/gitlab-shell-authorized-principals-check" file
#!/opt/gitlab/embedded/bin/ruby --disable-gems
# Fix the PATH so that gitlab-shell can find git-upload-pack and friends.
ENV['PATH'] = '/opt/gitlab/bin:/opt/gitlab/embedded/bin:' + ENV['PATH']

#!/usr/bin/env ruby

#
# GitLab shell authorized principals helper. Emits the same sort of
# command="..." line as gitlab-shell-authorized-principals-check, with
# the right options.
#
# Ex.
#   bin/gitlab-shell-authorized-keys-check <key-id> <principal1> [<principal2>...]
#
# Returns one line per principal passed in, e.g.:
#   command="/bin/gitlab-shell username-{KEY_ID}",no-port-forwarding,no-X11-forwarding,no-agent-forwarding,no-pty {PRINCIPAL}
#   [command="/bin/gitlab-shell username-{KEY_ID}",no-port-forwarding,no-X11-forwarding,no-agent-forwarding,no-pty {PRINCIPAL2}]
#
# Expects to be called by the SSH daemon, via configuration like:
#     AuthorizedPrincipalsCommandUser root
#     AuthorizedPrincipalsCommand /bin/gitlab-shell-authorized-principals-check git %i sshUsers

abort "# Wrong number of arguments. #{ARGV.size}. Usage:
#     gitlab-shell-authorized-principals-check <key-id> <principal1> [<principal2>...]" unless ARGV.size >= 2

key_id = ARGV[0]
abort '# No key_id provided' if key_id.nil? || key_id == ''

if key_id.include? '@'
  key_id = key_id.split('@').first
end

principals = ARGV[1..-1]
principals.each { |principal|
  abort '# An invalid principal was provided' if principal.nil? || principal == ''
}

require_relative '../lib/gitlab_init'
require_relative '../lib/gitlab_net'
require_relative '../lib/gitlab_keys'

principals.each { |principal|
  puts GitlabKeys.principal_line("username-#{key_id}", principal.dup)
}
git command via Border0
git command via Border0Before we can use our new border0 enabled access to our code we need to configure ssh client to use our setup.
update your local "~/.ssh/config" file by adding Border0 socket support
Match host *.border0.io exec "border0 client ssh-keysign --host %h"
  StrictHostKeyChecking no
  IdentitiesOnly yes
  IdentityFile ~/.ssh/%h
  ProxyCommand border0 client tls --host %h
We start by cloning out one of our repos osing the Border0 socket backed URL "[email protected]:greg/awsm-repo.git"

greg@work-laptop:~/ops/gitlab$ git clone [email protected]:greg/awsm-repo.git
Cloning into 'awsm-repo'...
remote: Enumerating objects: 18, done.
remote: Counting objects: 100% (18/18), done.
remote: Compressing objects: 100% (9/9), done.
remote: Total 18 (delta 5), reused 18 (delta 5)
Receiving objects: 100% (18/18), done.
Resolving deltas: 100% (5/5), done.
Let's make some changes and commit them
greg@work-laptop:~/ops/gitlab$ cd awsm-repo/
greg@work-laptop:(main)~/ops/gitlab/awsm-repo$ git checkout -b my-first-branch
Switched to a new branch 'my-first-branch'
greg@work-laptop:(my-first-branch)~/ops/gitlab/awsm-repo$ echo hello > my.file
greg@work-laptop:(my-first-branch)~/ops/gitlab/awsm-repo$ git add my.file
greg@work-laptop:(my-first-branch)~/ops/gitlab/awsm-repo$ git commit -m 'first commit'
[my-first-branch 720db77] first commit
 1 file changed, 1 insertion(+)
 create mode 100644 my.file
and finally, we push up the changes
greg@work-laptop:(my-first-branch)~/ops/gitlab/awsm-repo$ git push --set-upstream origin my-first-branch
Enumerating objects: 4, done.
Counting objects: 100% (4/4), done.
Delta compression using up to 16 threads
Compressing objects: 100% (2/2), done.
Writing objects: 100% (3/3), 270 bytes | 270.00 KiB/s, done.
Total 3 (delta 1), reused 0 (delta 0), pack-reused 0
remote:
remote: To create a merge request for my-first-branch, visit:
remote:   http://gitlab-rnd.border0.io/greg/awsm-repo/merge_requests/new?merge_request%5Bsource_branch%5D=my-first-branch
remote:
To ssh-gitlab-rnd.border0.io:greg/awsm-repo.git
 * [new branch]      my-first-branch -> my-first-branch
Branch 'my-first-branch' set up to track remote branch 'my-first-branch' from 'origin'.
Updated 9 months ago
