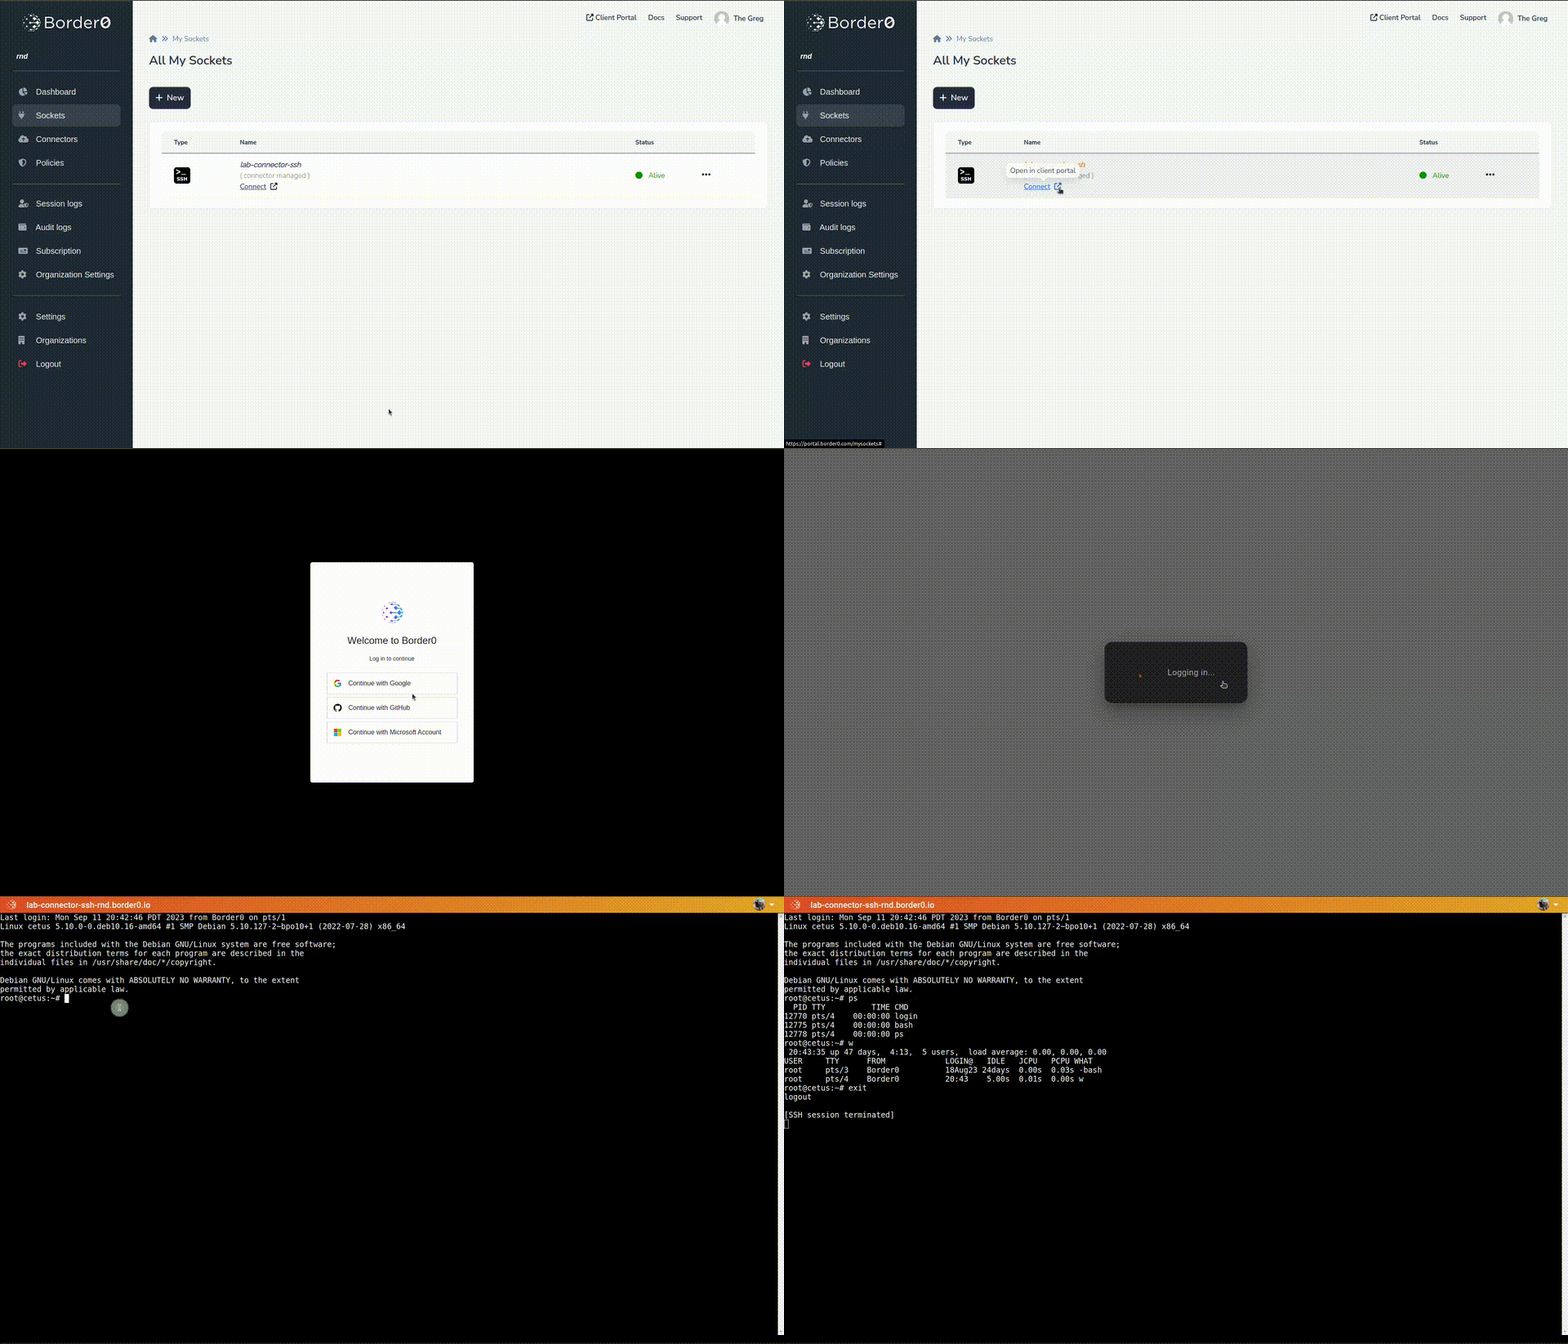
Access to an SSH server
🛡️ Intro
This section will show you how to access an SSH server using your single sign-on credentials.
We'll walk through two examples.
- Very easy - SSH access using the built-in border0 SSH server
- Easy - SSH access using an existing OpenSSH server
- Bonus - Connecting using your existing OpenSSH client
Let's get started!
SSH access using the built-in border0 SSH server
We'll walk through the following steps.
- Create an ssh socket of type ssh
- Connect the socket
- Test SSH access
- Bonus! kill the session and watch the session replay.
Step 1 - Create a socket of type SSH:
border0 socket create \
--type ssh --name sshtest
The command should return the socket id we will use in the next step.
Step 2 - Connect the socket
Let's make the service available by connecting and starting a built-in SSH server.
border0 socket connect \
sshtest \
--sshserver
Step 3 - Test SSH access
Now in a new terminal, test ssh access to the new socket. The easiest way to do this is by using the border0 CLI client like this:
border0 client ssh <socket_name>
Specifying a username
By default, we'll use your local username ($USERNAME). To explicitly set a username:
border0 client ssh <socket_name> -l USERNAME
orborder0 client ssh [email protected]<socket_name>
Step 4 - Kill the session and watch the recording
Go to the portal, and click on your ssh socket. Go to the sessions tab and kill your session.
Refresh the session's webpage, and now click watch recording.

SSH access using an existing OpenSSH server
In this example, we'll show you how to use OpenSSH with Border0. It's similar to the earlier example, except that we'll need to configure OpenSSH with the proper certificates.
We'll walk through the following steps.
- Create an ssh socket of type ssh
- start and configure the OpenSSH server for testing
- Connect the socket
- Test SSH access
- Bonus! kill the session and watch the replay.
Step 1 - Create a socket of type SSH:
border0 socket create \
--type ssh --name opensshtest
Step 2 - start and configure the OpenSSH server for testing
You can make any OpenSSH server available with Border0; for testing purposes, we'll use an OpenSSH Docker container that we'll run locally as the server.
Start a local ssh server; we'll use a docker container for this example.
We'll use Docker to start an OpenSSH server; the config will be the same on any other OpenSSH server if you're not using Docker.
First, get the SSH certificate Authority file for your organization and write it to a file called ssh-ca.pub
border0 organization show | grep ecdsa-sha2-nistp256 | awk '{print $5,$6}' > ssh-ca.pub
Now create a file called Dockerfile
that looks like this.
FROM ubuntu:18.04
RUN apt-get update
RUN apt-get install -y openssh-server
RUN mkdir /var/run/sshd
RUN echo 'root:root' |chpasswd
RUN sed -ri 's/^#?PermitRootLogin\s+.*/PermitRootLogin yes/' /etc/ssh/sshd_config
RUN sed -ri 's/UsePAM yes/#UsePAM yes/g' /etc/ssh/sshd_config
RUN echo "TrustedUserCAKeys /etc/ssh-ca.pub" >>/etc/ssh/sshd_config
COPY ssh-ca.pub /etc/ssh-ca.pub
RUN echo "AuthorizedPrincipalsFile %h/.ssh/authorized_principals" >>/etc/ssh/sshd_config
RUN mkdir -p /root/.ssh
RUN echo "mysocket_ssh_signed" > /root/.ssh/authorized_principals
EXPOSE 22
CMD ["/usr/sbin/sshd", "-D", "-e"]
Notice how we configure this server to accept users that authenticate using certificates signed with the CA we created.
We must also declare that all certs with the “principal” mysocket_ssh_signed
are allowed to log in as user root.
Now we're ready to start the OpenSSH server and make it listen on port 2222
docker build -t sshd .
docker run -p 2222:22 sshd
Step 3 - Connect the socket
Let's make the service available by connecting and starting a built-in SSH server.
border0 socket connect \
opensshtest \
-p 2222
Step 4 - Test SSH access
Now in a new terminal, test ssh access to the new socket. The easiest way to do this is by using the border0 client like this. Note that we set the username to root, as that's an existing user on the docker test server.
border0 client ssh <socketname> -l root
Step 5 - Kill the session and watch the recording
Go to the portal, and click on your ssh socket. Go to the sessions tab and kill your session.
Refresh the session's webpage, and now click watch recording.
Bonus - Connecting using your existing OpenSSH client
In the examples above, we used the border0 CLI to connect to your ssh servers. However, using your existing OpenSSH client (default on Linux and mac) is perfectly possible.
To start, we need to fetch a certificate. This can be done like this:
border0 client login
Add configuration to ~/.ssh/config
cat EOF ~/.ssh/config
Match host *border0.io exec "border0 client ssh-keysign --host %h"
IdentitiesOnly yes
IdentityFile ~/.ssh/%h
ProxyCommand border0 client tls --host %h
EOF
Now try and ssh using:
ssh [email protected]<socket name>
You can also use exec, or scp
ssh [email protected]<socket name> whoami
Notes for troubleshooting:
To connect directly to the container using signed cert:
border0 client ssh-keysign --host sshserver-andree-toonk.border0.io
ssh -vv localhost -p 2222 -l root -o IdentitiesOnly=yes -i ~/.ssh/ssshserver-andree-toonk.border0.io
To see the signed ssh cert:
ssh-keygen -Lf ~/.ssh/ssshserver-andree-toonk.border0.io-cert.pub
Updated 20 days ago