
Ansible AWX
Welcome to the Border0 AWX Integration guide! This article will walk you through the process of integrating Border0 with AWX, a powerful automation platform. By leveraging the Service Account feature and creating a Client Access Only token, you'll be able to streamline your workflow and take advantage of Border0's cutting-edge tooling and configuration. In this guide, we'll cover the necessary prerequisites, the integration process, and how to create and utilize Border0-specific credentials and execution environments.
Prerequisites
AWX integration with Border0 relies on the Service Account feature. For details on Service Accounts and their tokens navigate to Service Accounts
We will nee to create a Client Access Only token under "Team > Service Accounts"
Border0 AWX Integration
Components:
- New Border0 AWX Execution Environment
- New Border0 Credential Type
- Border0 Token (using border0 credential type)
- Border0 Execution Environment
Border0 Execution Environment
To accommodate AWX architecture and streamline the integration we cloned the default AWX EE and enriched it with Border0 specific tooling and configuration.
Forked from ansible/awx-ee the https://github.com/borderzero/awx-ee introduces minimal changes by including
- border0-cli tool (https://github.com/borderzero/border0-cli)
- ssh configuration (https://docs.border0.com/docs/faq#can-i-use-the-openssh-client-when-using-border0)
The image is published under ghcr.io/borderzero/awx-ee and is available with no credentials
To add Border0 EE via AWX UI we navigate to “Administration > Execution Environments” and “Add” new:
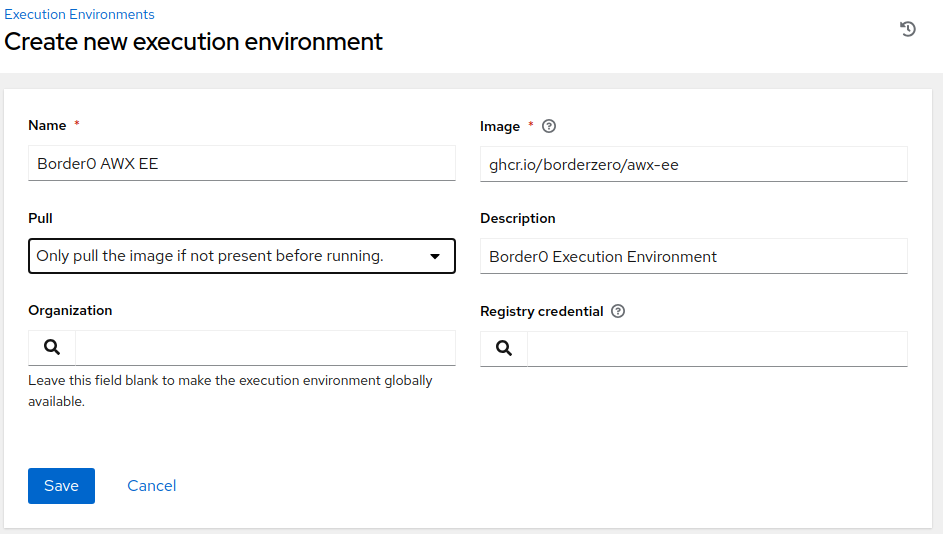
Form fields input as follows:
- Name: Border0 AWX EE
- Image: ghcr.io/borderzero/ awx-ee
- Description: Border0 enabled AWX Execution
- Registry credential: -leave empty / no credentials required
Select Pull strategy best suited to your internal policies and select organization
After saving the new environment will be available for selection in jobs and job templates
Border0 Credential Type
AWX enables creation of custom credentials by defining their structure and injection parameters. To add a new custom credential navigate to to “Administration > Credential Types” and “Add” new:
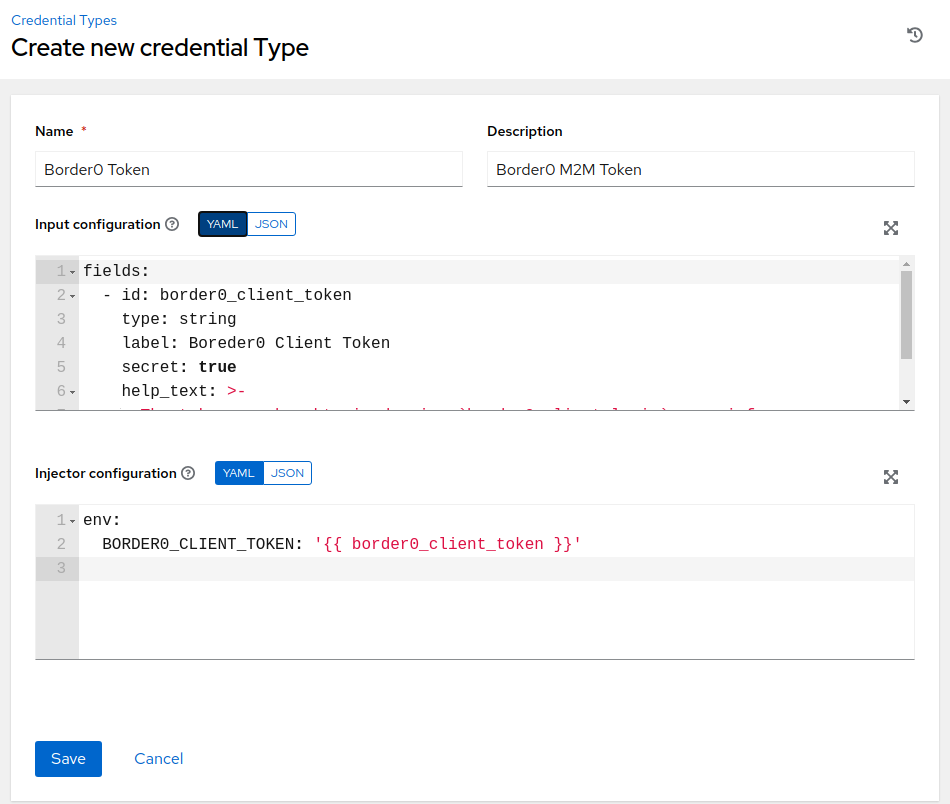
Once we input “Border0 M2M Token” in the name field, utilizing yaml we edit:
“Input Configuration”
fields:
  - id: border0_client_token
    type: string
    label: Border0 Client Token
    secret: true
“Injector configuration”
env:
  BORDER0_CLIENT_TOKEN: '{{ border0_client_token }}'
Token Credential
Once the new Border0 Credential Type is added we can input our M2M token. This is the token we previously created.
Navigate to to “Resources > Credentials” and “Add” new:
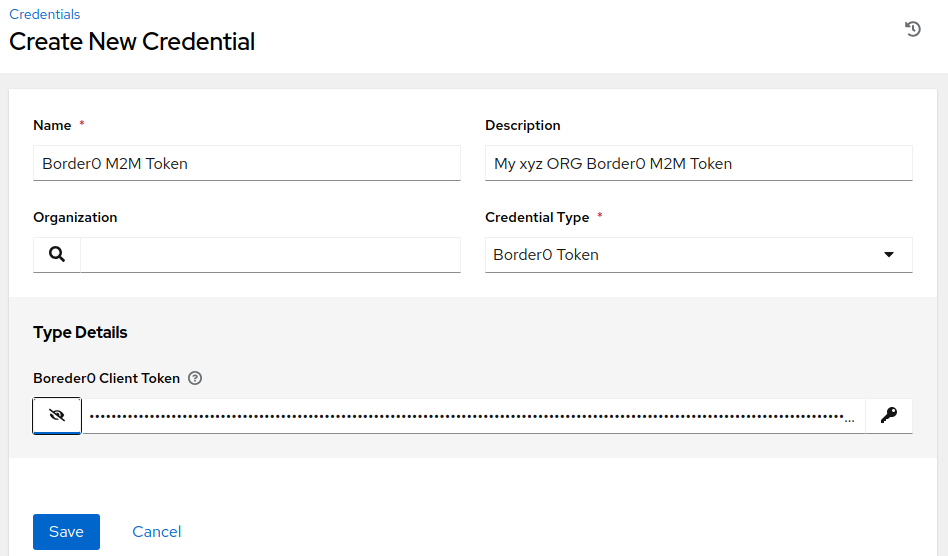
Select “Border0 Token” from Credential Type, Input desired name and the token value into the form. Then Save
Job Templates with Border0
Create or update existing job templates to use Border0 resources.
In the “Resources > Templates” edit or “Add” new Job Template
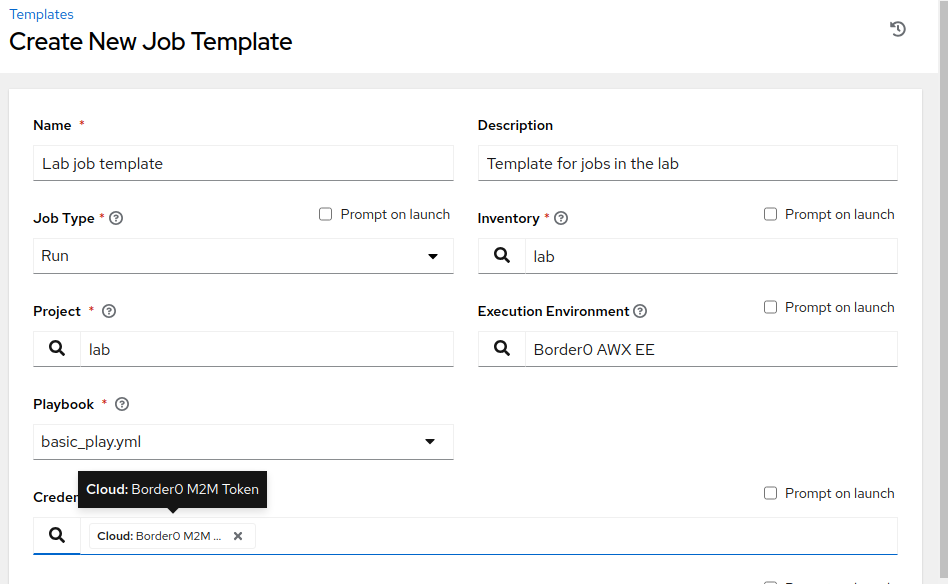
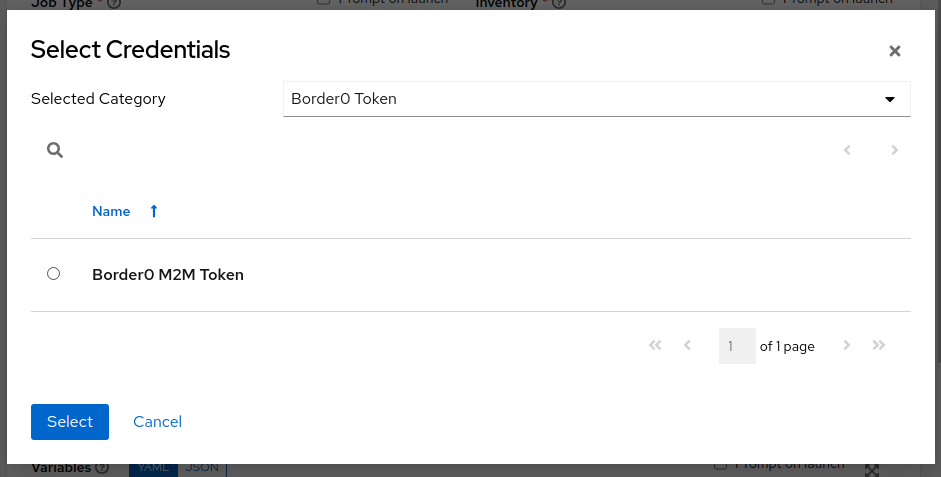
Create a new Template that suits your requirements, once ready set Border0 relevant settings:
- Execution Environment: Border0 AWX EE
- Credentials: Border0 Token > Border0 M2M Token
Additional CredentialsDepending on your environment additional username credential might have to be supplied, this would be standard Machine or Network type credential
Updated about 1 year ago