Custom DNS name to your Socket
Intro
When you create a new socket, it will get a deterministic name following this naming scheme:
<socket_name>-<org_name>.border0.io. This works for many cases, but there are scenarios where you may want to give a Socket a custom DNS name. Perhaps something like wiki.acme.com.
In this example, we'll take a look at how to achieve that. We assume you already have a socket called wiki-acmeorg.border0.io
1 - Add a CNAME DNS entry
to get started; you need to create a CNAME for the custom DNS name and point it to the Socket DNS name.
This is required, so traffic is routed to our global network and so that we can create the TLS certificates for your custom DNS name.
In the example below, you can see there is a CNAME for wiki.acme.com pointing to the Socket wiki-acmeorg.border0.io
$ dig wiki.acme.com
<SNIP>
;; ANSWER SECTION:
wiki.acme.com. 3600 IN CNAME wiki-acmeorg.border0.io.
wiki-acmeorg.border0.io. 300 IN A 15.197.134.180
It is important you do this step first. Without this, the next steps will not succeed.
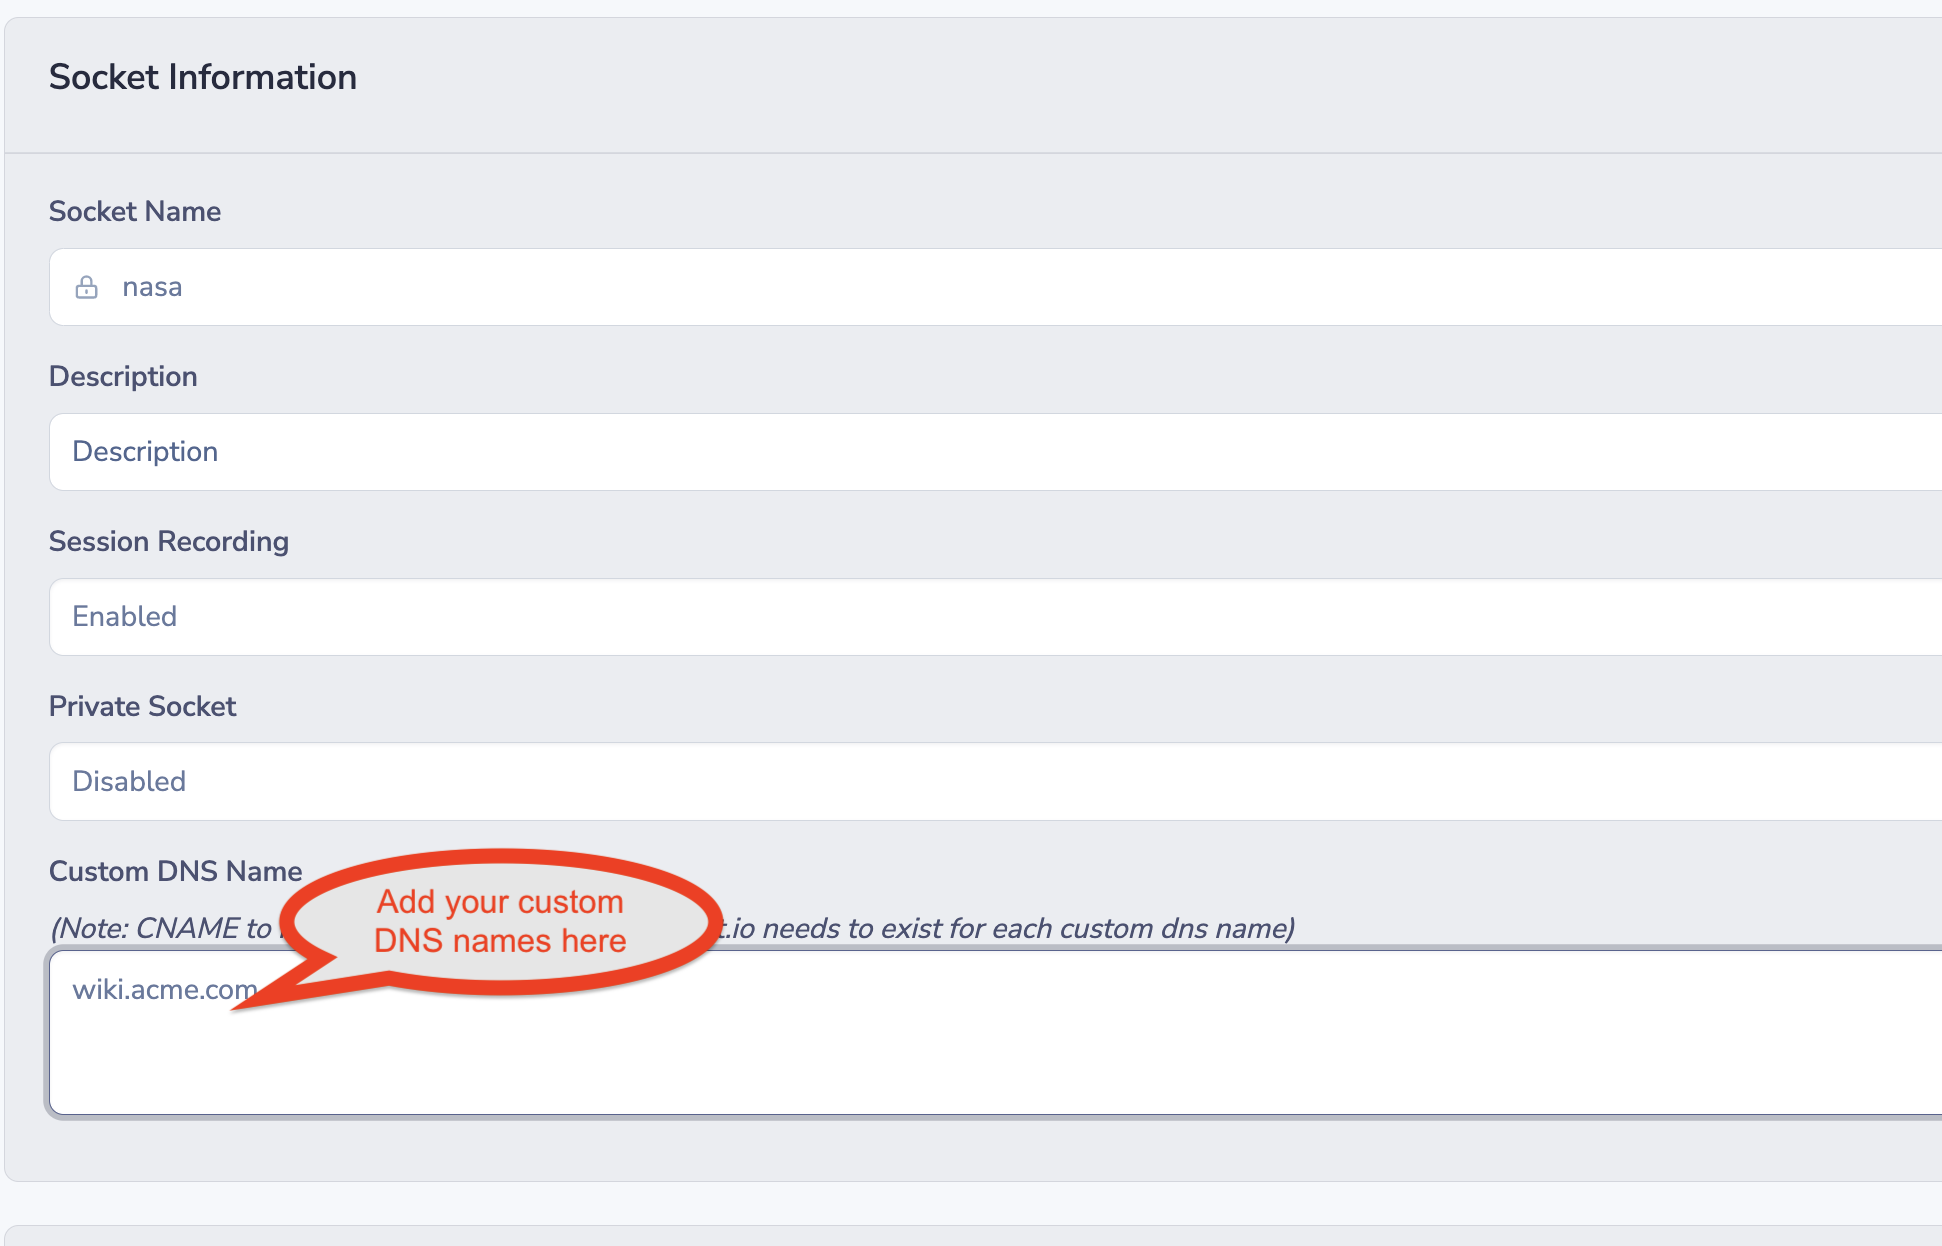
2- Add a Custom DNS name to your Socket
Now that the CNAME exists, we can add the custom DNS name to the configuration for this Socket. This can be done by editing the socket details using the portal (or API).
Multiple custom DNS names may be added for a Socket as long as the DNS entries are set up correctly.

DNS checkNote that our APIs will check if the CNAME exists, so it's important first to create the CNAME.
3 - Time to test
That's it already! You've now completed everything you need to do. Next up, we'll ensure that your socket's configuration is updated and distributed to all of our anycasted edge proxies. Typically this takes a few seconds. In parallel, our configuration systems will also request a TLS certificate for this custom domain and, once successful, distribute it. The TLS work may take up to a minute.
4 - Wrap up
To summarize:
-
Make sure you have a CNAME for your custom DNS name pointing to the border0.io socket DNS name.
-
Update the socket configuration with the custom DNS name(s)
3)🚀🚀🚀 that's it! Within a minute, you have your custom DNS names up and running.
That was pretty simple, right? This feature makes your apps highly available and secure by leveraging our anycasted edge proxies. Our flexible policies ensure only authenticated, authorized users can use your service quickly. Best of all, it now works with DNS names that make sense for your users and customers.
Updated 10 months ago
